Getting PXE Boot to work on new Toshiba Satellite Pro (C70) laptop range.

I recently purchased a new 17.3 inch widescreen Toshiba Satellite Pro C70 laptop for a senior academic colleague. The device came pre-installed with Windows 8, but, since the requirement was for Windows 7, I decided to completely rebuild it by injecting it with a new network image via WDS and PXE booting over our fast network. Sounds straightforward, right? Wrong! It took me a while to figure out – and I hope this may help anyone who may be coincidentally having similar problems. First, I needed to access the BIOS. Since I had already booted into Windows 8, I found that the bells and whistles of Windows 8 hibernation features  interfered with BIOS access. I overcame this by pressing and holding the SHIFT key down whilst performing a complete system shut down. Only releasing the SHIFT key on COMPLETE shut down (lights off!).  Next, I held F2 key down whilst booting  to enter the BIOS. Since this is a new laptop, it has the UEFI  (Unified Extensible Firmware Interface) boot mode feature, which I needed to change to the legacy CSM (Compatibility Support Module) mode. This was found in Advanced … System Configuration … Boot Mode section of the BIOS.  I saved the changes, again shutting down whilst holding down the SHIFT key. Booting up, I held down the F12 key simultaneously, to enter the Boot Menu. I was then able to pick network (LAN) boot, and successfully PXE network boot to our WDS menu, thereafter choosing the appropriate 64-bit WIndows 7 Enterprise image. Phew! I hope this helps anyone who may find a) problems entering newish Toshiba Satellite BIOSes and b) then finds they cannot PXE boot.

PXE-boots (below) – all the rage at Enterprise outlets these days … 🙂

Ruslan Russian multimedia added to LRC

This week, I have been looking at automating the installation of Asymetrix  toolbook-based Russian multimedia language  learning titles, from beginner  through to advanced level. Successful deployment has been through wrapping the software in msi wrappers, tweaking registry settings and adding special fonts. These e-learning titles offer lessons in everyday practical Russian, with additional resources (vocab, handy currency tips, etc). Should be a useful addition to the Centre’s language portfolio.

Automating SDL Trados Studio and Multi-Term Installations

It’s been a fair while since I last wrote anything, as I have been busy during these summer weeks to catch up and perform some much needed lab maintenance while the students are away. So here’s what I’ve been up to this week . I’ve  been automating the installation of SDL Trados 2011, desktop language translation software, and Multiterm 9, which provides a management database of terminology (a “termbase”), for translations.

The software comes compressed as single exe files which can be uncompressed to discreet directory structures containing all the runtime libraries and msi files, which lend themselves to auto deployment (with a bit of tweaking) via Group Policy (GP). GP administrative templates are also provided which can be used to further tailor the install – specifically, to enable or disable automatic updating. I’ve chosen to disable automatic updating and disallow users the ability to do this, as I want to manage this centrally.

The installation has been done via VBscript within a Group Policy Object (yes, I know Powershell is here, but I’ll stick to what I;m more familiar with – for the moment).

I wrote a script to download copies of the uncompressed installation files from our software server to every local client, do the install, and clean up the local environment later. Here’s a snippet of the code to install a couple of core components:

Set WshShell = CreateObject(“WScript.Shell”)
.
.
.

WshShell.Run “msiexec /i C:\SDLTrados2011\SDLTradosStudio2011_SP2_3046\modules\TranslationStudio2.msi /qn /l*v C:\temp\sdltrados.log”,1,true
.
.
.

C:\SDLTrados2011\SDLMultiTermDesktop2011_SP2_361\modules\MTCore9.msi /qn /l*v C:\temp\sdlmultiterm_core.log CLIENTINSTALL=1″,1,true

The boolean parameter ensures that the run command completes before the script continues to execute.

I’ve tested the install in one of our digital language labs, and I plan to deploy the software to all five labs before our students return. I may also need to put this on most of our Language Resource Centre cluster machines.

 Postscript: Since my time of writing the original article, The Trados and Multtiterm Software has now been been successfully deployed to every language lab. in our School.

Language Lab Refit

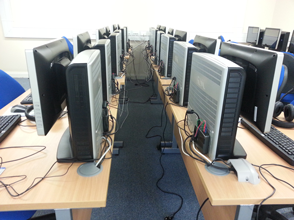
This week, I’ve been getting plenty of exercise tearing down one of our oldest Language Laboratories, replacing the ageing RM One Core 2 Duo computers with the latest RM One offering featuring Intel Core i5 processors… as shown here:

A view of part of the upgraded Lab 4.2. The RM One's are secured to each desk and have quite a small footprint. (Photo courtesy Fred Wu!)

Each PC has 8 Gb memory, so I’ll be building them with 64-bit Windows 7 Enterprise WDS images. The language lab has hard-wired audio connected to a central electronic relay in the Teacher console. Audio and video is broadcast to every PC using the Sanako Lab 300 system, which requires very specific audio card requirements (of which true full duplex audio is essential). As such, I’m using the Trust Expert surround sound USB hub at each student PC, which works well with the Sanako system.The older RM One computers had a larger compartment at their rear in which to conceal the hub. The newer models, although wider, are slimmer and the rear compartment is inadequate. So I’ve had to physically fasten every hub to the back of each computer. This works well, but is fiddly and takes a little time to deploy!

David Lowe in Lab 4.2

Working in the Language Lab 4.2 (Photo courtesy Fred Wu!)

Still, I’m nearly there – the only PC left to place in the lab is the teacher console. Then, the real hard work starts – OS deployment, application software installation, and testing.


Audio recording … in a Flash, if you’ll pardon the pun…! Flash – can’t live with it, can’t live without it (so it seems for now…)

I’ve been looking at creating an on-line audio recorder for potential use on language learning websites. Most solutions out there seem to revolve around javascript and Flash, and I’ve already successfully played around with these to produce a Flash-based (user-agent limited) solution. But what if you want to develop for the iPad, or an Android device? HTML 5  still seems to be in its infancy with regard to audio capture, understandably since producing an all-encompassing, secure, easy-to-use method for manipulating a device’s microphone system for on-line use is no mean feat. I’m going to be keeping an eye out on the (slow but) steadily evolving audio/video capture standards in HTML 5. (useful link: http://www.w3.org/TR/html-media-capture/) This seems to be the way forward. Flash is dead (!) – long live Flash!

Import Powerpoint into Adobe Captivate 6

One great feature of Adobe Captivate 6 is the native PPTX support which allows media-rich Powerpoint slides to be imported without losing any features such as embedded audio, animations and transitions. I’ve been looking at Captivate with a view to using existing Powerpoint resources and building a little more interactivity into them, using branching and menus. Good stuff.