To take measurements on railway track (possibly miles from civilisation), it is useful to have a system that doesn’t require mains power or display, keyboard, etc. In this case I used:
- 5000mAh Li-Ion Rechargeable Power Bank; supplied by RS Online (775-7508)
- Belkin Cable Transfer Windows 8; supplied by RS Online (779-8827)
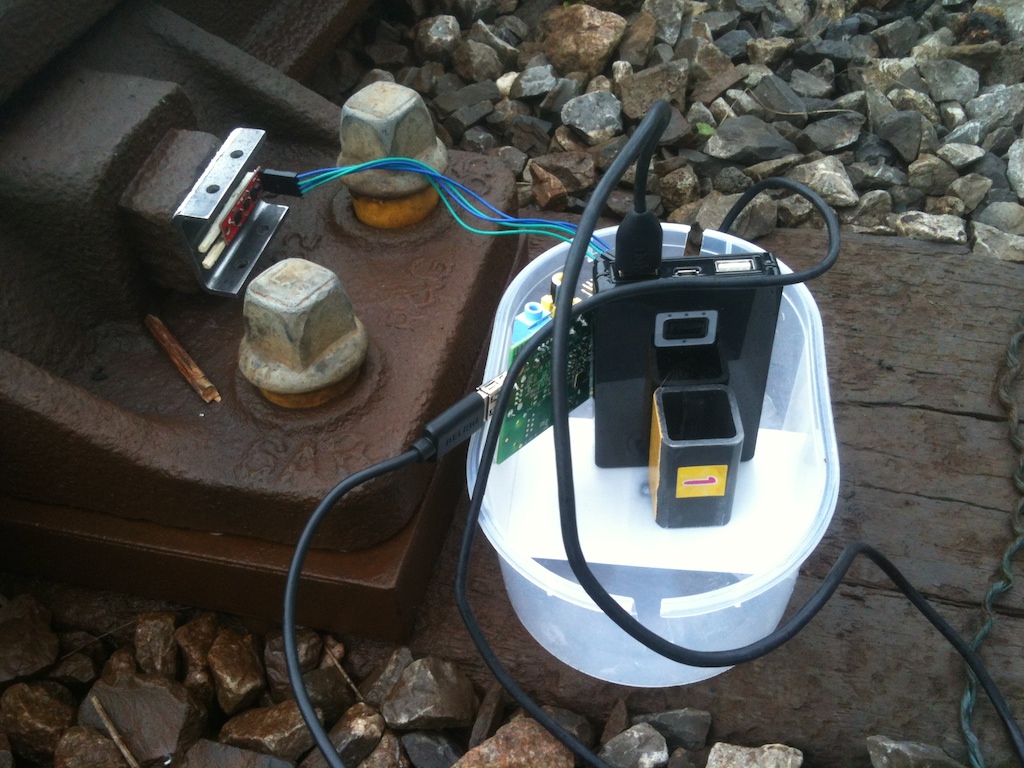
Raspberry Pi Type A and Sparkfun Sensor Stick used to monitor railway track
Power Source
The Power Bank is a rechargeable battery that is powered through a USB connection, and that supplies power to two USB-powered devices. In this case it is used to power only the Raspberry Pi Type A, and was used extensively over a 24-hour period without need for recharge.
Ethernet Communication between Raspberry Pi and Laptop
The Transfer Cable masquerades as an ethernet connection on Linux and was used to connect the Raspberry Pi with a Dell Laptop (with Debian Wheezy 7.4.0 newly installed). Of course, there are other ways to establish a link between the the Raspberry Pi and the outside world, and I plan to get it working via WiFi and radio in the near future, but the hard-wired connection has other potential applications. Also, it can be unplugged and then plugged in again, so is probably the lowest-power option.
To get the Raspberry Pi to recognise and configure the USB connection, add the following settings for usb0 in /etc/network/interfaces:
allow-hotplug usb0
iface usb0 inet static
    address 192.168.99.2
    netmask 255.255.255.0
    gateway 192.168.99.1
Update: Actually, the gateway setting isn’t necessary – I have tested the Belkin cable on a Raspberry Pi Type B*1 without the gateway setting and it works fine. The gateway setting is required if you want to share the laptop’s internet connection – in which case, you will also need to configure iptables on the laptop*2.
*1 I read somewhere that the Belkin cable doesn’t work with the Type B, but it seems to work fine for me.
*2 I used ufw for this, which is easy enough to use, but where things do get complicated is with nameserver configuration on the Raspberry Pi.
Something similar needs to be done on the laptop:
allow-hotplug usb0
iface usb0 inet static
    address 192.168.99.1
    netmask 255.255.255.0
Results
The graphs below are accelerometer and gyro measurements averaged over a period of one second. The sensors were collecting data continuously and most of the time there was no activity. The passing trains appear as a compressed burst of movement, against which long-term changes are apparent.
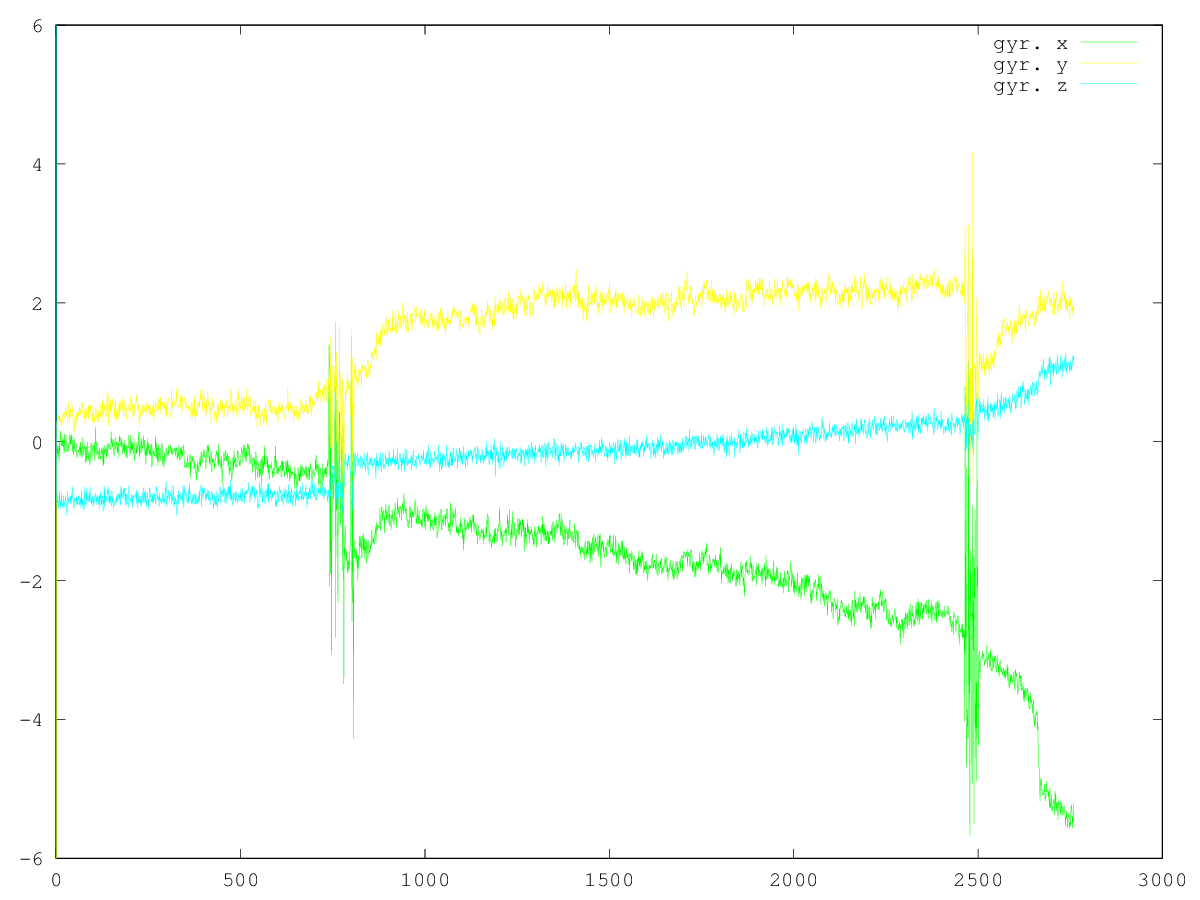
Gyro on rail web: Deltics and Class 37
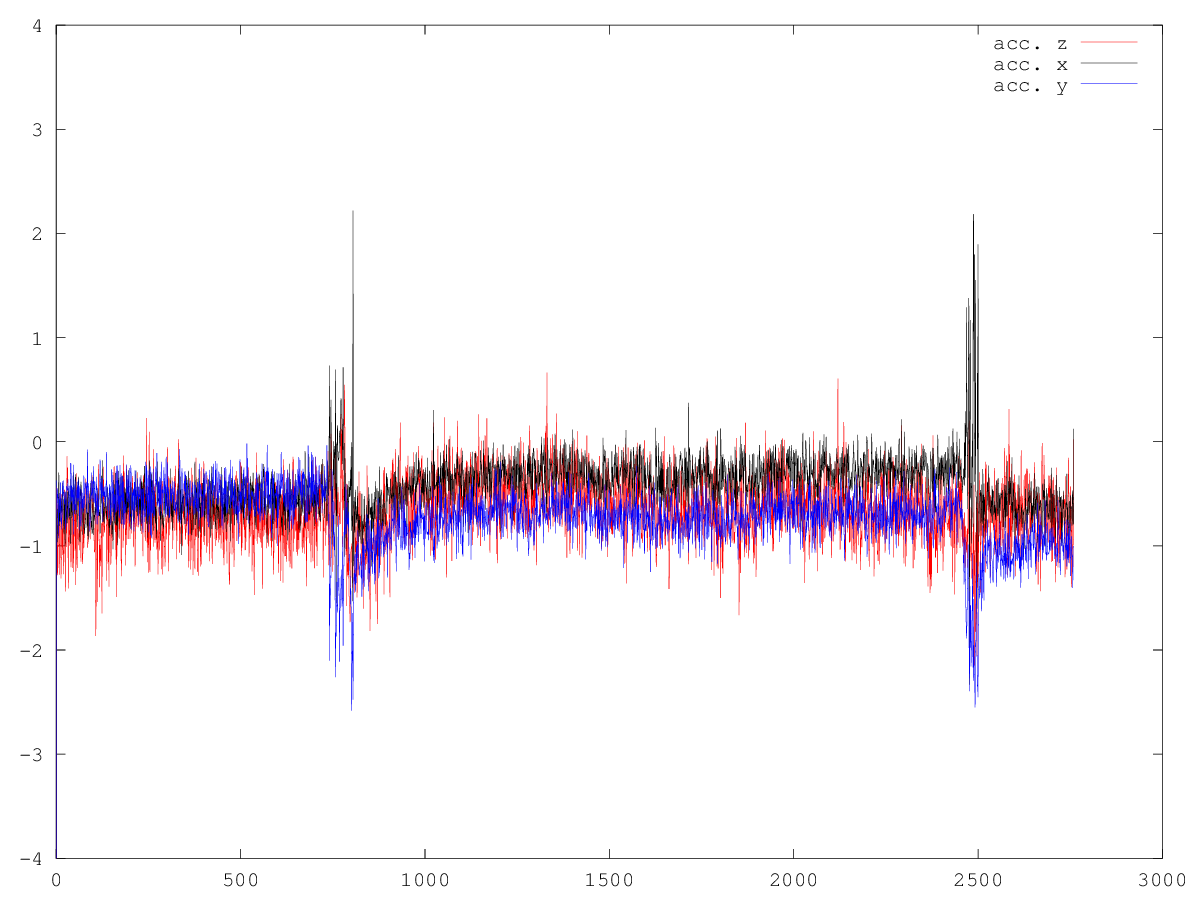
Accelerometer on rail web: Deltics and Class 37
Above: The Deltic arrived at Barrow Hill preceded by a Class 37, and later they left with a second Deltic coupled behind.
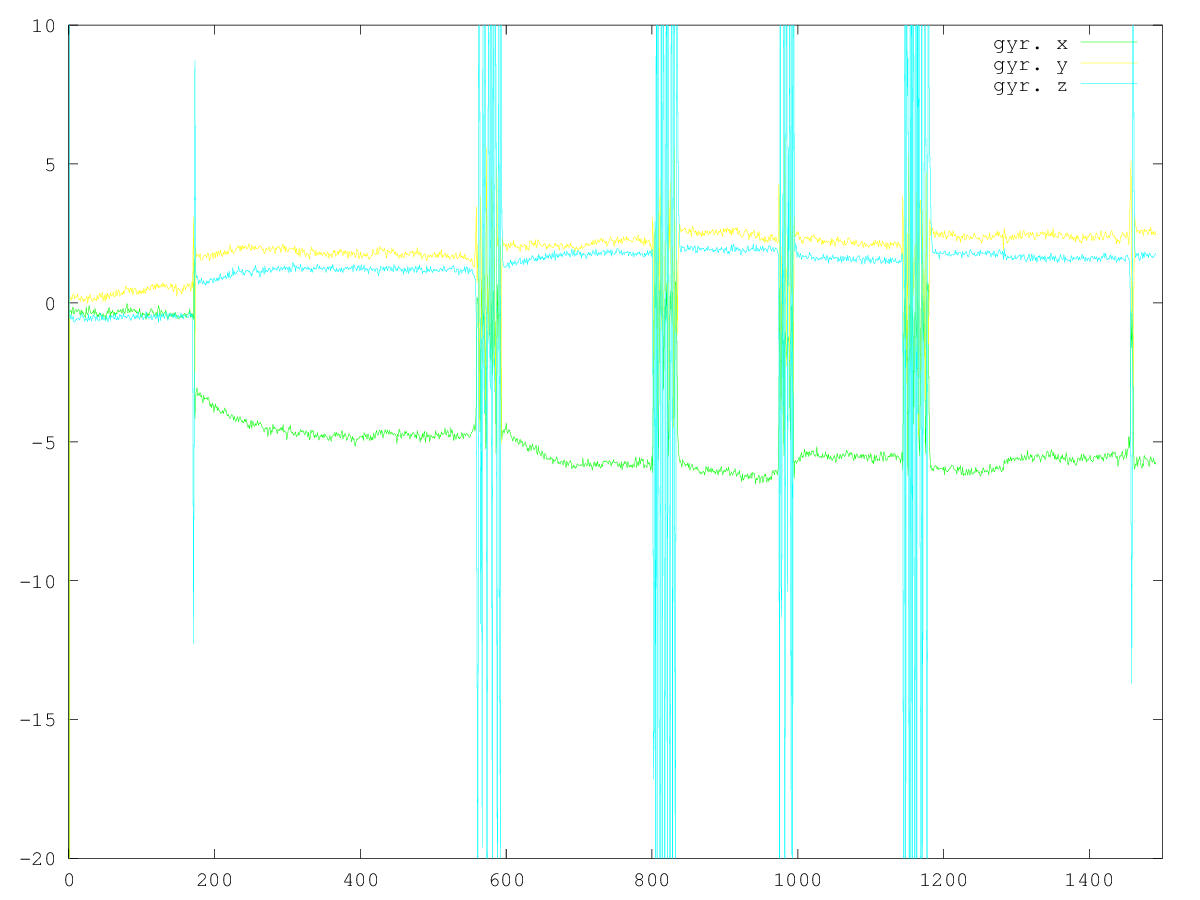
Gyro on rail web: 0-3-0, Class 40 and Class 45
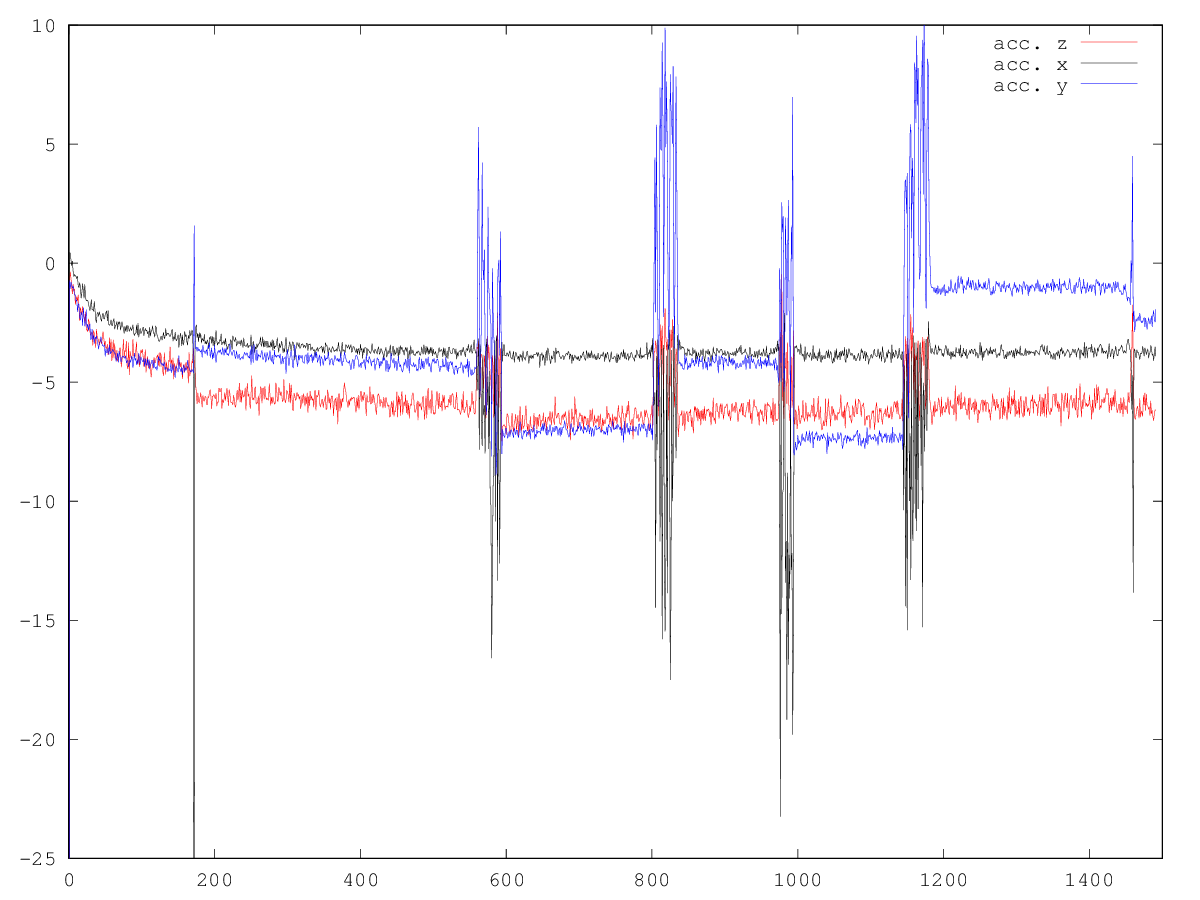
Accelerometer on rail web: 0-3-0, Class 40 and Class 45
Above: The 0-3-0 passed first, collected the Class 40 and Class 45 for a total of four passes, then uncoupled and returned.
