When we went into lockdown in March, I had to record my few remaining lectures at speed. Back then, being on video felt weird, so I just did PowerPoint voiceovers with the video off. I then got gradually used to video while teaching a PhD class via Zoom. But while the simultaneous part felt good, I didn’t quite like the recordings I got from that – they were basically big slides with a tiny talking head in the corner. Over the summer, I then started to see videos that I liked much better – for example, this keynote at the virtual congress of the European Economic Association (https://eeavirtual.org/sessions/marshall-lecture) or this series of lectures by Harvard Professor Gary King (https://www.youtube.com/watch?v=qbxNf4iqJPo&feature=youtu.be&ab_channel=GaryKing).
What these have in common is that they have a much bigger video of the speaker – essentially some split screen where two thirds of the screen are slides and the remaining third was a reasonably large video of the speaker. I found these much more engaging to watch, so I started to look into ways to emulate this. There is apparently a way to achieve something like this in zoom (e.g., https://s2020.siggraph.org/wp-content/uploads/2020/06/SIGGRAPH-2020-Step-by-Step-Session-Recording-Guidance.pdf), but it looked a bit too convoluted to me – you basically have to use one account to stream, login with another account as a guest, rearrange things like you want them to look like on this second account and then record from there. After some digging and asking various people, I settled on something called OBS Studio – which is an open source (and free) video recording and streaming software.
The nice part about OBS is that it lets you combine multiple inputs, such as a screen display, a webcam video, coloured backgrounds, images, slideshows, etc., rearrange them as you please and record this combination of inputs as various video formats. The other nice part is that’s it comparatively easy to setup – on the first run it took me about 2 hours to arrange everything they way I wanted it to. Now I use this setup as a pre-set for further recordings.
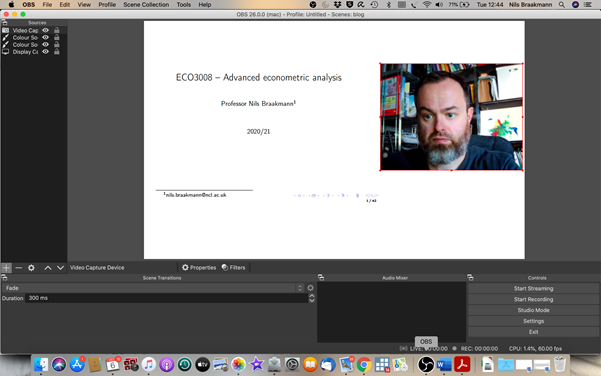
In my case the final product looks like this:

In an ideal world, I would have liked the video on the right to be in portrait orientation rather than landscape, which would have filled the screen better (see the Gary King video as an example). Unfortunately, Apple doesn’t give you much freedom with your webcam configuration, so this didn’t work out…
The image is essentially a combination of four inputs:
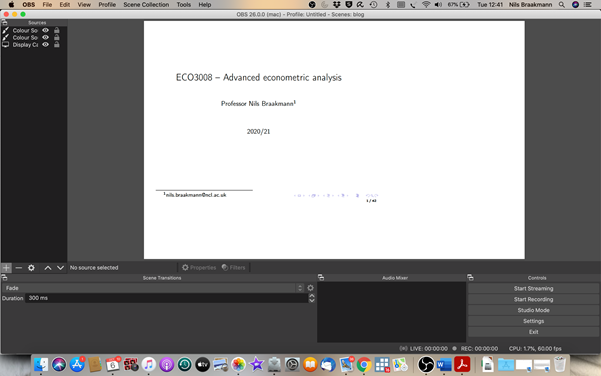
- A full-screen display of my slides on a second monitor in the top left corner
- A video feed from a webcam to the right of the slides
- Two sets of white background to cover up empty areas at the bottom and to the right
This is how it looks like in OBS step by step.
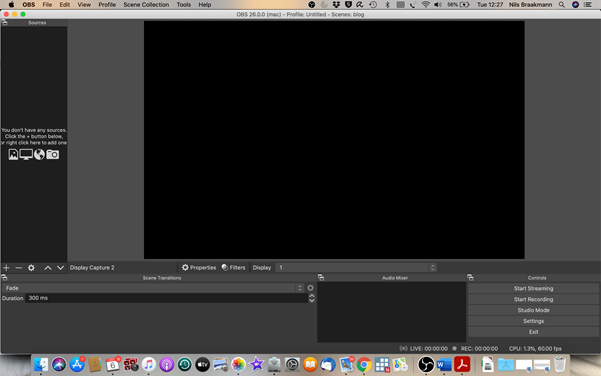
The big screen in the middle is what is being recorded – you can fill this with various sources, which you can add using the window on the left. At the bottom right you can see the controls you use to start, stop and pause recordings (or streaming). You also get audio info and some options on scene transitions that you can probably ignore (or at least I have ignored them).
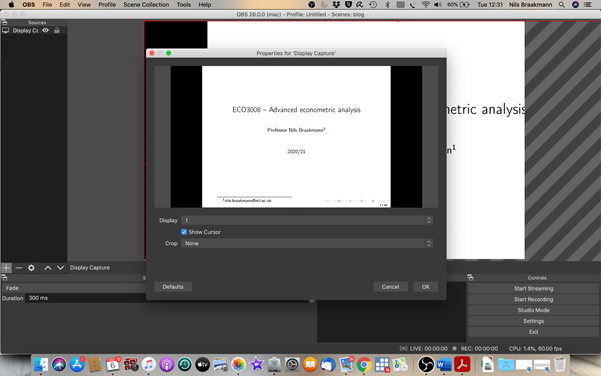
We can now start adding sources. You can rearrange what goes on top of what later or you can just add them in the order you want them to end up in. I want the slides to be the foundation so I start with those (you could also start with white colour, but I found that this creates a black frame along my slides, which I didn’t like). In my case, this means adding a display capture of my second monitor:
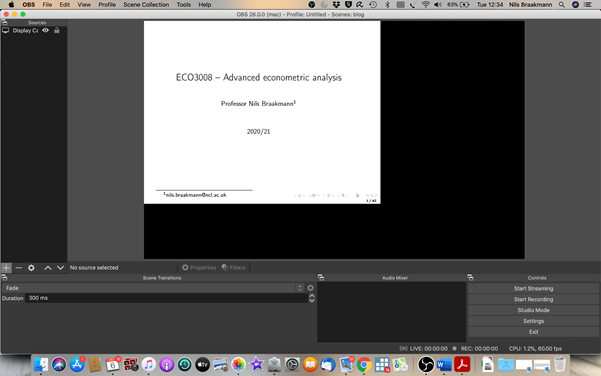
As you can see, this leads to something that doesn’t look very good:

However, we can simply move and resize this input like any window on your screen – moving it to the left gets rid of the black bar there and resizing gives me enough space to add the video to the right:
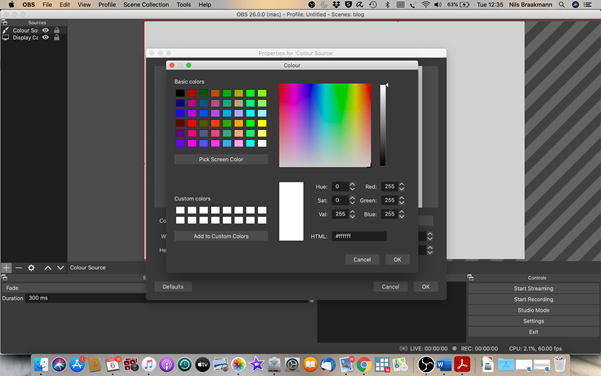
Before adding the video feed, however, I would like to get rid of the black parts around my slides. To achieve this, I can simply select “colour” from the source menu and add white squares:
After adding another and resizing, this now looks like:
Now we can add a webcam video by selecting video capture device:

Again, we need to resize the video, but then we’re done with the video part:
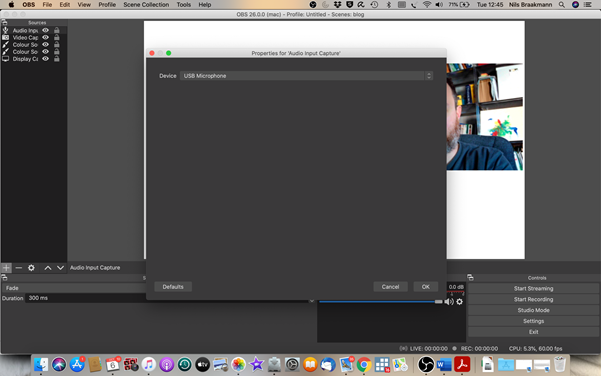
The final thing to do is to add audio. To do this we select an audio capture source – this could be your computer’s internal microphone or – in my case – an external one:
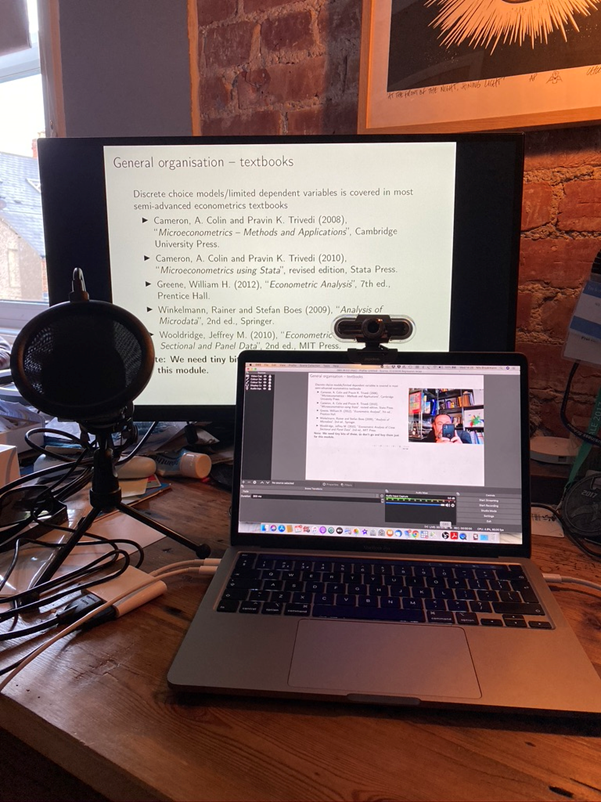
The final thing to do is to fiddle around with the webcam positioning to make sure that you look into the camera while being able to see your slides. In my case, this looks like this (some frontal light source helps as well):
Now you just record and save the result as one of various video formats (I use mp4). You can then upload the result to recap via campus.recap.ncl.ac.uk/, edit it like any other video source (and add captions etc.) and add it to canvas as you would do with videos recorded via Panopto.