
Using online forms is a really handy way of collecting information, organising events and taking bookings and means that all of the responses are automatically collated in one place.
Form builder
The university’s form builder service is available here: http://forms.ncl.ac.uk/
To get started click “Create New Form!”
Click on the form title to edit the form properties, here you can add a title, description and message that will appear after people have submitted the form.
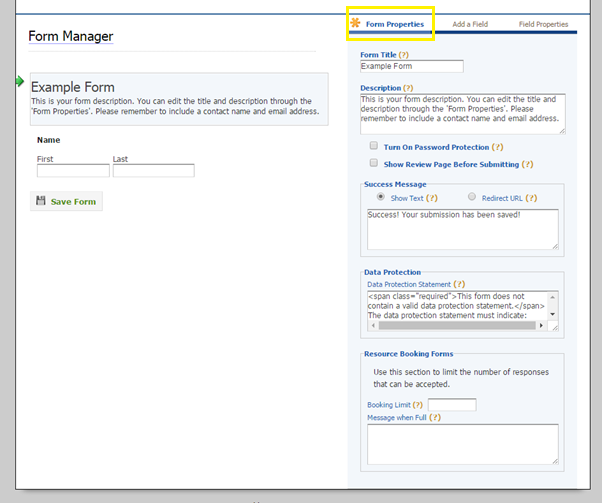
All forms must have a relevant data protection statement added:
e.g. “All information that we hold concerning you as an individual will be held and processed by Newcastle University strictly in accordance with the Data Protection Act 1998. We will not, without your consent, supply your name and addresses to any third party except where (1) such transfer is a necessary part of the activities we undertake, or (2) we are required to do so by operation of law. Newcastle University’s data protection policy is available at www.ncl.ac.uk/data.protection/”
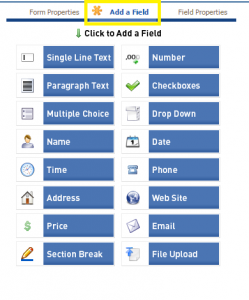
You can then choose from a number of different fields to add to your form:
Once you have built and saved your form, it will appear in a list on your homepage:
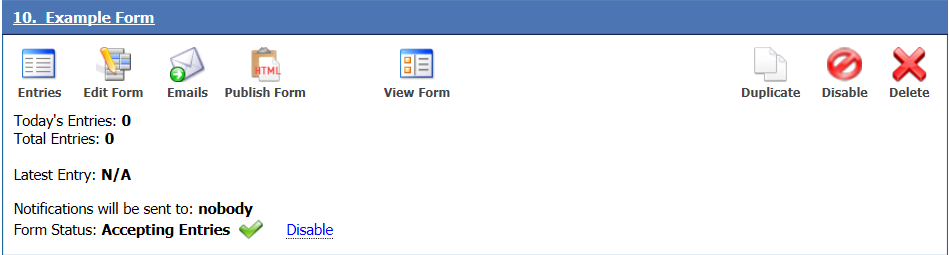
Click “Publish Form” to get the url which you can either send via email or include in a website and you can set the entries to be emailed to a particular email address by clicking “Emails”. You can also download a spreadsheet of the results by clicking “Entries”.
Once you have made a form, you can easily duplicate it to reuse it for another event or delete it.
Top Tip! Use a shared account to create your form, this means they can be easily duplicated or edited by anyone in your team
Typeform
Typeform makes a very pretty form which you can customise. It also allows you to apply calculations and logic steps. You can have a go using the free trial option which also has lots of handy How To videos.
You can access it here: https://www.typeform.com/
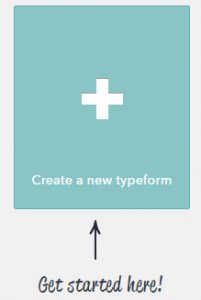
Click “Create a new typeform” to get started and you can choose to start from scratch or use a template.
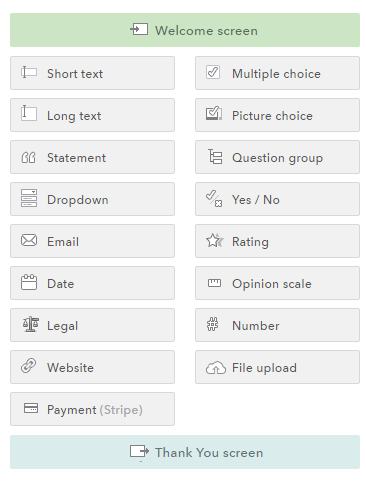
On the left hand side, you will see that you can add a welcome screen, a thank you screen and choose from loads of different question types.
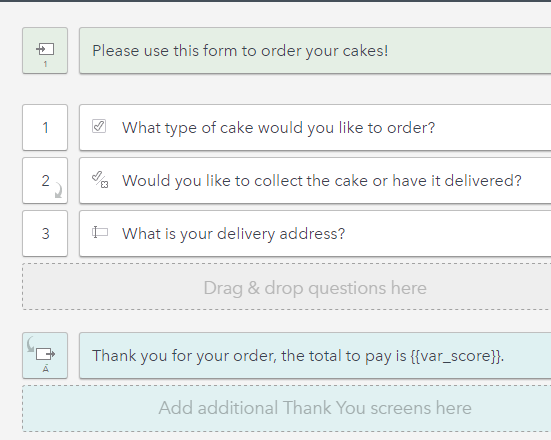
Have a go at creating a form to order some cakes using this spreadsheet. Add the welcome text, questions and thank you screen then we will add the calculations and logic jump.
Adding a Calculation
Now we are going to add a calculation that will give the user a total price for their cake and delivery. On the multiple choice “What type of cake would you like to order?” question click the calculator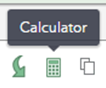
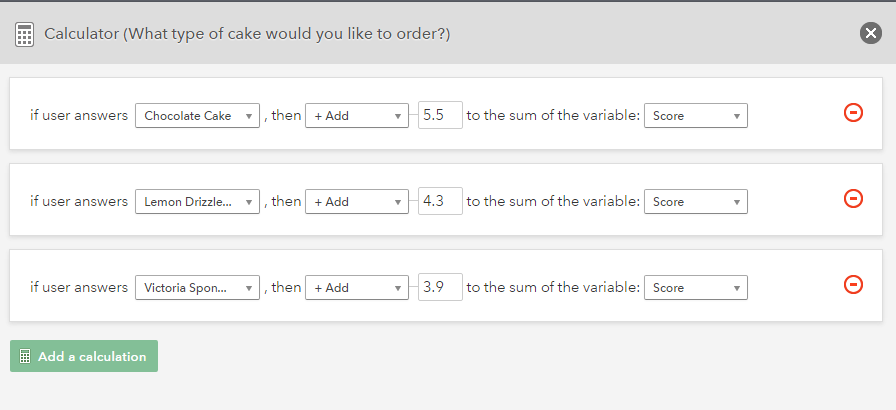
Then you can assign a price for each cake by clicking “Add a calculation”
Then do the same for the delivery question and add the price for delivery when they answer “Yes” (You don’t want it to charge them if they said no!)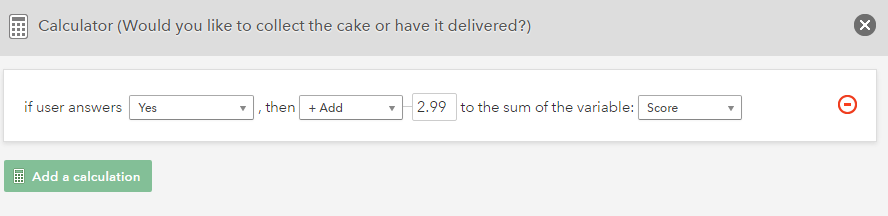
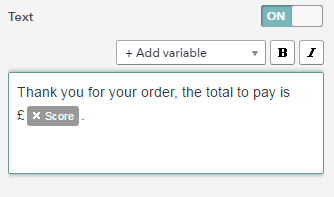
Finally in the Thank you screen, you can add the variable of “Score” which will show them their total at the end of the form:
Adding a Logic Step
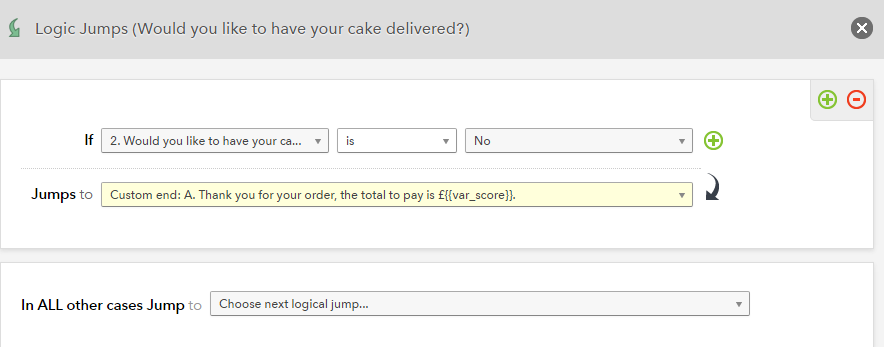
We want to skip the delivery address question if they are collecting their cake and go straight to the end of the form.
So click the logic jump icon on the “Would you like your cake delivered?” question:
Here you can set it so if they answer “No” it jumps to the Thank you screen.
Now you can check your form is working by viewing it.
You can also use the “Design” tab to change how the form looks and the “Analyze” tab to view the results and other info. You can download your results as an excel spreadsheet and you can also view a report which gives you stats for each question.
