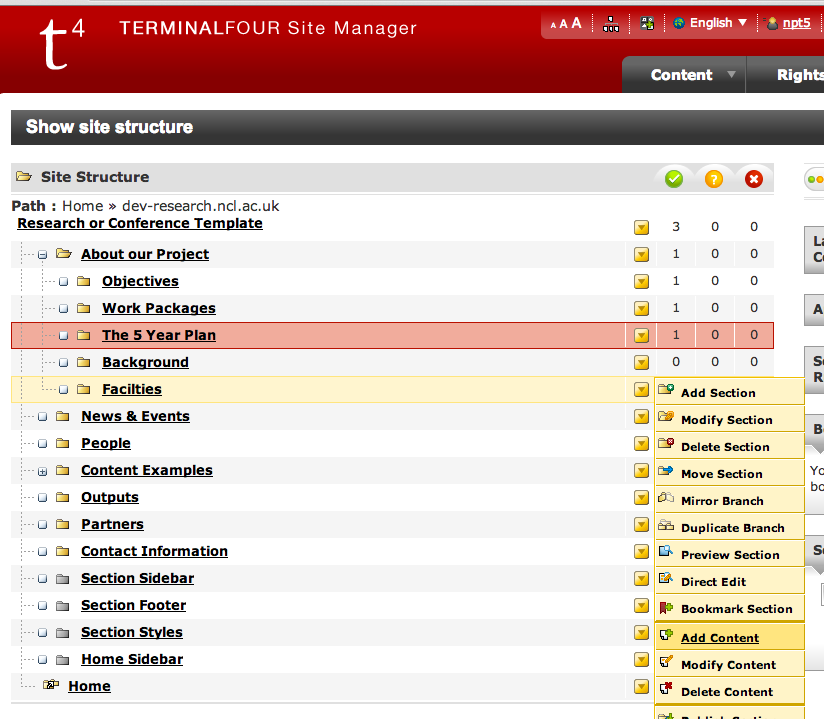
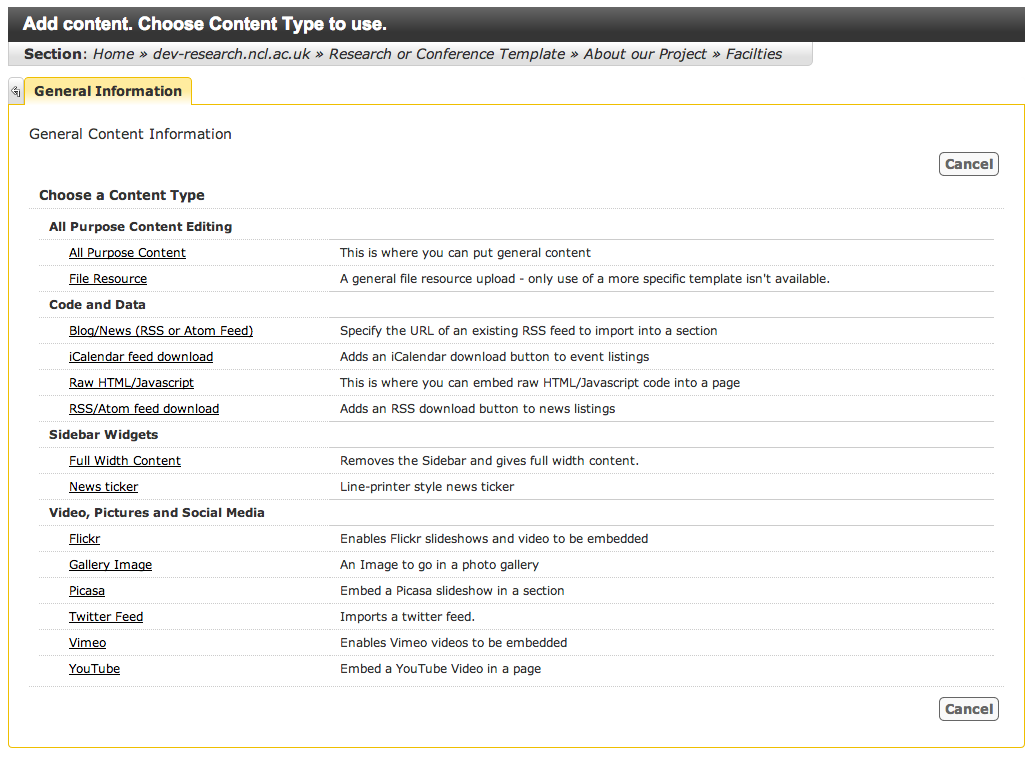
To add new content to a Section use the yellow box to its right, and click ‘Add Content’. You’ll then be presented with a list of Content Templates (this list may change depending on your site, and it is likely to get shorter as we find ways to simplify the system).
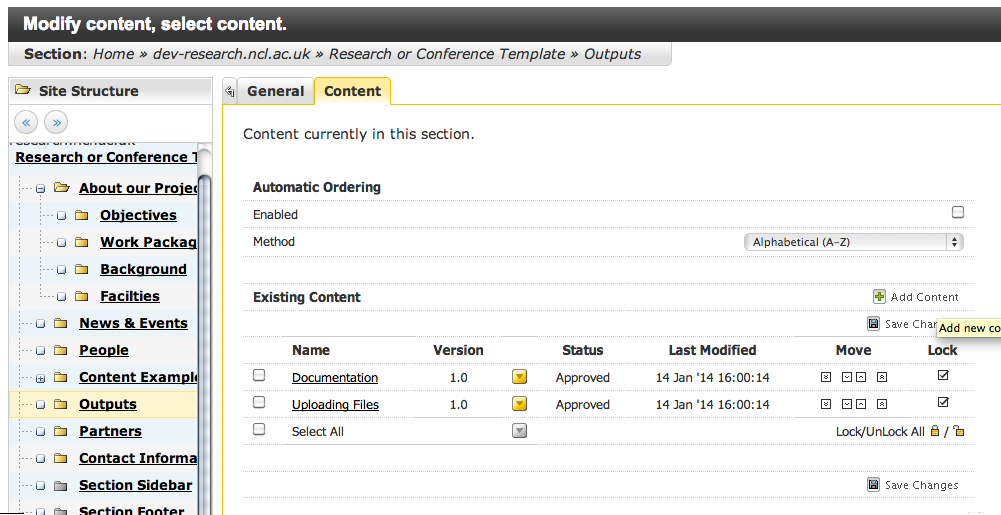
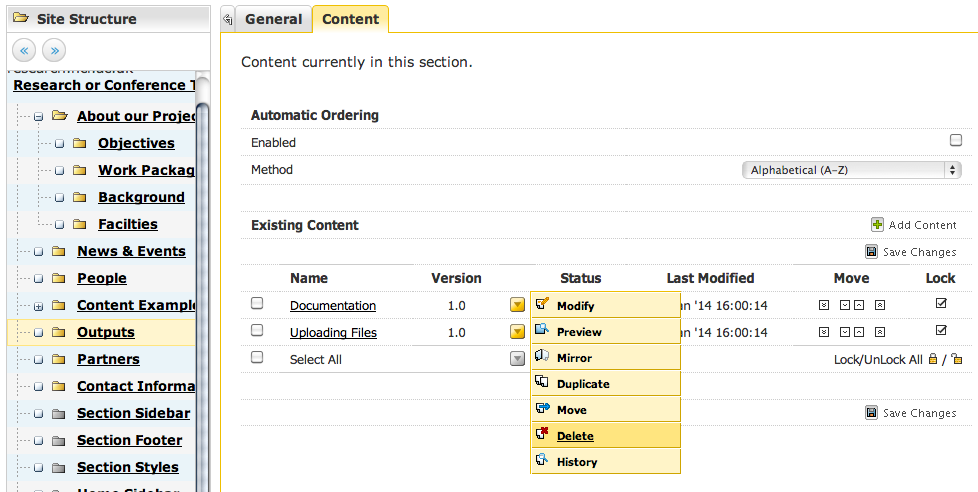
To amend content within a section, click ‘Modify Content’. You’ll be presented with a list of the existing Content within a section – click on it to edit.
The vast majority of pages on your site will be ‘All Purpose Content‘, which is the general purpose Content Template for formatting words and pictures on a webpage. Other content templates are available depending on where you are within your site (Staff Profiles and News templates, for example, are only visible within the People and News & Events sections).
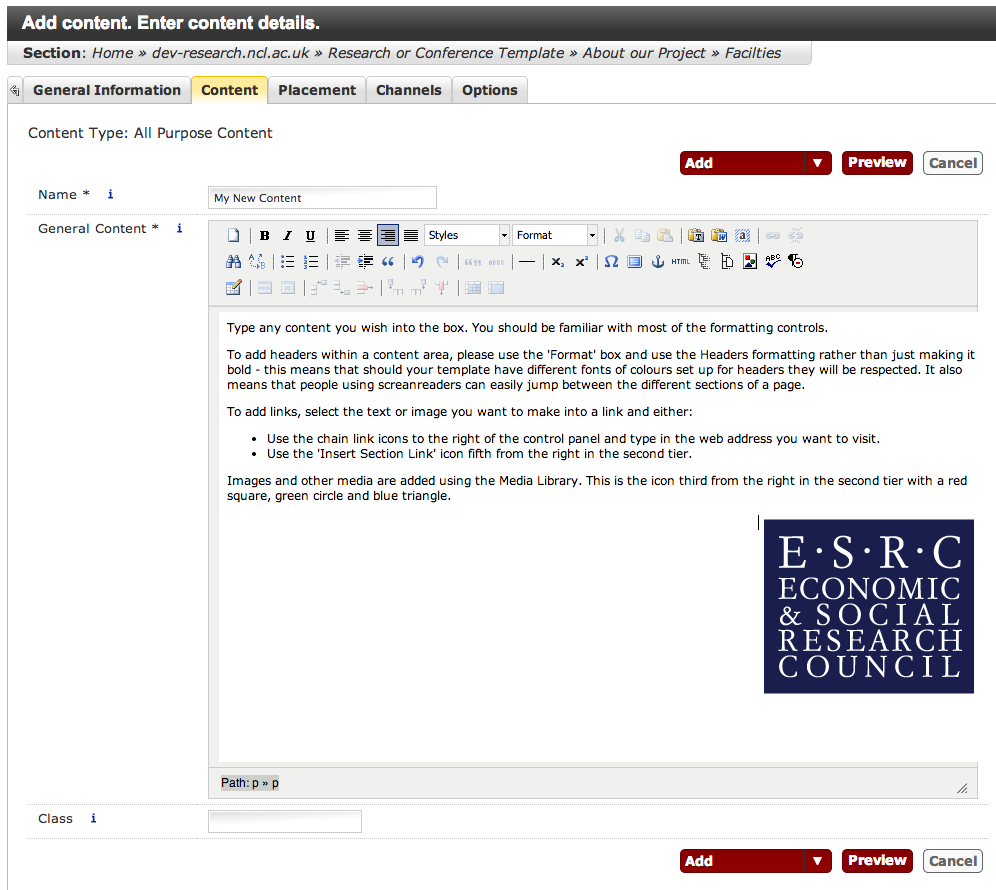
All Purpose Content looks like this:
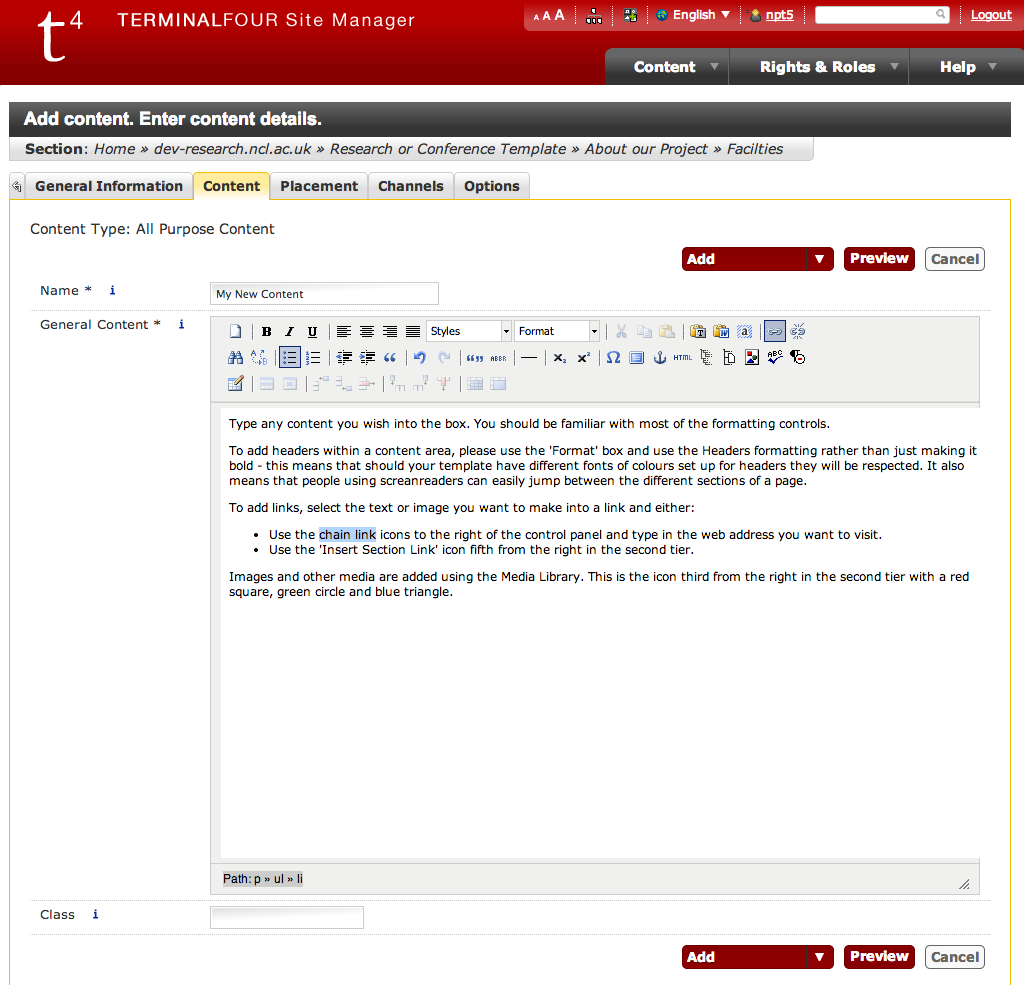
Type any content you wish into the box. You should be familiar with most of the formatting controls.
To add headers within a content area, please use the ‘Format’ box and use the Headers formatting rather than just making it bold – this means that should your template have different fonts of colours set up for headers they will be respected. It also means that people using screen readers can easily jump between the different sections of a page.
To add links, select the text or image you want to make into a link and either:
- Use the chain link icons to the right of the control panel and type in the web address you want to visit. You can also use this to link to email addresses.
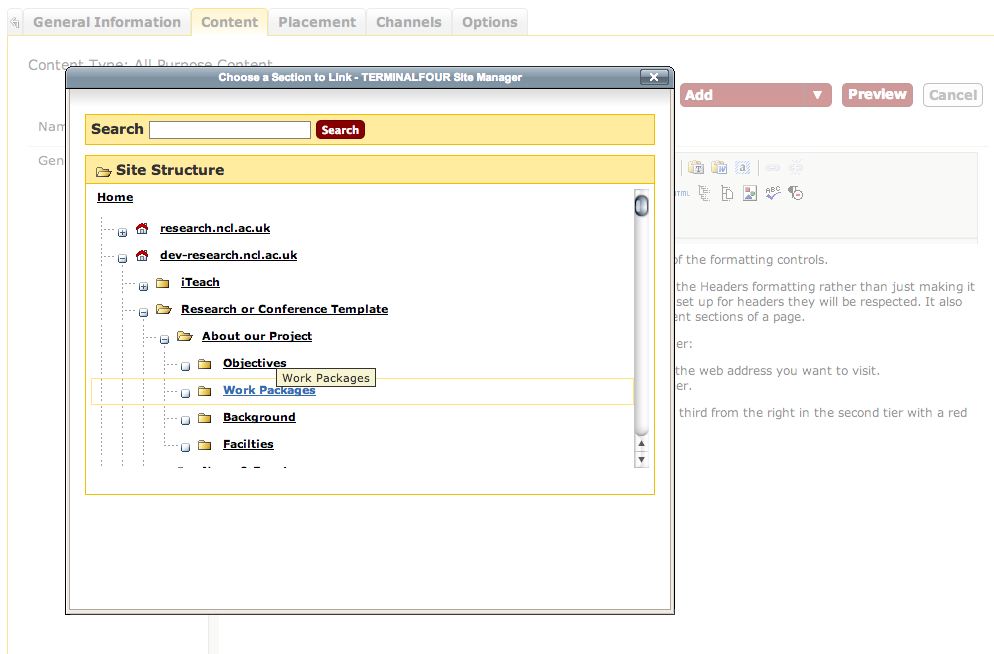
- Use the ‘Insert Section Link’ icon fifth from the right in the second tier to link to a page within T4. If the page is moved or renamed, links created in this way will not break.
Images and other media are added using the Media Library. This is the icon third from the right in the second tier with a red square, green circle and blue triangle.
![]()
The Media Library appears as a pop up window and has a folder set up for Logos. You’ll also find (within Sites) a folder for your own website project. The Media Library will be discussed in more detail in its own post.
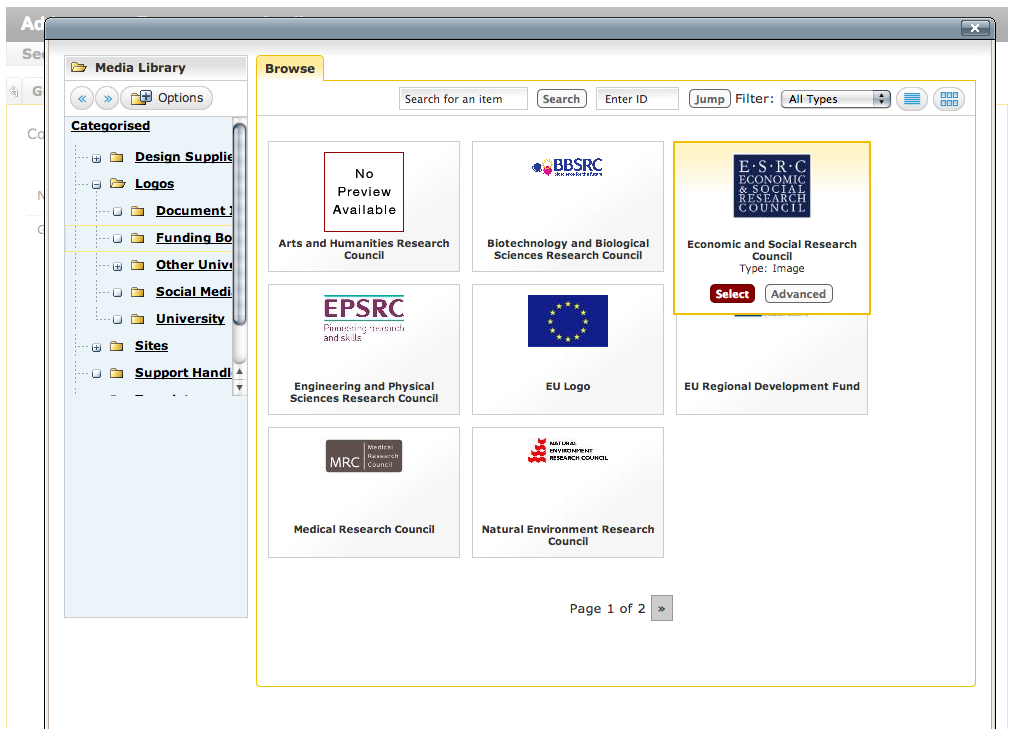
Click on Select and the item will be embedded within your content.
You can Preview the content using the red button, which will create a popup window showing the content as it will look within the page.
To save the content, use the dropdown icon next to the word Add.
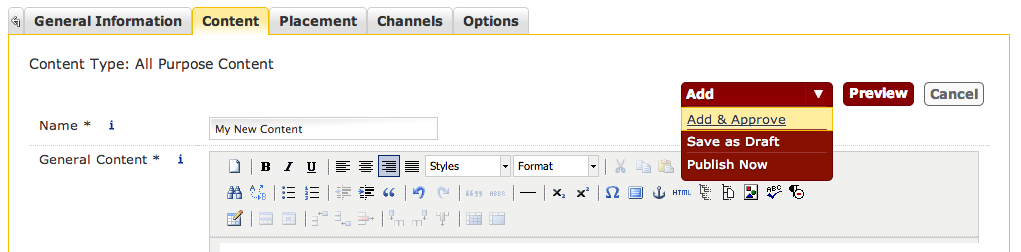
- Add and Approve – the content is approved and will publish the next time the site as a while is published. This happens automatically every four hours.
- Save as Draft – the changes you’ve made will not publish. The version that publishes will be the last one you clicked Add and Approve or Publish Now for.
- Publish Now – the content will be added to a queue to publish as soon as possible. This is usually immediate, but if many files are queued, or the page has a lot of images within it, can take a few minutes.
- Press F5 to force a refresh of the page (your browser may have stored a cached copy of the page)
- Check that you haven’t saved the file as Draft.
- Check that you haven’t renamed the sections (which may make the page publish to a different address).
- Failing that, email it.servicedesk@ncl.ac.uk with the web address of the page you’re having problems with.
Next:
- People Profiles and Staff Lists
- Document Uploads
- The Media Library
- Video and Social Media
- Content Versions and Rollback