This method works in Studios 1 & 2, Flexible workspaces and the Music Skills Suite.
Studio One – Basic Operation
Contents:
Turning On The Equipment
Computer Login
Launching Pro Tools
Initialising the Neve 8424
The Dashboard & Pro Tools Session Templates
Correct I/O Settings
Switching Inputs on the Neve 8424
How To Create A Headphone Mix
Getting Audio Out of Pro Tools
Control Room Monitoring
Listening Through Different Speakers
Trouble Shooting/Other Notes
Neve 8424 Console software pop-up
Technical Details
Turning On The Equipment
Ignoring these steps could result in permanent damage to equipment!
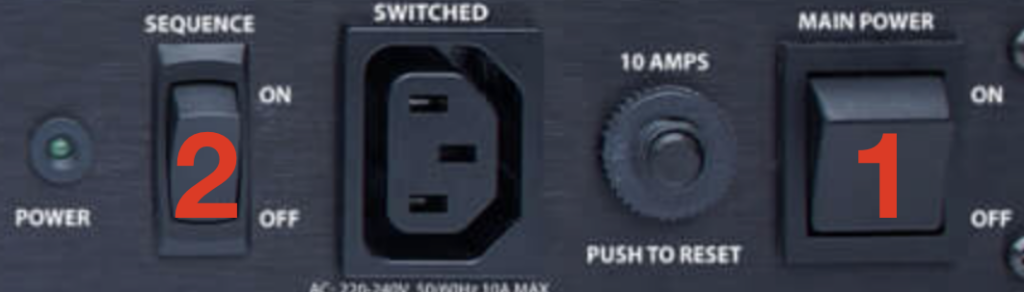
Power up Rack 1 and Rack 3 by turning on the power conditioners. To do this, press the Main Power switch, followed by the Sequence switch.
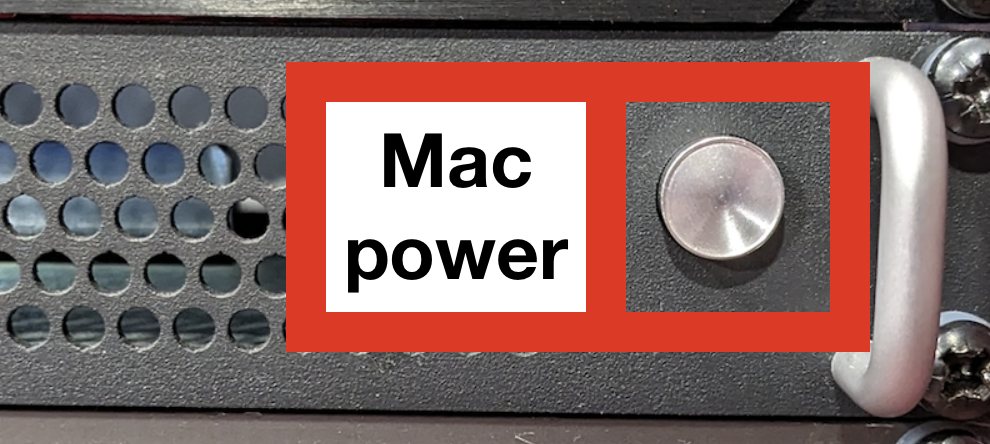
Press the power button for the Mac (you should hear the Mac start-up sound to confirm that this has worked).
Once the sequences for Rack 1 and Rack 3 are on (indicated by three green lights on the left of the power conditioners), power up Rack 2 in the same way.
To turn off the studio, reverse the process, as follows:
- Rack 2 Sequence off (wait for three green lights to go off).
- Rack 2 Main Power off.
- Rack 1 and Rack 3 Sequence off (wait for three green lights to go off).
- Rack 1 and Rack 3 Main Power off.
You can shut down the computer at any point in this process.
Computer Login
Login to the computer using the Student account. Password is ‘student’
Launching Pro Tools
Launch Pro Tools by selecting it on the hidden dock which can be found by hovering the mouse at the bottom of the screen.
Initialising the Neve 8424
Before beginning any session, initialise the Neve 8424 Console by following these instructions:
- Select [SYSTEM] on the small screen using the arrow > keys
- Press the [RETURN] button to accept
- Select [LOAD], then [RETURN]
- Ensure LOAD # is [1], then select [OK] and accept This will load the default console settings for Studio One.
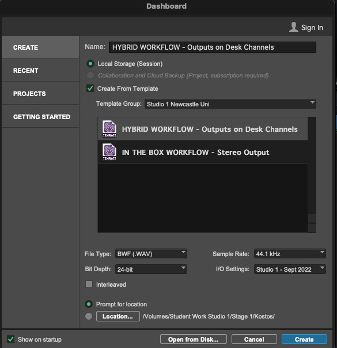
The Dashboard & Pro Tools Session Templates
There are two templates created for Studio One, both available in the ‘CREATE’ tab of the Pro Tools Dashboard.
- HYBRID WORKFLOW: Discrete channels are output from Pro Tools to the Neve console, allowing for an analogue-style workflow and enabling outboard gear to be inserted into the signal flow. In this mode, you are somewhat limited to the number of physical channels on the desk.
- IN THE BOX WORKFLOW: ‘In the box’ (ITB) mode uses the console like a control surface, with the main output from Pro Tools routing direct to the Mix Bus. It is also possible to route groups to the Neve 8424 in order to utilise the ‘sound’ of the desk’s transformers.
It is also possible to combine these workflows, but the two templates provided are good starting points.
Correct I/O Settings
This stands for ‘in/out settings’. Select ‘Studio 1’ from the dashboard when starting your session to ensure that the internal and external routing is correct.
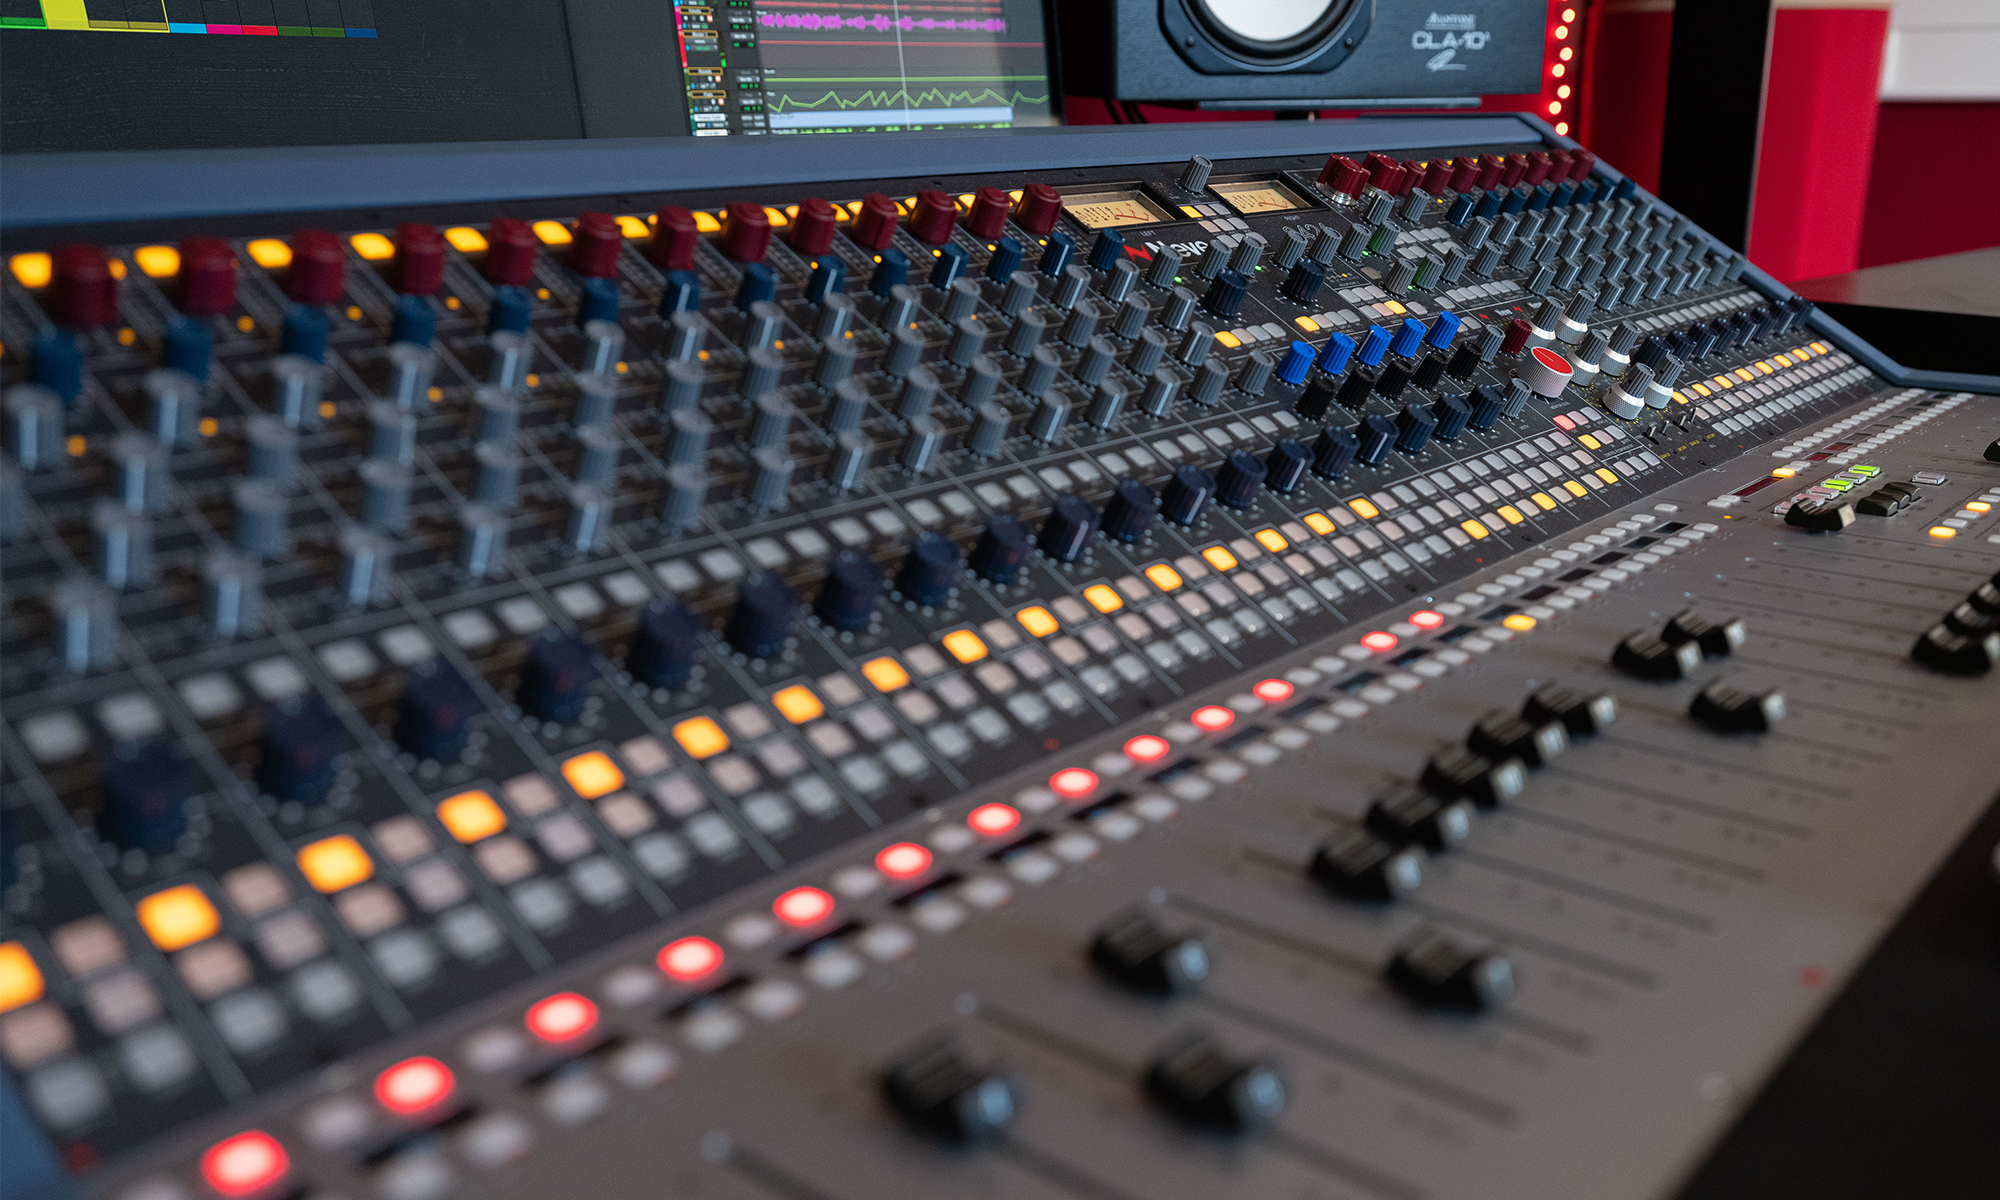
Switching Inputs on the Neve 8424
The Neve 8424 has two sets of inputs – ‘Channels A’ and ‘Channels B’. To change between them, use the switch found in the ‘master’ section (see pic)
INPUT CHANNEL B : The buttons will turn ORANGE, indicating the desk channels will receive audio from the analogue domain (i.e. pre-amps, mics, line inputs and external rack equipment).
You will need to change this depending on whether you are tracking (i.e. recording) or playing back tracks already recorded into Pro Tools.
How To Create A Headphone Mix
Typically, headphone (or Cue) mixes are sent PRE-FADER to the artist. This means that signals are sent before they get to the main faders. In this way, two independent mixes can be set. One for the performer, another for the engineer/producer.
The Headphone Cue mix in Studio One can be assigned in numerous ways.
Within the software. Pro Tools has the Headphone Cue configured on SEND A. Any level adjustments made with the small fader in Pro Tools will be reflected in the headphone mix ONLY.
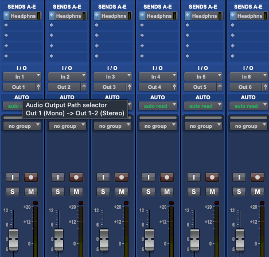
This mix is sent equally to all headphones connected in the LIVE ROOM.
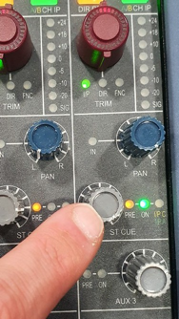
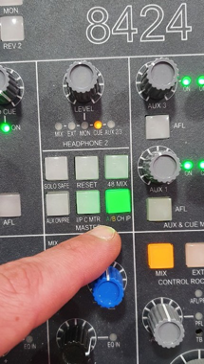
Using STEREO CUE from the desk. If you are monitoring channels through the desk, it is possible to send a Cue Mix using the ST CUE pots. By default, these are PRE-FADER. The send just needs to be activated by pressing the ST CUE pot until the green LED shows ON (see picture, left)
This mix is sent equally to all headphones connected in the LIVE ROOM, and can additionally be monitored in the CONTROL ROOM using the Engineer Headphone 2 (EHP2) socket found under the righthand side of the console.
Getting Audio Out Of Pro Tools
All outputs from Pro Tools are returned through the Neve 8424.
Generic Stereo Output
The ‘Stereo Output (stereo)’, found in the I/O dropdown, sends audio direct to the Mix Buss. This can be found directly above the master fader and allows you to utilise the unique width and EQ shelving functions, both found on the mix buss.
Discrete Channel Output (Hybrid Mode)
In the HYBRID template, each channel is routed out of Pro Tools to discrete channels on the console. In this case, the user must select the output routing on the desk.
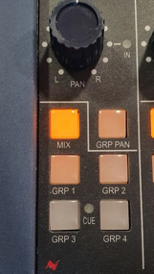
Selecting MIX will route the audio to the Mix Buss.
Selecting GRP 1 (for example) will route the audio to a sub-mix named Group 1, which must then be routed to the Mix Buss.
Control Room Monitoring
The ‘CONTROL ROOM MONITOR’ section controls the final output stage (i.e. the master volumelevel, and which set of monitor speakers are being output to).
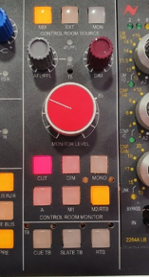
When the Neve 8424 is initialised, the output will be CUT to prevent accidental damage to monitor speakers. Press the CUT button to unmute.
Listening Through Different Speakers
There are 3 pairs of stereo monitors, which can be selected as follows:
A = Genelec 8341As
M1 = Focal Twin 6 BEs
M2 = Avantone CLA-10s
Trouble-Shooting/Other Notes
Neve 8424 Console software pop-up
This controls the connection between the desk and the external Neve 1073-OPX rack. Everything should be automatically configured. If not, click ‘Scan & Link’ and all should be well.
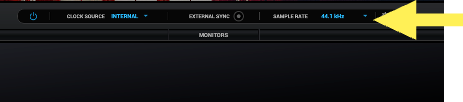
Setting the Sample Rate
Various bit depth and sample rate options are available on the Pro Tools dashboard. Most of the time, you should follow the setting in the screenshot below (24bit, 44.1kHz).
IMPORTANT: check that the sample rate on the Antelope Galaxy 32 interface matches exactly the sample rate of the Pro Tools session. For audio production this will commonly be 44.1kHz, but occasionally 48kHz or higher.
The sample rate can be viewed on the Antelope Galaxy 32 in the second equipment rack.
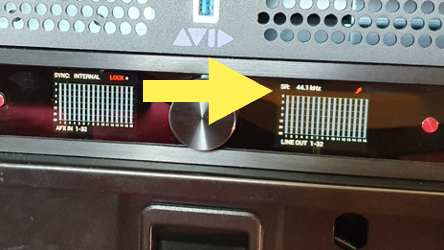
If you need to change the sample rate, open ANTELOPE LAUNCHER from the computer. This will open a software window, with the sample rate shown at the top. Change this to match what is set in the Pro Tools dashboard.
FAILURE TO FOLLOW THIS STEP WILL RESULT IN A RECORDING WHICH PLAYS BACK AT THE WRONG SPEED/PITCH. THIS CANNOT BE FIXED AFTER THE FACT.
Technical Details (to be updated)
SIGNAL FLOW
The signal flow is as follows:
In LIVE ROOM:
Microphone -> XLR cable to LIVE ROOM patchbay (ch 1-32) -> feeds to CONTROL ROOM patchbay
In CONTROL ROOM:
Patchbay routes signal to various pre-amp -> pre-amp patched to audio interface, as outlined below -> interface linked to 8424 console -> to Pro Tools
I/O Configuration
INPUTS:
1-8: Neve 1073, via OPX rack
9-16: RME Octamic
17-18: Console based 1073 pre amps
19-20: UA 2-610
21-22: Drawmer 1960
23-24: DACS Mic-amp
OUTPUTS:
Headphone Cue are sent on channels 31/32. The Main LR outputs are on channels 63/64.
INSERTS:
Software Inserts are available on channels 33-52 (Galaxy AFX plugins)
Making your first recording
In this video we will be discussing the basics of Pro Tools, plugging in a microphone and how to make a recording!
Studio 1 multi-DAW workflow for Logic / Ableton users
Studio 1 and 2 both exclusively use Pro Tools as their system DAW (Digital Audio Workstation). However, if you use a different DAW at home you can still integrate the studios as part of your production process using some very simple file transfer workflows. In this video our Ableton Live expert, Tom Waterworth, shows you the ropes.