| Microphone Type | Condenser |
| Polar Pattern | Shotgun (Line and Gradient) |
| Frequency Response | 30Hz – 20KHz |
| +48v Phantom Power Required: | Yes |
| Manual | ManualsLib.com |
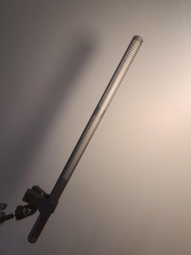
The Audio-Technica AT815B is a shotgun microphone that is widely used in broadcast and video production recording. It excels in recording clear audio over long distances, while effectively reducing unwanted sounds from the sides and back of the microphone. This is due to its directional pickup pattern, which focuses on capturing audio from the front of the microphone while rejecting sound from other directions.
One of the key features of the AT815B is its low frequency roll-off switch. This switchable filter reduces the presence of ambient noise such as traffic or footsteps, which can significantly impact the quality of your audio recordings. By cutting out these low-frequency sounds, the AT815B provides a cleaner and more focused sound.
Another benefit of the AT815B is its versatility. It can be used in a variety of recording environments, from field recordings to in-studio sessions. Its directional pickup pattern allows it to capture a wide range of sounds while isolating them from background noise. This, combined with its low-frequency roll-off switch, makes the AT815B an excellent choice for those who require high-quality audio in challenging recording conditions.
However, despite its many benefits, the AT815B may not be the ideal microphone for every situation. For example, the microphone’s directionality can be a disadvantage as it only captures sound from the front, which means that it might not pick up the full sound of a space, should ambience be desired.
Another consideration is the microphone’s length and design, which can make it difficult to use in tight spaces or when working with limited mobility. It may also be more challenging to use the AT815B for handheld recording, as its length and weight may cause hand fatigue. It may be paired with a Rycote handle or windshield in these situations.
To use this microphone attach the clip to a stable stand before securing the microphone in the clip. Connect the XLR cable to the bottom of the microphone and the other end to a patch bay. Then, switch on the 48V Phantom power on the preamp or mixer and select the correct input in your recording software or mixer.