Site Structure – Adding, Amending and Moving Sections

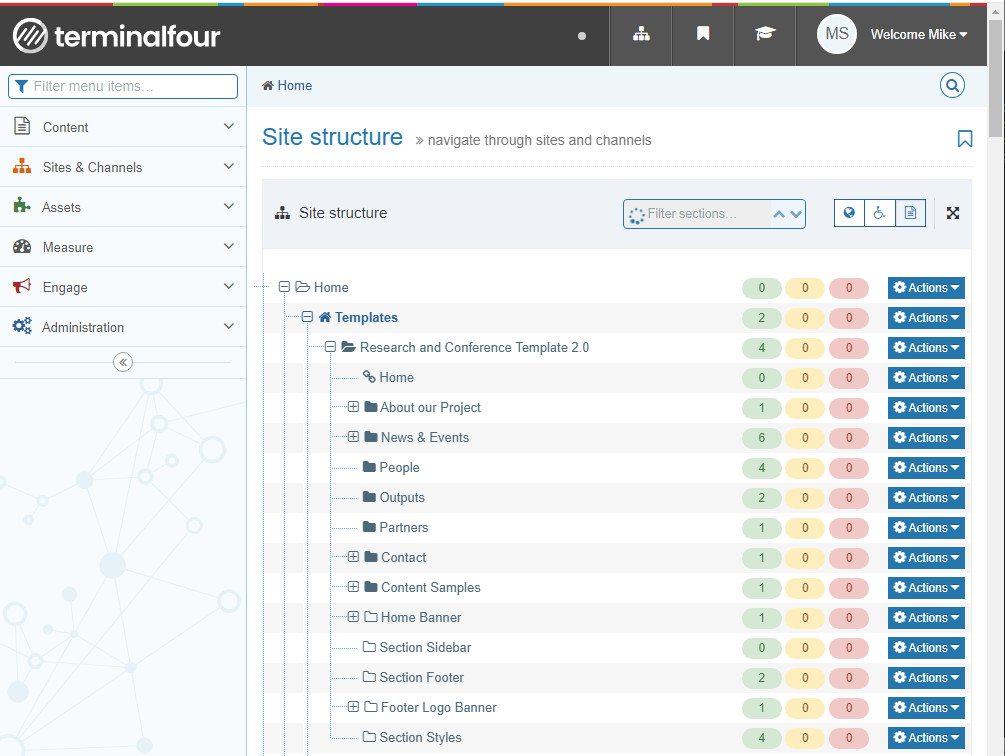
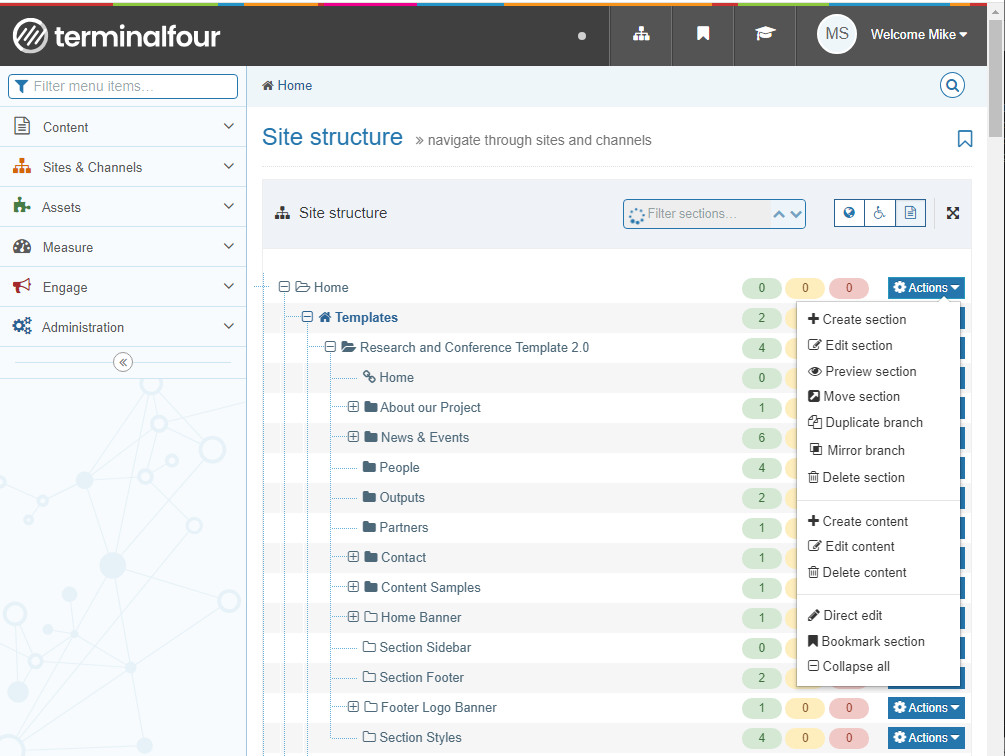
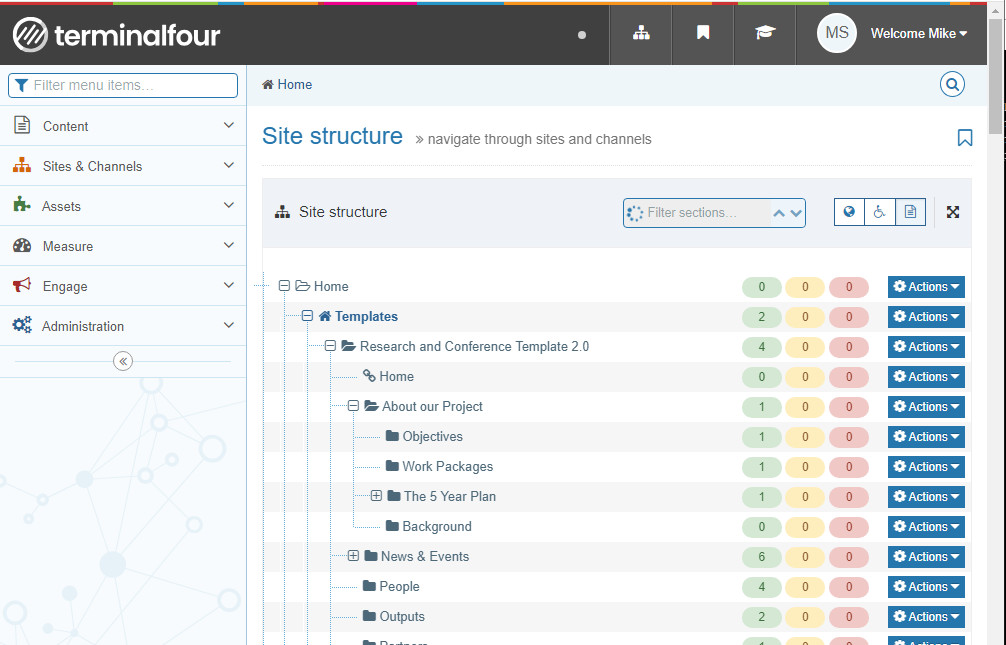
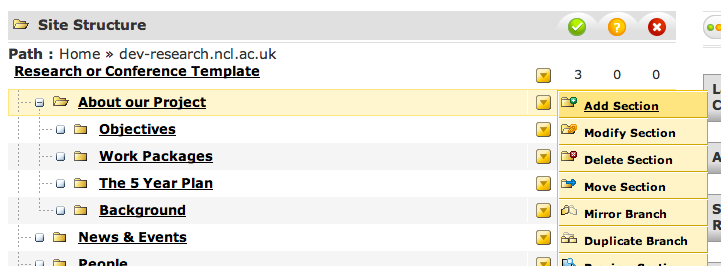
Sections in T4 represent the structure of your website. They are represented by yellow folder icons within the system. To add a new Subsection to the ‘About our Project’ section click on the yellow box to the right of that section, and click ‘Add Section‘.

Add Section

Give the Section a name and an ‘Output URI’ – this represents the part of the web address that people will see on the web.

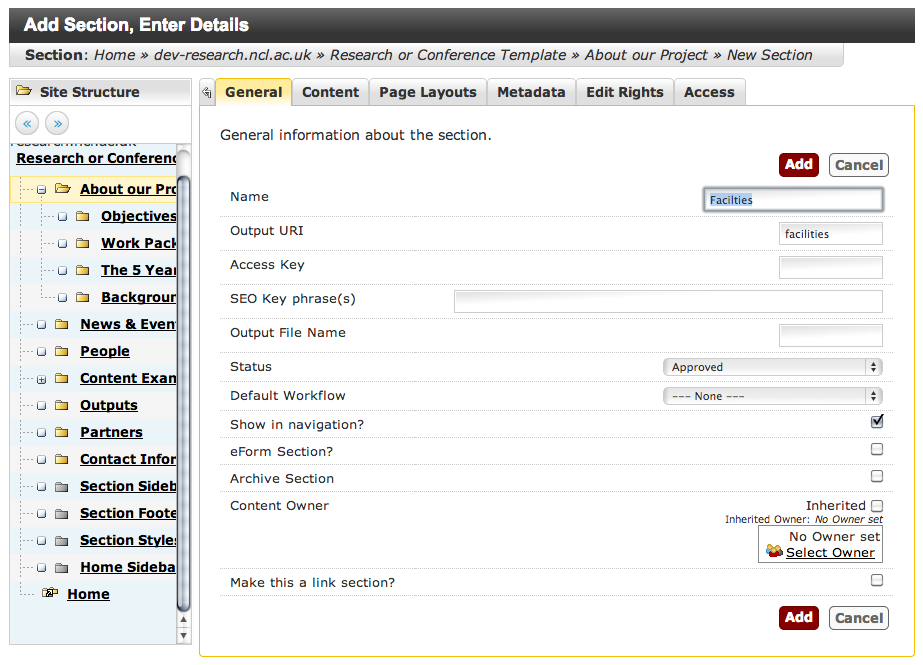
If you don’t enter anything into the Output URI box, the web address will be the name of the section, in lower case with all spaces removed. So in the example above, the web address for this Section when published will be:

http://research.ncl.ac.uk/researchandconferencetemplate/aboutourproject/facilties

You can change (if you’ve spelled facilities incorrectly, for example) the Name and Output URI of an existing Section by using the Modify Section link below Add Section.

Use the same menu to Delete Section. They will not vanish immediately, but will appear with a red background for a short while until the system removes it. There is currently no fixed timescale for this – it’s something we’re working on.

You can move sections by dragging and dropping them into other sections, but to re-order them you need to click again on Modify Section and click on the Subsections tab.

Re-ordering Subsections

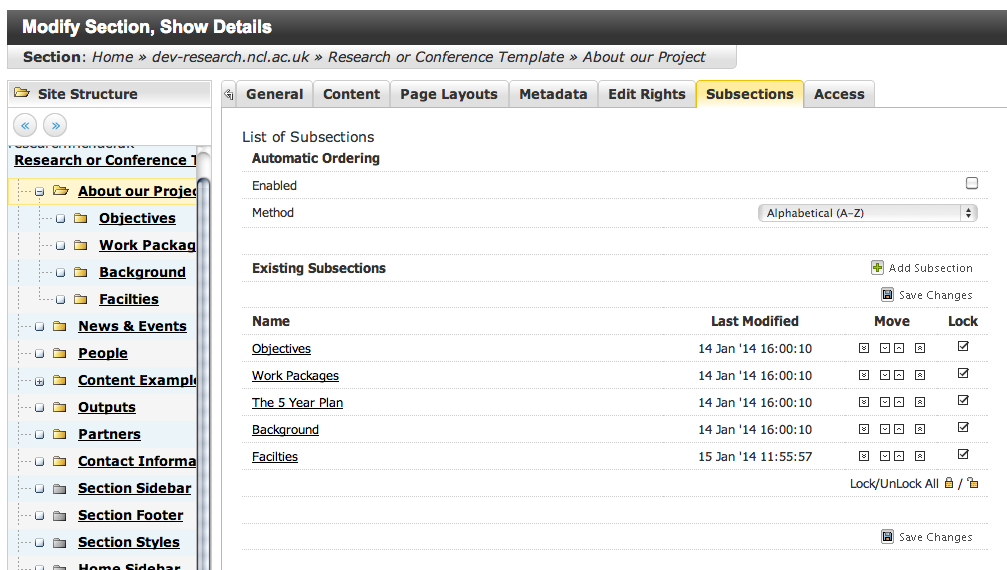
Sections can be moved up and down by clicking on the up and down icons. You can also set them up to be automatically ordered alphabetically or by recently updated. Remember to click Save Changes once you have finished re-ordering.

Note that your newly created sections are effectively empty folders: T4 will not publish them until you have added content to them.

Next:

Getting Started with the T4 CMS in Newcastle University

We provide standard templates for research group, project and conference websites which you can edit with our Content Management System (CMS).

To request a site simply complete the Research or Conference site registration form.

Unless your project is jointly held with another university, the address will be either research.ncl.ac.uk/projectname or conferences.ncl.ac.uk/projectname.

Your site will be set up within three days, and you’ll be emailed the getting started documentation and information about training.

The T4 cms can be found at cms.ncl.ac.uk and once setup you login using your usual campus username and password. Once logged in, click on Content and then Site Structure in the tabs across the top, and you’ll arrive at a screen that looks something like this.

Getting Started - Basic Screen Layout

(Click on images in this blog to view full size)

The main portion of the screen shows the Section structure of your site. Visible Sections of the site are shown as yellow folder icons. Hidden Sections are grey. Use the + icons next to them to view subsections.

To the right of this is a column of yellow boxes, which is used to Add, Edit or Remove Sections or Content. If you want to preview the site, you’ll find the Preview Section option within this column.

Yellow Boxes for Add, Edit and Remove

Clicking on this will popup a preview window (popup windows might be blocked by your browser, you may have to enable them for this site) showing what your site is going to look like. The initial template we provide looks like this:

preview_of_basic_template-fw

Note that the menu items along the top correspond to the Section structure (yellow folder icons) within T4. Clicking on About our Project will reveal the subsections that you’ll see if you click on the + button next to About our Project within T4.

subsections-in-preview-fwSubsections in T4

In general, a Section represents a single page on the website. A Section can contain multiple pieces of content (a list of news items, or staff profiles).

The three columns of numbers to the right of this part of the screen represent the amount of Content in a Section in three categories: Approved, Pending and Awaiting Deletion.

Next: