
As well as helping learners who are hard of hearing. Captions and transcripts also help:
- non-native speakers
- people accessing resources on limited bandwidth
- those without soundcards or headphones
- people who prefer to read and annotate text
In this activity we’d like to show you how to add subtitles to a video on YouTube. You’ll need a video, a script and a google account.
Feel free to use the following example files that we used in the Nutela session.
- Video: transcripts and subtitles (right click and selectvideoscript save as)
- the videoscript (right click and select save as)
Sign into YouTube with your own google account
- Upload the video to YouTube (look for the upload button in the top right), and click Publish when it is done
- Click on the Video manager button
![]()
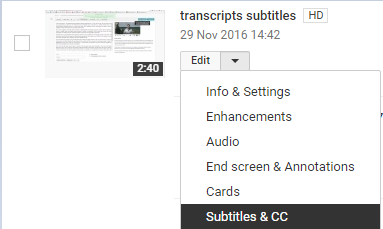
- Click the drop down next to the video and select “Subtitles & CC”
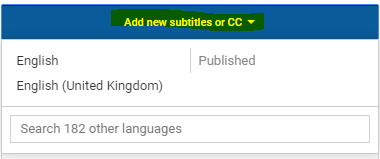
- Next click “Add new subtitles or CC”
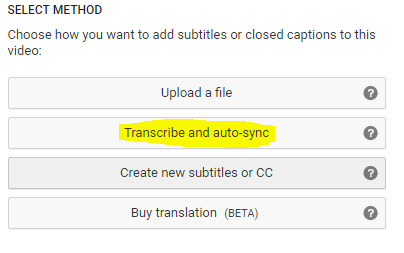
- The method we will use here is “Transcribe and auto-sync” as this will automatically set the timings of the text:
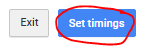
- Paste your text into the text box and then click “Set timings”
You will now see an option under “My Drafts”.
- Wait 30 seconds or so and then click the refresh button:

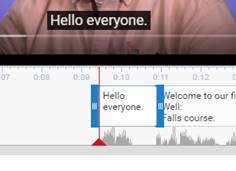
Now you can check that it has aligned it correctly by listening to the video and make any changes.
- To adjust the timings click on the phrase you wish to change and then drag the blue tabs:
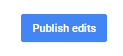
- Once you are happy with the words, punctuation and timings click “Publish edits”
You should see the following video, click on the CC button to view the captions.
(Our demo video is about how we generate subtitles when we don’t have a script.)
YouTube also has a function which automatically generates subtitles
If you don’t have a script for your video you may be able to make use of the automatic subtitles which YouTube adds to all videos.
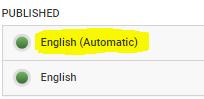
- In Subtitles & CC, instead of adding new subtitles you need to select “English (Automatic)”
- Listen to the full video to check if the text is correct and make any changes.
- Once you are happy with the words, punctuation and timings click “Publish edits”
[Huge thanks to Eleanor Lockhart for preparing these instructions and screenshots for the hands-on session.]