Inspera have developed a new digital drawing tool which has increased functionality beyond the existing drawing tool. In terms of what is new, the new tool allows you to enable the drawing tool at a question level, rather than at a test level. Colleagues can choose what questions they wish to enable the drawing tool on for their students to use in their Inspera digital exam.
The new Digital Drawing Tool is now available to use on Inspera as of Friday 27th February 2026.
Within this blog post you can find out how you can enable the new drawing tool on your Inspera exam questions in your question sets and the functionality available within the tool.
Over the summer, work took place to improve the security, functionality, and performance of Turnitin assignments in Canvas. This means there is a slight change of workflow when setting up a new Turnitin assignment.
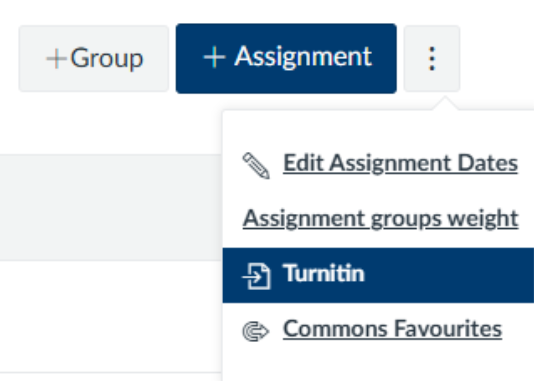
You are no longer be required to select Turnitin as an “External Tool” from the Submission Type assignment settings. This step occurs on the assignment homepage instead, select Turnitin from the Assignment Settings (3 dots) button when creating a new assignment.
Please note that change will only affect how you create new Turnitin assignments; any pre-existing Turnitin assignments will still be available and any Turnitin assignments already set up for 2025/26 will not need to be changed.
It is now possible to submit a Turnitin assignment on behalf of a student, via the Turnitin inbox. Simply select ‘Submit on behalf of student’, and a drop down menu appears of all students attached to the course in Canvas. Select the student you wish to submit for, confirm your selection by clicking continue, then follow the steps to choose a file and upload the submission.
In the Gradebook Settings of the Canvas Gradebook area, a View Hidden Grades indicator option is available. This will allow Teachers and Admins to see an icon marking any grades that have not yet been posted to students.
This will help you quickly identify which grades are hidden from students, reducing confusion and ensuring more accurate communication about grade visibility.
This feature is available for use from 25th September 2025.
How do I use this feature?
To use this feature, you would navigate to the Gradebook area of your course in Canvas.
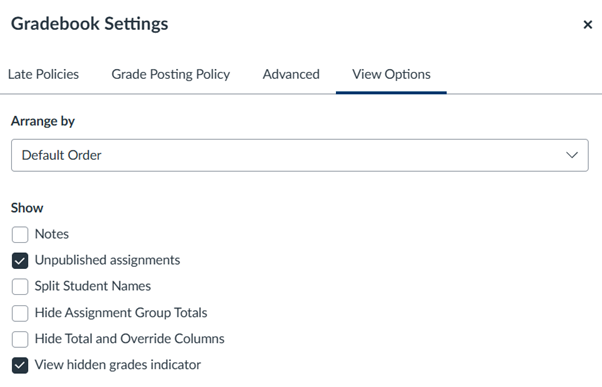
You would then locate the ‘Gradebook Settings’ by selecting the settings option (cog icon) in the top right corner of the screen. Once here, you will navigate to the ‘View Options’ tab where you will be able to select the ‘View hidden grades indicator’. This enables the hidden grades indicator within the Gradebook of the particular course you are in.
The gradebook settings area in Canvas Gradebook where you can enable ‘view hidden grades indicator’.
What does the feature look like in action?
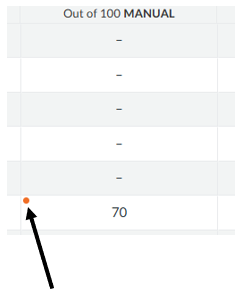
In the Gradebook, an orange indicator displays which grades have not been posted next to each grade where this is applicable.
An orange dot shown against a grade in the Canvas Gradebook to indicate the grade has not been posted.
Find out more
You can find out more about the functionality of the Canvas Gradebook on the Canvas Course Navigation website, under the heading ‘Grades’.
In Spring 2025, there will be some updates to Canvas SpeedGrader. This update makes SpeedGrader faster and more stable, while keeping the interface easy to use. The grading process you know will stay the same, but with some improvements behind the scenes.
Previously, courses with large cohorts or assignments with large file submissions experienced frustratingly slow loading times. This update aims to enhance SpeedGrader’s performance, making navigation quicker and more efficient.
In addition to performance updates, there will be minor interface changes to assist with navigation. Although small, these changes will help with the usability of SpeedGrader. After these changes, the interface will still have the familiar SpeedGrader feel.
Let’s dive into the changes made to Canvas SpeedGrader…
Sections Selector Dropdown
The section selector now has a streamlined interface, making it easier to navigate between different class sections. Previously, filtering by section required more steps. With the new Sections Selector Dropdown, you can quickly filter submissions by section.
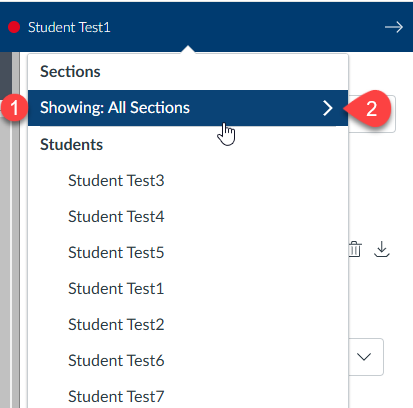
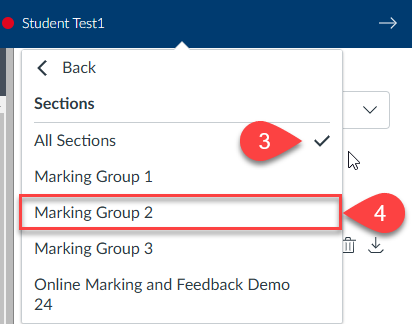
In the Student Dropdown List, you’ll now see a Sections header. Under ‘Showing,’ you’ll find the current section that the list is filtered to (point 1).
To apply a new section filter, click on the Section filter (point 2). A dropdown list will then appear, as shown below:
In the dropdown list, you’ll see all the sections associated with the assignment. A tick mark will indicate the section currently applied as the filter (point 3).
To choose a new section filter, click on the name of the desired section (point 4).
No Submission Alerts
The alert for assignments without submissions has been enhanced to be more prominent and visually clear.
Previously, this would be indicated with the assignment showing as blank in the DocViewer. It is now clearly indicated that there is no submission.
You can see in the below (point 1), this is now clearly displayed in the DocViewer.
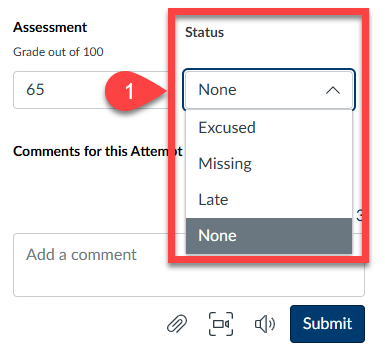
Grade Status Selector
Changing the status of a submission is now easier with a new dropdown box. However, it’s generally not recommended to use this feature, as our assignment statuses are tracked via the NESS system.
Previously, this status was managed by a pencil icon located in the top corner of the marking pane in SpeedGrader.
To change a submission status, click on the dropdown box and selected the appropriate status.
This is demonstrated in point 1 below:
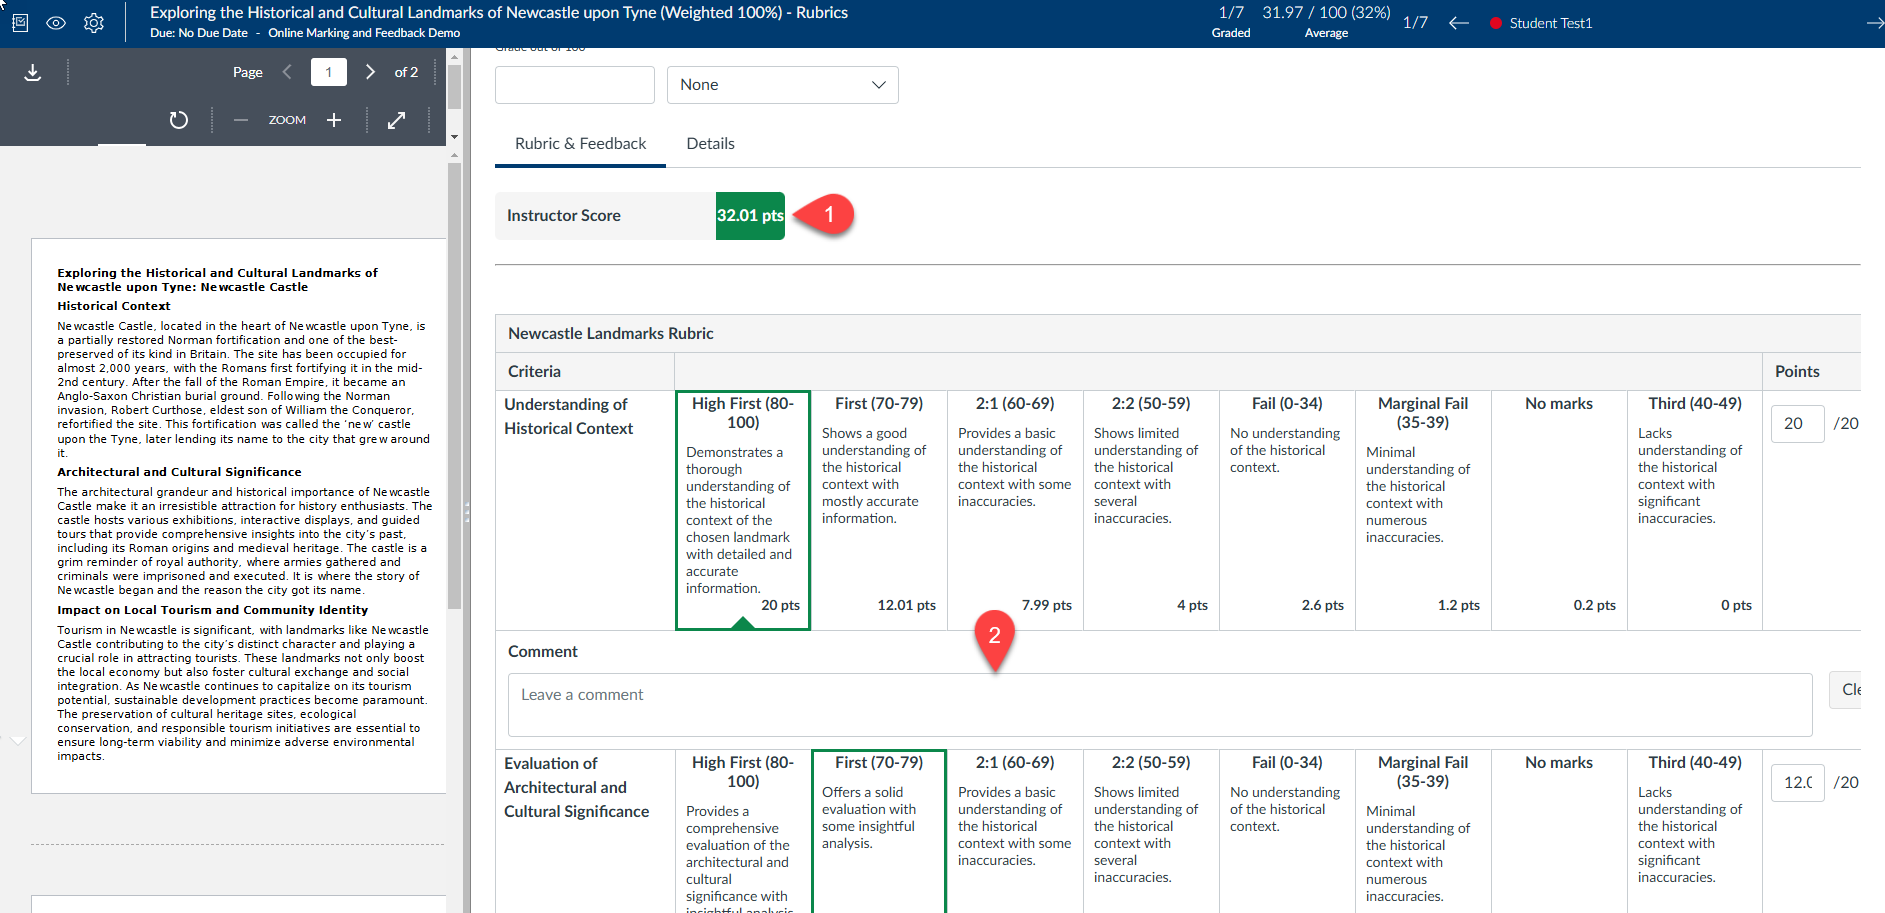
Rubrics
Rubrics are now consistently displayed in the new traditional (grid) view. This view is very similar to the rubrics you’re used to marking with, though there are some minor changes.
The Instructor score is now displayed at the top of the rubric, making it easier to see while marking an assignment (point 1).
Providing feedback for rubric criteria is now easier with the feedback entry box clearly displayed (point 2). Previously, you had to access this feature via a button. Having the feedback option readily available encourages more frequent addition of comments to rubric criteria.
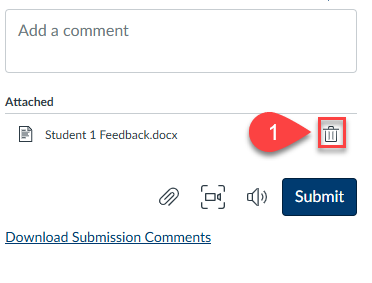
Media Attachments
Uploading and managing media attachments in submission comments is now more intuitive, thanks to an improved dialogue and a more straightforward deletion process.
Deleting an attachment has been made more intuitive with the introduction of a rubbish bin icon, replacing the previous red ‘x’ button (point 1). This change not only modernises the interface but also makes the deletion process clearer and more user-friendly. The rubbish bin icon is universally recognised, ensuring that users can easily identify and use this function without confusion.
Over the summer there have been a series of updates to the SpeedGrader tool within Canvas to improve the ability to provide feedback.
In this blog post, we will highlight some of the key changes to the SpeedGrader and how you can utilise these changes in your courses.
Submission Comment Drafts
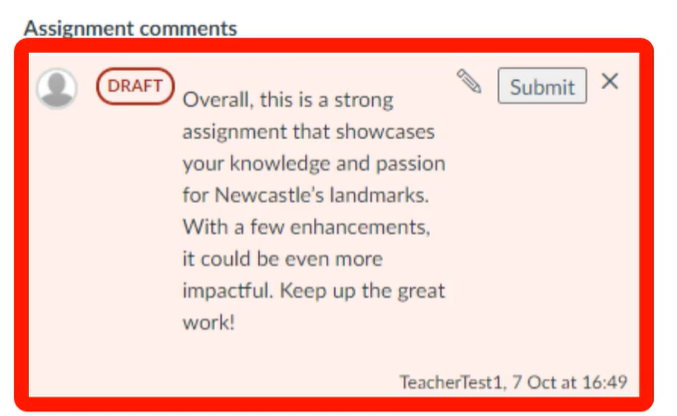
In SpeedGrader, after adding a submission comment, if this has not been saved, a Draft pill displays indicating that this comment has not been saved and a warning message is presented alerting the teacher that the comment has not been saved.
Previously there was no clear indication that a comment had been submitted and this would lead to students not seeing comments/feedback in their assignments.
With this update, it is clear for a teacher to see the status of a submission comment.
You can see in the example below that the submission comment has not been submitted and we have a draft pill alongside our comment:
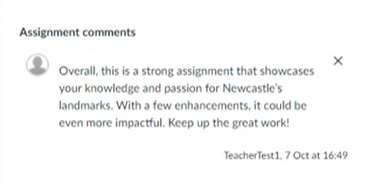
When we press submit on this comment, the draft pill disappears which means the comment is visible to the student:
Rich Content Editor (RCE) In Submission Comments
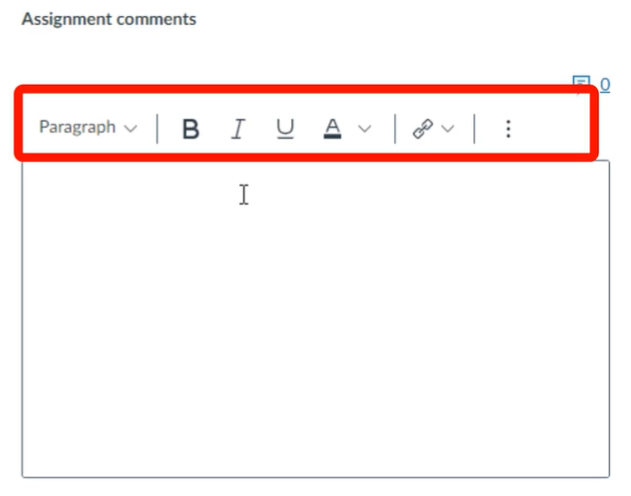
In SpeedGrader, some Rich Content Editor (RCE) features are available when using submission comments. The available RCE features include:
Heading
Bold
Italic
Underline
Font colour
Insert Hyperlink
Bullets
This allows teachers to style feedback and provide further resources via linking. In the example below, you can see a link is provided to further resources to assist the student:
This functionality is available at the top of the submission comments box as demonstrated below:
Equation Editor in Submission Comments
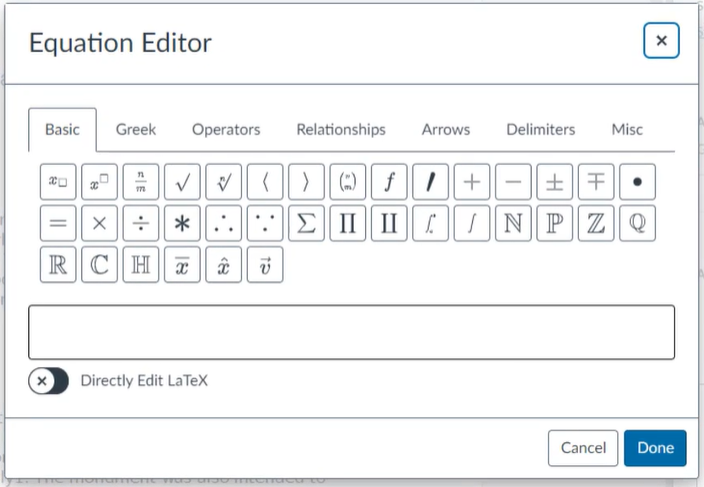
In SpeedGrader, an Equation Editor function has been added to the Rich Content Editor. This feature enables instructors to incorporate math equations into their submission comments.
In the below example, you can see the new equation editor function within the submission comments in SpeedGrader:
Randomise Students in Submission List
In SpeedGrader Settings, instructors now have the option to randomise the order of students within each submission status. This update helps mitigate grading fatigue and biases by ensuring a random sorting of students. Additionally, it enhances grading efficiency by maintaining this random order within submission statuses.
Below are step by step instructions on how to do this:
In the top left corner of the SpeedGrader, select the cog icon
From the dropdown menu select “Options”
Within SpeedGrader options, select “randomise students within a submission status”
Select the “Save settings” button
Please note that when the randomised students, the preference is saved as the default in the browser for the course. When logging in on another device, instructors must select the sort by options again.
A question set is a group of questions created in Inspera. In Inspera you can make individual questions, or you can set up a question set and create a group of questions in there. Individual questions can also be imported into your question set.
Creating your question set
Accessing Inspera
All colleagues (and students) access Inspera via Canvas. Colleagues can either access a ‘test’ exam set up in their Canvas Sandbox area, or by going through an existing Inspera exam.
Naming your question set
You should give question sets meaningful names, e.g. ‘MOD1234 Semester 1 Exam 202425’. This makes it easier to identify the question set for the current academic year. Question sets are created in the Author tab of Inspera.
Remember to rename your individual questions too, so that you can easily find them in the question set. Each new question is automatically given the name ‘New Question’ so if you are creating question sets with multiple questions in, giving them a meaningful name will help you find specific ones later.
If you need to update a question, a meaningful name will make it easier and quicker to locate.
Adding labels to your questions
Adding labels to your individual questions can also help with locating and re-using your questions in other question sets.
If you’d like to know about adding labels and using filters to find questions, please see our dedicated label filtering blog post.
Content creation in question sets
There are various features you can use within Inspera to enhance your question sets. These are optional features you can apply within your question set.
For example, you can randomise the order in which the questions appear for students when they sit they exam. You can also use the random pulling feature to pull a sub-set of questions from a larger bank of questions, so that each student receives a different combination of questions.
If you are using both manually marked essay questions, and a set of multiple choice questions, you are able to put these into what is known as sections. This means you could apply randomisation to the multiple-choice questions only. You could also use another feature on the essay questions known as candidate selected questions.
There is a dedicated Content Creation Featureswebsite on our Learning and Teaching Inspera site which lists the full details on these different features.
Question set deadlines
Once the Module Leader has completed their Digital Exam Form to confirm the details about their Inspera Digital Exam, the next step is to start creating their question sets.
Question sets are created by the module team and shared with the Digital Exams Team via email to Digital.Exams@newcastle.ac.uk.
The question set deadlines for 2024/25 are detailed in the following table:
Semester
Question Set Deadline
Semester 1
15th November
Semester 2
7th March
Semester 1 August Resit (Semester 3)
17th April
Semester 2 August Resit (Semester 3)
8th July
A table with the question set deadlines for each semester.
Training webinars
The Digital Exams Team deliver a training webinar ‘Creating and managing exam questions in Inspera’ which colleagues can sign up to via the Elements training system. The training session covers an on-screen demos of setting up and adding questions to your question set.
As we enter the assessment marking period, the Digital Exams Team want to share some marking ‘hints and tips’ for Inspera Digital Exams. Check out some of our hints and tips listed below.
Hints and Tips
To attach yourself to an exam as a grader, make sure you click the link from the Inspera assignment point in Canvas. This takes you into the ‘Deliver’ area of the exam and you can click the ‘Open in Grade’ button to enter the ‘Grade area’.
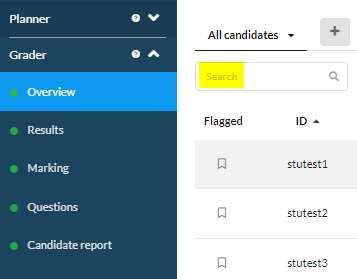
If you need to search for a specific student, within the ‘Overview’ section of the Grader area, you can search for a student number to locate their submission. In the screenshot below, ‘stutestX’ is a placeholder for a student ID. In your exams you will see student numbers listed instead.
If you are in the Grade area and need to go back to the Deliver area (for example, to set the feedback settings), there is a shortcut available. Click the ‘Options’ button at the top of the screen and navigate to ‘Shortcuts’. Select ‘Deliver’ and click ‘Open test in Deliver’,
It is possible to download raw marks from Inspera as an Excel file. Click the ‘Options’ button at the top of the screen and navigate to ‘Downloads’. Select ‘Marks as Excel file’,
As standard the Digital Exams team will set up the Canvas assignment associated with your Inspera exam as 100 points. This means (once released) students will view their Canvas Gradebook mark as a proportion. If you’d like students to see raw marks, please edit the Canvas assignment points area to match that of your total Inspera marks.
For manually marked questions, Graders can add Annotations to student submissions. Within student submitted text, click the left mouse button and move the mouse across the text you want to annotate. Click Annotate:
Within the Grade ‘marking’ area there is a search icon for students now for all graders. When marking, use the bottom panel to navigate to specific students using their ID. For example:
Further Support
Webinars
The Digital Exams Team run two dedicated marking webinars which colleagues can book onto:
These training webinars cover a range of marking workflows, including how to amend auto-marked questions and adding annotations to manually marked questions such as essays.
Videos
There are a range of marking videos available on the Inspera L&T website which provide on-screen demonstrations of grading tasks.
Feedback Release
If you would like to release feedback to your students on your auto or manually marked Inspera questions, check out our dedicated webpage on Inspera Feedback Release for further information.
Further questions?
If you have any questions about marking an Inspera exam, please contact the Digital Exams Team via Digital.Exams@newcastle.ac.uk.
If you have any hints or tips that you think we could add to the above list, please do share them with the Digital Exams Team.
Artificial Intelligence is this year’s hot topic for our Art of the Possible week 26-30 June 2023.
We will be offering a series of in-person, online and asynchronous opportunities to join the conversation, share ideas and reflect on the ways AI affects education.
Save the time in your diaries to join in and hear from external speakers and colleagues, and to experiment with a range of AI tools.
Schedule
Monday 26 June
Embracing the AI Landscape: Debbie Kemp from the University of Kent will open our week, sharing and reflecting on how she has incorporated AI in her teaching and assessment. Online 10:00-10:45
Introduction to AI: a one-hour overview from LTDS and FMS TEL colleagues. In person 14:00-15:00
Wednesday 28 June
AI and Assessment: a one-hour session exploring the impact of AI on assessment. In person 10:00-11:00
Embracing AI @Newcastle: find out how colleagues at Newcastle University are embracing AI in their teaching and learning. Online 14:00-15:00
Thursday 29 June
Hands on Explore AI Tools: Join us in the Herschel Learning lab to try out a range of AI tools. In-person, bring your own device: 10:00-11:30
Microsoft 365 and AI: Join the NUIT Digital Adoption team for an overview of what is currently possible, and what the future holds, for AI in Microsoft 365. Online 14:00-15:00
AI in Education Retrospective: Dr David Kennedy, Dean of Digital Education will present his thoughts on the week and comment on outstanding challenges going forward. Online 14:00-15:00
Get involved
We will be blogging over the week, gathering question, sharing comments and recordings on our Learning and Teaching Development Blog, so come back for updates.