Basic Image Editing in Photoshop

While it is possible to crop and resize images within the T4 media library and resize them within the content area, higher quality results will be obtained by resizing them in photoshop, which is available on RAS in the folder labeled Graphics Software.

Images for use in the News or Staff templates may need to be resized before uploading as modern cameras take images that are far too big to be uploaded to a website.

Open Photoshop in RAS

Firstly, save all of your images to your H or other shared Drive so that they can be accessed from within RAS.

ras

Go to ras.ncl.ac.uk and open the folder labelled Graphics Software. Then click on photoshop. Once photoshop appears, go to File -> Open and locate your file.

Cropping and Resize the Image

If you need to crop the file you’ll find the crop tool in the vertical tool bar on the left – it looks like a dashed square, and will allow you to drag a box within the image you wish to crop.

photoshop_0008_Layer 1

Select Image -> Crop from the top menu bar.

photoshop_0007_Layer 2

Once you have the crop of the image you like, you’ll need to resize it to better fit webpages (your phone or camera will probably have taken images designed for much higher resolution than is available on websites).

photoshop_0006_Layer 3

The content area of most websites built using T4 is around 710 pixels wide so set this as the width.

photoshop_0005_Layer 4

Contrast and Colour Balance

Many images will benefit from a little ‘warming up’. If you visit Image -> Adjustments -> Color Balance, you might want to experiment with increasing the Red in the image by +10 to +20 – don’t overdo it or the image will look artificial.

Iphotoshop_0004_Layer 6

If you visit Image -> Adjustments -> Auto Contrast you may find that the image looks better on screen than your original, though this does depend on the type and quality of your camera.

photoshop_0002_Layer 8

Save for Web and Devices

When you’re happy with your image, go to File -> Save for Web & Devices.

photoshop_0001_Layer 9

You’ll be given an opportunity to choose file format and quality in the right hand panel: 70% is more than adequate for web publishing.Photography is best saved as JPG and line art or diagrams as PNG.

photoshop_0000_Layer 10

Once you’re done, click Save, being careful to choose a new file-name and not overwrite your originals.

And once you’ve done that, upload the image into the T4 Media Library.


Ticker Tapes

This post relates to the old Research and Conferences template and so has been Archived.

This article describes how to turn a regular bulleted list into a ticker tape. Another post (coming soon) will discuss how to sync this with your site news page, or with an RSS feed from another site or blog, but there are plenty of cases where you wouldn’t want the content to be fully synchronised.

  • Ticker tapes and other animated elements should be used with restraint, as they effect the readability of content on your site. This technique will only work with one ticker per page – you should not have more 😉

As with sliding banners, column and grid layouts, this makes use of the Class field in All Purpose Content.

Create a bulleted list in some All Purpose Content and make sure that each item is web a link to another webpage using the chainlink icon, this would ideally be your news page or the individual news items.

Give the piece of All Purpose Content the Class ‘tickertape’ in the field at the bottom of the content edit area – see below.

TickerTape

Any bulleted list items within this piece of content will become a ticker tape which types out the item character by character. Obviously the below screenshot isn’t animated:

Ticker Tape Example

Alternatively, using the same technique, you can use a different class ‘scrollingticker‘ which scrolls a new item vertically into view.

Scrolling ticker is slightly more flexible in that it does not restrict you to only having hyperlinked content in your bulleted list and can even work with images if laid out carefully.

Scrolling Ticker

See Also:

Embedding Video, Maps, Twitter and other media in your site

There’s a good chance you’ll want to embed content from other websites in your site. Youtube Video, Flickr photo galleries, Twitter feeds, Google Maps for example.

There are two ways in which you can do this.

The easiest way is to embed the URL into the content area as follows:

  • Paste the web address of the content the content area of a piece of All Purpose Content (this also works with News, Events and Staff Profiles).
  • Click on the chain link icon and ensure that the web address is a link to the content.
  • Select the linktext and in the Styles dropdown in the toolbar, select ‘media_embed‘. This will surround your link with a grey box.

Media Embed

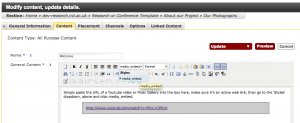
When this page publishes to the live or dev site, the link will be transformed into the full video. Some services will display in preview, some won’t (such as flickr) for security reasons so you’ll have to publish them to see them in action.

video-fw

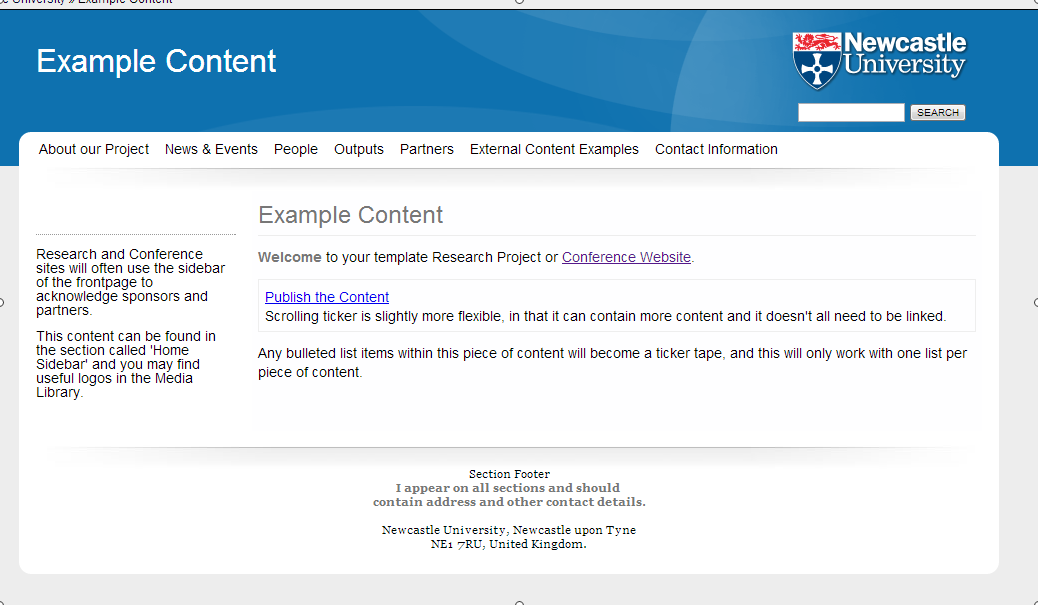
The full list of supported services can be found on the Embedly website. We’ve not tested all of them and some require the URL to be in a specific format. If you’re using a very recent version of our template site (since 15th January 2013), you should find a suite of examples in one of your sections, if you’re not, please email it.servicedesk@ncl.ac.uk and we’ll hook you up.

The Newcastle University Form Builder and Steaming Video from NuVision can be embedded using this method.

Notably, Twitter and Google Maps do not work using this method, so for these services you will need to obtain their embed code.

Pasting Embed Code into the Content Area

Most social media provide embed code to paste into your site. Some require you to have an account (Twitter), others don’t (Google Maps) – we’ll run through these two examples.
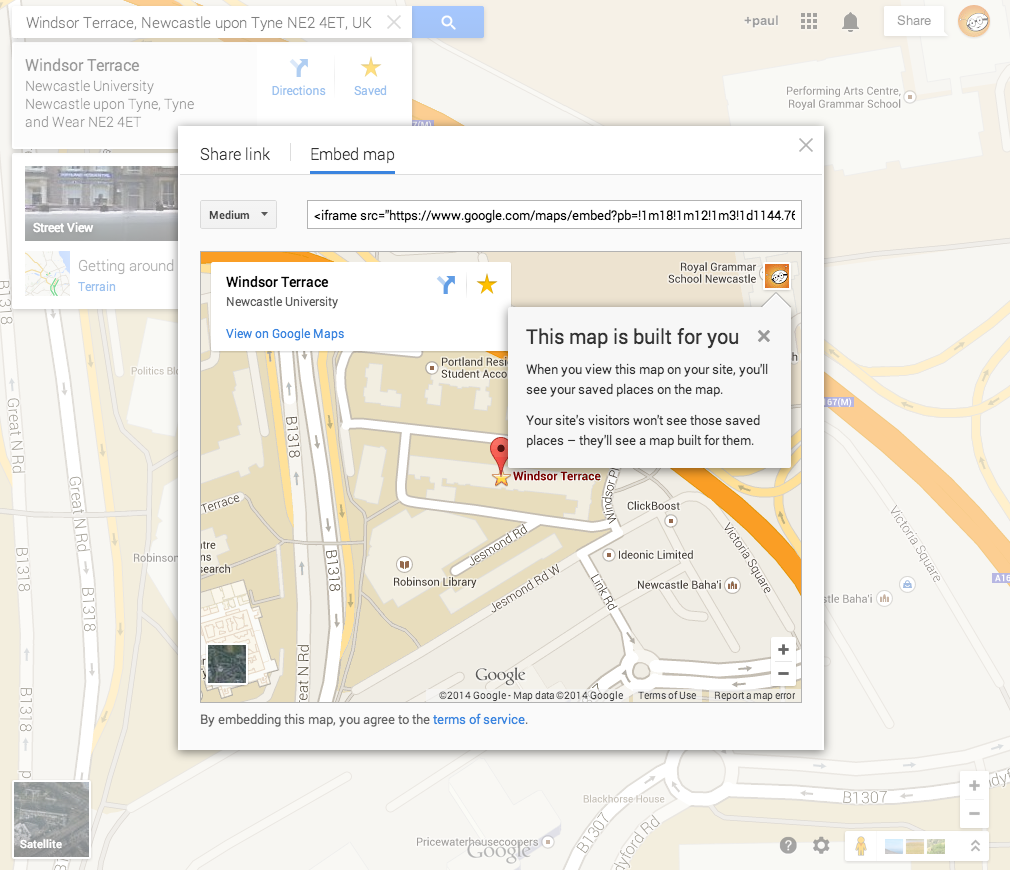
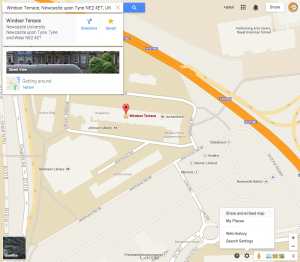
Google Maps

Any map you create in google maps can be embedded. The embed code for google maps can be found using the cog icon to the bottom right of the screen.

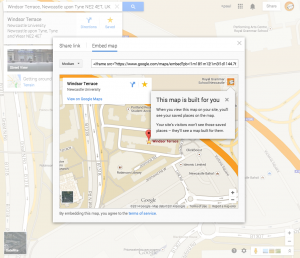
The code it gives you will look something like this:

<iframe src=”https://www.google.com/maps/embed?pb=!1m18!1m12!1m3!1d1144.7632681901744!2d-1.6098427562973012!3d54.981401731193344!2m3!1f0!2f0!3f0!3m2!1i1024!2i768!4f13.1!3m3!1m2!1s0x487e70ce4c82e66d%3A0x8012218ea348cebb!2sWindsor+Terrace%2C+Newcastle+upon+Tyne+NE2+4ET%2C+UK!5e0!3m2!1sen!2suk!4v1390505405824″ width=”600″ height=”450″ frameborder=”0″ style=”border:0″></iframe>

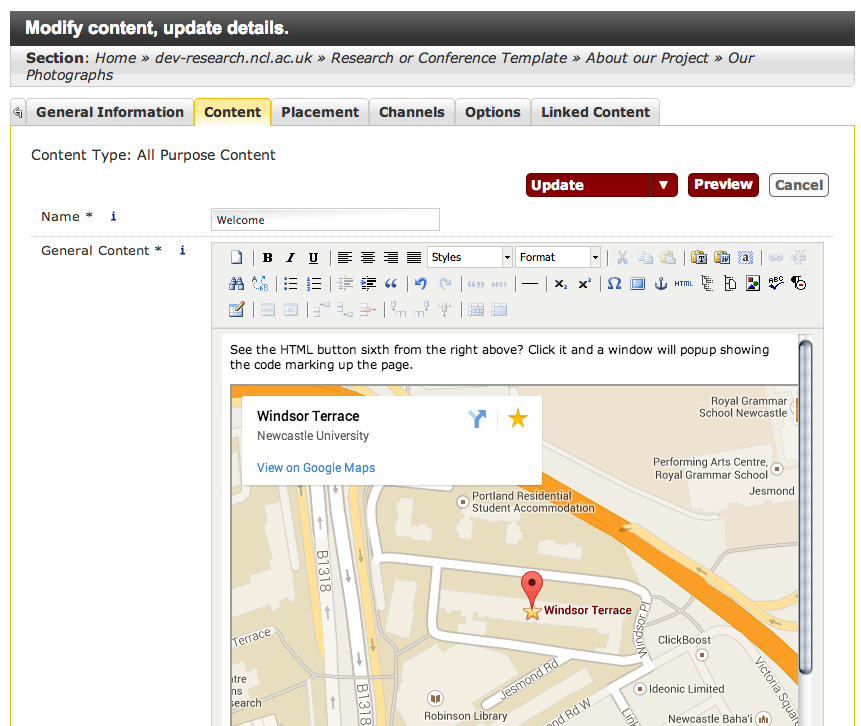
Copy it using Ctrl+C, then return to T4 and amend your content. You’ll need to paste this into the content area of all purpose content as HTML.

The HTML link is sixth from the right in the content formatting toolbar. When you click it a window will pop up showing you the code of the page. HTML isn’t terribly complicated, and in this case it’s just a matter of pasting the code you’ve been given into the page:

Find the HTML button

HTML Popup

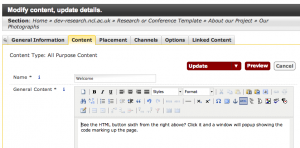
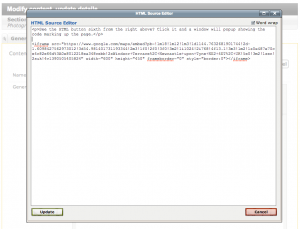
Click update and you’ll return to your page:

Google Map Embedded

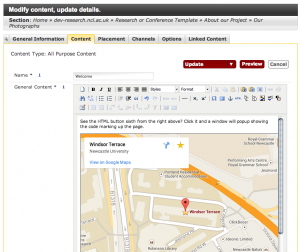
As with the URL embed method, some services will be blocked for security reasons from within T4 so you’ll may not see it until you preview or publish the site. With google, however, you can see the content within the edit area as in the screenshot above.

Twitter

To add twitter timelines or searches to a page, we need to create a twitter widget.  To do this goto publish.twitter.com and past in the URL of feed you’d like to embed.
e.g. https://twitter.com/TwitterDev

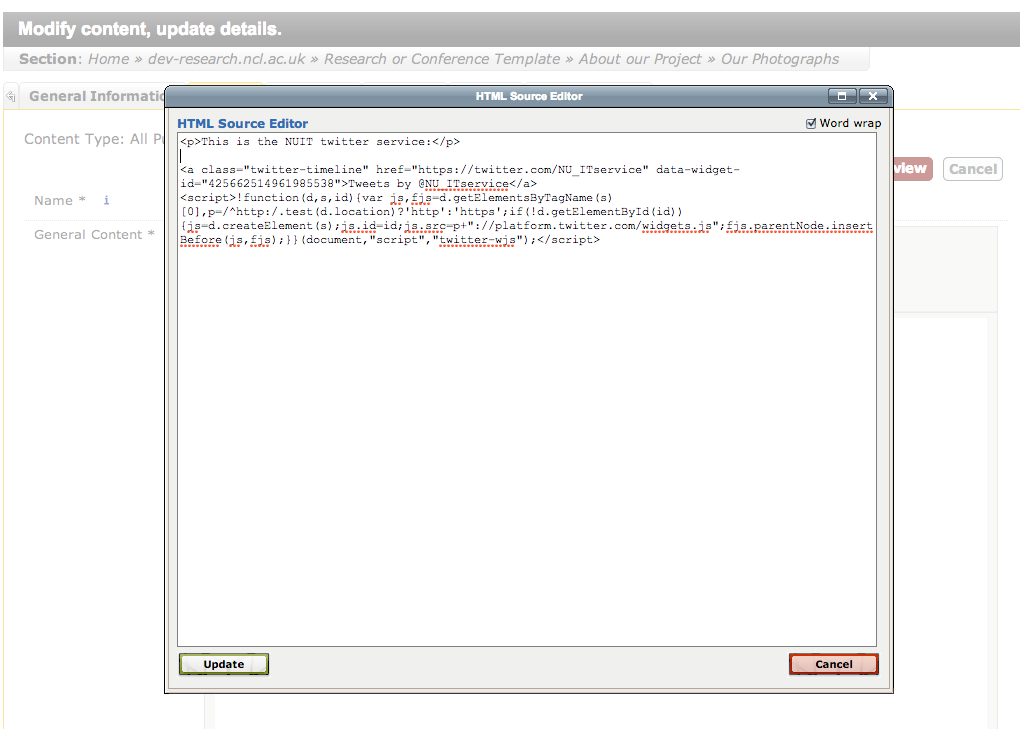
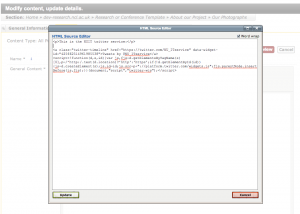
You’ll end up with a piece of code like:

<a
class="twitter-timeline" href="https://twitter.com/TwitterDev">Tweets
by TwitterDev</a> <script async
src="https://platform.twitter.com/widgets.js"
charset="utf-8"></script>

  • Copy it using “Ctrl+C”, and return to T4.
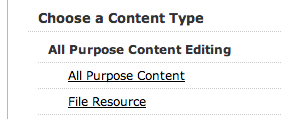
  • Add a ‘Raw HTML/Javascript’ type, where you would like the feed to embed
  • Paste the code into that and Update/Approve the content.

Making changes:

An overview of embedding Twitter timelines is available detailing customisations that can be made.

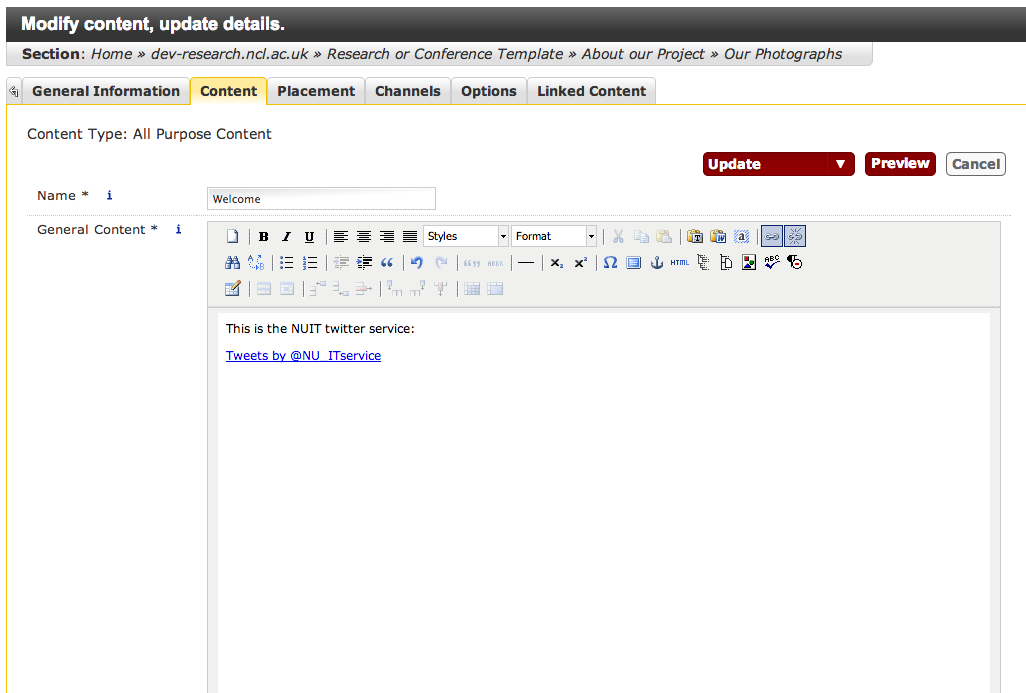
As with google maps, go back to T4, click on the HTML icon, and paste the code into the content area. Unfortunately, this will not appear in the edit area OR preview. You must publish the site to see the results.

Paste the Code

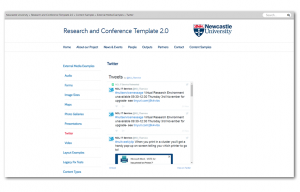
It just shows the link in both the edit area and preview:

It just shows the link

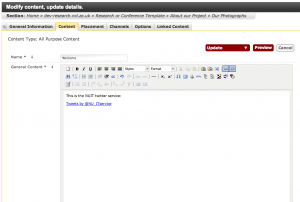
But when published the twitter feed shows in the content area:

twitter-fw

That’s it. You might be tempted to put the twitter feed in your sidebar: don’t. It updates constantly and will cause reading problems for people (especially people visual impairments or on a mobile network), and twitter will lock you out if you are using the service too much, so instead of a feed, you’ll get an error message. It’s best to put this kind of thing on a contact or get involved page.

The Media Library

Terminal Four has a media library which can be used to store images and other kinds of documents such as PDF files or powerpoint presentations. It’s not suitable for larger file types such as Video, which should be hosted on NuVision.

This page describes using the Media Library for images. Note that while the T4 Media Library can resize and crop images, you will always get better results if you do this in photoshop (which can be found on RAS).

If you are planning to be using the Media Library a lot, you will find performance greatly improves if you use the Chrome web browser rather than Internet Explorer.

It can be accessed in two ways, via the Control tab to the top right of T4.Media Library Menu

… or by using the Media Library Icon icon while editing content (it’s third from the right in the middle tier

Media Library Icon in Situ

When you enter the media library, its folder structure is on the left and can be browsed using the + icons next to the folders. There is a top level section in which we are maintaing a set of useful icons (other university and funding body logo’s). You’ll find a section called ‘Sites’ in which you should have a folder set up specifically for your site, depending on its category.

NOTE: Browsing these long list can be fiddly. We’ll shortly be setting up shortcut links for all media library folders people have permission to edit.

The contents of each folder appears on the right and at the top of this panel, if you are in a folder you have permission to edit you’ll see Add Media buttons.

Media Library with Slides in

When you click on Add Media, you’ll visit a screen with quite a few fields. You only need to be interested in Name, Description and Media.

Media Library Upload

  • Name is what you’ll see in the list of media
  • Description is important since it’s what people will read or hear if they can’t see the images for some reason (they could have visual imparements and be using a screen reader, or on a slow network or mobile phone, for example). The description should convey (in so far is possible) the same information as the image, but if the image is purely a decorative flourish, this is not needed.
  • Media allows you to browse to the piece of media you wish to upload.

Fill these fields in and click Add – you’ll be returned to the media list.

Resizing and Cropping

To resize and/or crop the image, mouseover the image and click ‘Advanced’

Advanced Media Library Action

You can then click on Modify to alter your original image, or Add Variant to create alternative versions of it.

If you select Resize, you’ll be invited to enter the numbers for the width and height and give the new variant a name.

Resize

The full width of the content area of your website is 710 pixels, so this is a good width for landscape formatted images. If your image is portrait format, and you want text to flow around it, try 300 pixels for the width. Unless you want to stretch the image, leave the Keep aspect ratio box checked.

If you select Crop, you can draw a box over the image selecting the area you want to keep. Again, you give the variant a name a click Save. Your variants will appear along the bottom of this screen.

Media Library Crop

Inserting the Media into Content

Go to the Site Structure and click Modify Content for the section you want to amend (or Add Content if it has no content yet).

Modify ContentModify

Within the content, use the Media Library Icon icon to access the Media Library.

Click the Icon

A window will pop up – browse to the correct folder, mouseover the image you want and click Select.

Select an Image

You’ll be returned to the content area with your image embedded. It may be the case that you need to resize it. If you’re using a good web browser such as an up to date version of Chrome you should be able to drag the corners of the image.

Too Big

Otherwise, you can double click on it and type in the width and height (click Constrain Proportions) to ensure that you don’t distort the shape of the picture. A width of around 200-300 is good if you want text to flow around the image.

Width and Height

Use the left/right alignment buttons to place the image to the left and right of the content.

Media Alignment

Please note that the web is not good at complex layouts of images on a page. If you really need precise positioning of images relative to each other or text, you are likely to be much better off uploading a PDF of your information.
Next:

Banner Slideshows

Note that these slideshows don’t have to go in the Home Banner – you could easily make one in the sidebar or even in the content area, but the image dimensions mentioned on this page are for that purpose.

It’s a good idea to prepare your images in advance. The best tool for the job is Photoshop, which you can find on RAS. Images in the banner should be 950px wide. The height of the image is up to you, so long as they’re all the same size, but 250px works well.

Upload your images into your folder of the Media Library, which can be found in the Content tab top right of T4.

Media Library Menu

Each site should have its own Media Library folder in the corresponding section – only when you’re your section will you see the Add Media button.

Slides in the Media Library

Uploading a File in the Media Library

Once you’ve uploaded your images to the media library, go back to the Site Structure.

If you don’t already have one, create a hidden section called Home Banner as described here.

Home Banner

Each slide will be its own piece of content in the section, click on Add Content in the column of dropdowns to the right of the Home Banner section and then select All Purpose Content.

All Purpose Content

Add one slide image from the media library to each piece of content. The Media Library is accessed by the button to the right of the too bar with the coloured shapes in.

Media Library

The Media Library will popup in the last section you visited, so this should be the same one you uploaded your slides to. Select the Slide image by mousing over it and clicking on Select.

Selecting a slide from the Media Library

Remember that you can use the chain link icon to make the slides links to different sections in your site.

Slide Class

Enter the word ‘slide‘ into the Class field in the All Purpose Content, and then click Add and Approve.

Repeat this process, creating a new piece of content for each slide.

Banner Content

Banner Content

You can re-order the slides (or any content) by using the Move buttons to the right.

To preview this you need to preview the site as a whole (previewing from within an individual piece of content won’t work because they’re fragments of the page) so use the Preview Site link to the right of your homepage.

The next time the site homepage publishes, your slideshow will publish with it (for the same reason as previewing them as fragments, they won’t publish individually). Use ‘Publish branch’ from the top level section to force the whole site to publish – this may take five or ten minutes for a big site or one with lots of images.

Publish Branch

950_pixels_wide-fw

See Also: