Dialogues: Digital Storytelling with Microsoft Sway

In this session we demonstrated the functionality of Microsoft’s digital storytelling app.

  • Quickly create interactive and accessible web content without needing to be a web developer.
  • Create and/or share Sways with the rest of the web, just the University or select users.
  • Sway Overview

We then presented a case study on how the software has been used to create Research Digistories as online educational resources for research students. In the case study, Sways have been created using past student work and focus not on the product of the research but on the externalisation of the hidden and personal knowledge involved in the research process itself.

Sway is available to all staff and students by logging into sway.com with their Office 365 credentials. (campusID@newcastle.ac.uk and your university password)

Additional resources

Sway Video Tutorials

Sway Quickstart Guide

Sway Online Course

Dialogues: Creating resources that are useful and useable

We spend lots of time creating digital resources, how can we build in accessibility so that they can be used by the widest group of people?

In our 3P session we explored a few ideas

  • documents are best when they have text (not pictures of text), structure, and a sensible reading order.
    – We explored this with a hands-on exercise looking at pdf accessibility.
  • videos are much more accessible and useful when they have a transcript and subtitles.
    – We had a look at how easy it is to add transcripts to YouTube.
  • Images can convey information powerfully, but how can we make these useful to people with little or no sight?
    – We explored the use of images in a Sway

Video Transcripts

As well as helping learners who are hard of hearing.  Captions and transcripts also help:

  • non-native speakers
  • people accessing resources on limited bandwidth
  • those without soundcards or headphones
  • people who prefer to read and annotate text

In this activity we’d like to show you how to add subtitles to a video on YouTube.  You’ll need a video, a script and a google account.

Feel free to use the following example files that we used in the Nutela session.

Sign into YouTube with your own google account

  • Upload the video to YouTube (look for the upload button in the top right), and click Publish when it is done
  • Click on the Video manager button

videomanager

  • Click the drop down next to the video and select “Subtitles & CC

subtitles

  • Next click “Add new subtitles or CC”

add-new

  • The method we will use here is “Transcribe and auto-sync” as this will automatically set the timings of the text:

transcribe-and-autosync

  • Paste your text into the text box and then click “Set timings

settimings


You will now see an option under “My Drafts”.

  • Wait 30 seconds or so and then click the refresh button:

mydrafts

Now you can check that it has aligned it correctly by listening to the video and make any changes.

  • To adjust the timings click on the phrase you wish to change and then drag the blue tabs:

change-timings

  • Once you are happy with the words, punctuation and timings click “Publish edits

publishedits

You should see the following video, click on the CC button to view the captions.

(Our demo video is about how we generate subtitles when we don’t have a script.)

YouTube also has a function which automatically generates subtitles

If you don’t have a script for your video you may be able to make use of the automatic subtitles which YouTube adds to all videos.

  • In Subtitles & CC, instead of adding new subtitles you need to select “English (Automatic)

published

  • Listen to the full video to check if the text is correct and make any changes.
  • Once you are happy with the words, punctuation and timings click “Publish edits

publishedits


[Huge thanks to Eleanor Lockhart for preparing these instructions and screenshots for the hands-on session.]

ULTSEC Innovation Fund Workshop Reminder

LTDS are running an ULTSEC Innovation Fund workshop on December 12th 2-3pm in KGVI 1.36C. You will be given an overview of the fund as well as guidance from the Careers Service about how to employ students for your project. There will also be presentations from successful project teams from previous years who will share details of their project and the application process.

To sign up to this workshop please do so via the following link: http://www.ncl.ac.uk/ltds/about/training/ultsecinnovation/workshops/. We would love to see you there.

Further information including key dates and application forms and guidance can be found on the Innovation Fund section of the LTDS website: http://www.ncl.ac.uk/ltds/funding/teaching/

Useable PDFs

Imagine that a 20 page PDF arrives in your mailbox.

  • How do you go about reading it?
    Do you skim it? check for a table of contents or look for an abstract or executive summary?

There are a few things that document authors can do to make a PDF more useable.

Top of my list would be:

  1. Make sure that the pdf itself contains text, not just pictures of text – your readers may wish to annotate it, copy relevant portions and highlight key ideas.
  2. Add some structure to guide the reader, headings and bullets.
  3. Think about readers who may be using text to speech to listen to the document – check that it has a sensible reading order.
  4. Have a think about how whether the document would make sense if any pictures or diagrams were removed.

Let’s explore these with a few examples.

Note: For the PDF examples in this post, you’ll need to download these to a folder on your PC, navigate to the folder and open them with Adobe Reader.  We want to make use of  a few features in Adobe Reader and don’t want to open them in a browser.

Is it text or a picture of text?

You can quickly work out whether a pdf has any text in it, or just contains images of words by

  • trying to select text using the cursor
  • listening to the pdf using “Read out Loud”

Try this:

  • selecting some of the text – you won’t be able to!
  • In Adobe Reader select View then Read Out Loud and click Activate Read Out Loud
  • Once Read Out Loud is active click anywhere on the pdf – it will only read the page numbers.

In comparison try the same things with a version containing text.
v2-musings-text-only

Does it have discoverable structure?

You’ll have seen Version 2 is a bit better.  It has text, and there look to be some headings.

The downside is that the headings have been created by making the text bold, not by marking them as headings.  As a consequence we don’t see anything at all in the page navigation.

Let’s look at V3: v3-musings-with-headings

This one has bookmarks, so I can see the structure.

bookmarksThis is only a short example, but imagine if it was longer!  The heading structure shown in the bookmarks would really help me understand the flow of the document and revisit pertinent sections once i had read it.

If you are making your own pdfs from Word documents it’s easy to add these bookmarks in.

Adding Structure to your Word/PDF documents

Next: we’ll ask you to create a word document, add headings and save it to a PDF.

  • Start Microsoft Word
  • Type out headings for a short report (you could use “Introduction”, “method”, “results”, “discussion”) and add some dummy text beneath each of these “fjkfjkdfjsj…etc”
  • Put the cursor on each of the headings and click on the Ribbon to make each of these a heading

ribbonYour document should look something like this:

myreport

  • Click File/Save As and in “Save as type” choose PDF
  • Click Options

saveas

  • Make sure “Create bookmarks using Headings” is selected.

options

Save and open your PDF – you should see the headings as bookmarks.

Check the Reading Order

If you are reading through the documents using a screen reader or text to speech programme the reading order is vital.

If you generate pdfs from Word the reading order is normally OK, but floating text boxes rarely end up being read in a sensible place.  However, the reading order on some pdfs that have been designed for print can be disasterous!

Here’s a really bad example:  v4-newsletter-example

  • turn on Read Out Loud and listen to this – what has gone wrong?
  • Use right arrow key to move through the document – you’ll see that it moves across the columns indicating a dodgy reading order.

Fixing this kind of problem can be time consuming.  You can get someway with Adobe Acrobat Pro (Touch up Reading Order), but a better approach is often to go back to the original author.

Finally, does it need to be a pdf?

By definition PDFs are designed to be printed.  If people want to increase the font size the only way they can do it is by zooming the document, and they will loose information off the side of the screen.

In contrast if the same information is on a Word document or a Web page this can be zoomed much more easily.  (Try Word’s Web layout), and although PDFs can be annotated in Adobe Reader and other tools, many students would prefer to edit a standard document.

Also, think carefully before you add passwords to prevent editing, copying and annotating – these can really impact useability.

Try annotating v3-musings-with-headings if you want to see how frustrating it is.


About Numbas

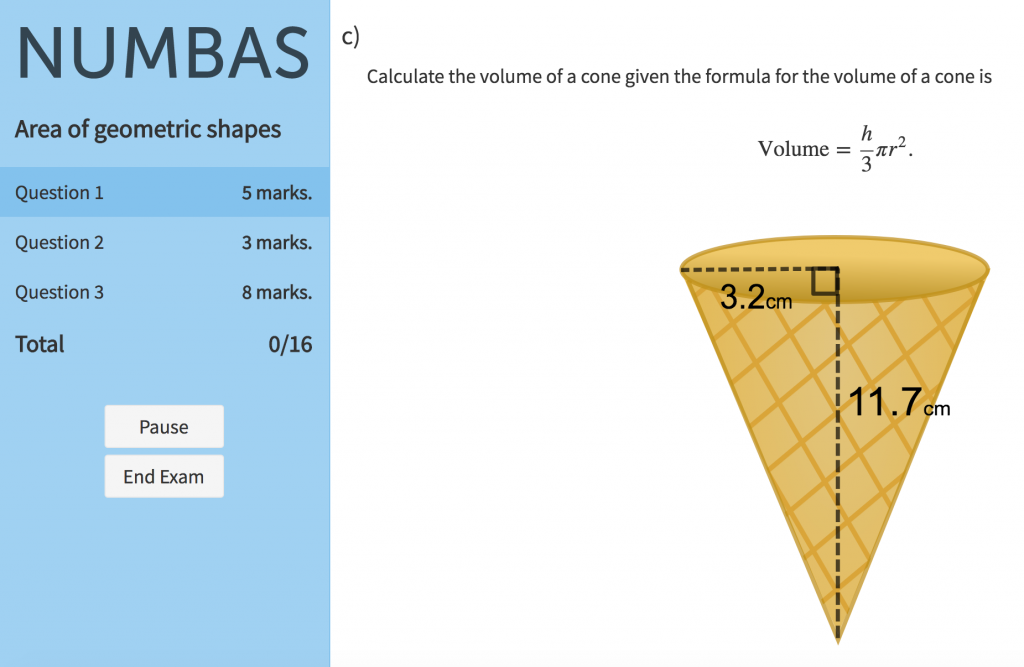
Numbas is a web-based assessment system with an emphasis on mathematics. It helps users to build sophisticated online tests suitable for numerate disciplines, including support for interactive graphs, statistical functions and the assessment of algebraic expressions.

Suitable for both practice and in-course assessment, Numbas tests integrate seamlessly with Blackboard, returning marks to Grade Center and offering the opportunity to download scores and reports directly from the tool.

Numbas is used in a wide range of subject areas here at Newcastle University, including accounting, biomedical sciences, engineering, physics and psychology. It is also used to deliver online support material in the ASK Academic Skills Kit.


Developed here at Newcastle University by the  School of Mathematics & Statistics e-learning unit, Numbas is an open source project with users and partners around the world. More information can be found on the Numbas public website.

The Numbas section of the LTDS blog is in its infancy, however the team is very happy to answer any queries: numbas@ncl.ac.uk.

Peer Mentoring: Feedback Sessions

With the Peer Mentoring Scheme well underway across the University, mentors have been meeting with convenors to check how things are going.

Alison Graham convenes the Peer Mentors in the School of Biology.

feedback-session-peer-mentoring
Students in Peer Mentoring feedback session

She meets with Peer Mentors in the school in week 2, week 4 and week 7 or 8, just to check how students are doing and make sure that mentors and mentees are getting the most out of the scheme.

‘What I’ve started to try to do is to incentivise the meetings, so the students feel that they are getting something out of them, as well as just catching up.

‘I came up with the idea of tying them to the Graduate Skills Framework, so I often work through how the mentors will be able to use their skills in applying for jobs.

‘We go through how to evidence the skills that they’ve gained in applications and at  interview.’

Alison hopes that this approach will make the scheme more lucrative for second and third year students who may be unsure about giving up their time.

‘It’s really about making sure that students can see and really use the skills they are gaining form being a Peer Mentor, in addition to helping other students.’

Alison says the scheme has proved popular in the School and that students have described it as useful but that often the whole experience relies on engagement from the mentors.

‘We have some excellent mentors who establish a real social group and relationship with their mentees by organising trips and events.

‘We try to encourage that and encourage teamwork within the groups – for example, we organise a treasure hunt in week one where they all have to work together.’

She says that the amount of engagement with mentors depends on individual students and often to circumstances.

‘But it depends on them. Some students only really liaise with their mentor in the first few weeks but some need a little bit more.

‘They also tend to turn to their mentors around exam and assignment time.

‘But it can also be really important for some students who are struggling.’

As a convenor for the programme, Alison points out that its important for the mentors to be trained and supported so that they know what queries they can answer.

‘We have to be quite careful to make sure that they know how much help they can give students with their academic work.

‘Obviously they can provide some advice but we don’t want people sharing assignments or anything, so that’s something we have to train them for.’

As well as the feedback meetings, Peer Mentors have all been invited to a Thank You party, taking place on 5th December in the Great North Museum.

Claire Burnham, the University’s Peer Mentoring Coordinator said: ‘We’re very excited about the event.

‘The Mentor of the year award will be presented on the night and we’ve already had 400 nominations from students across the University.

‘It’s a great way of rewarding our mentors and our convenors for all of their hard work.’


NUTELA 3Ps: Dialogues

The next 3Ps: Pizza Pop and Practice workshop will take place on 29th November 2016.

3ps-dialoguesThe topic is ‘Dialogues’ and draws together sessions on storytelling using Microsoft Sway and the complexities of designing materials accessible to all students.

The event will take place between 12 and 2pm in the Hope and Tees Clusters of the Robinson Library.

There will, of course, be pizza and pop available before the workshops begin.

Please do register here.

We look forward to seeing you there!