Extending Visual Studio Team Services via the Marketplace

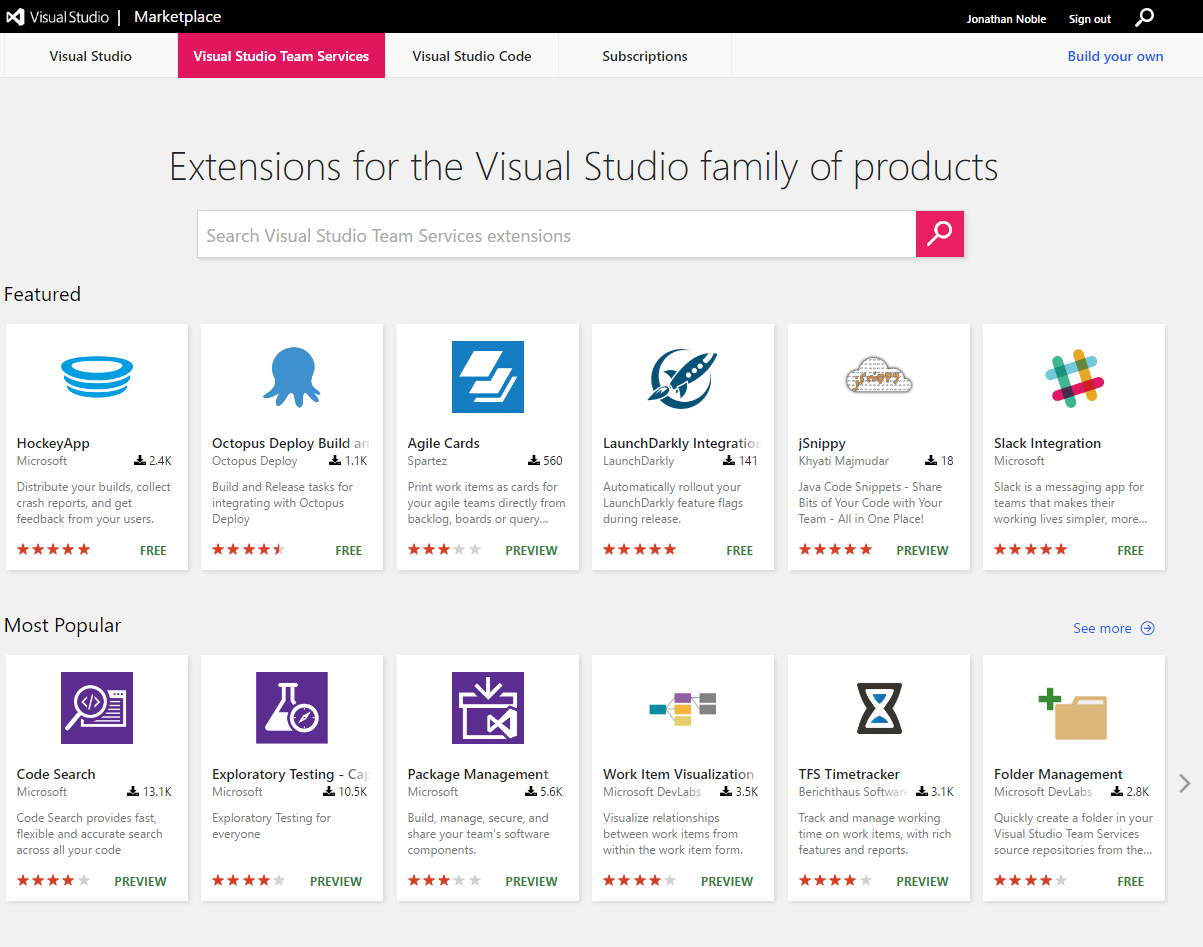
As useful as Visual Studio Team Services is by itself, and with its API (we sync our LANDesk tickets with the VSTS Kanban board via the REST API – I’ll write a post about that sometime), it can be made a lot better through the use of extensions that have been created by Microsoft and the community and made available through the Marketplace.

There are a whole load of extensions to integrate with other products to help your team collaboration, build, deployment, testing, etc. All you need to do is click the shopping bag icon in the top right of any VSTS screen to go to the Marketplace.

VSTSMarketplace

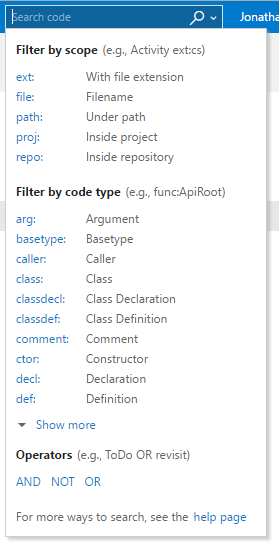
One extension which I think everyone should add is Code Search, which has been written by Microsoft themselves. This gives you a handy search tool which you can use to find bits of code in your repo which match a variety of criteria. You’ve got a number of powerful search options to make sure you find what you’re looking for, no matter how big your codebase is.

CodeSearch

The other extension that we use all the time is the Microsoft-written integration extension for the Slack messaging app. We’ll probably have another post in the future about Slack – it’s a great tool for teams doing DevOps style work because of all the integration options that it has. By using the VSTS/Slack integration, we all get notifications (in the Slack desktop or mobile apps) of code commits and automated test results, so we don’t need to open the VSTS website to see how builds have gone.

SlackVSTS

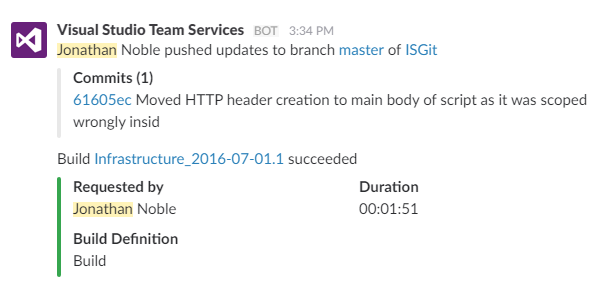
We’ll sometimes commit some code and then stick a comment in the Slack channel for the team if we’re perhaps expecting the build to fail for some reason, and we might have a little group celebration of success in the channel when something we were struggling with eventually works.

Useful, huh?

You can have a browse of the VSTS marketplace at https://marketplace.visualstudio.com/VSTS

PowerShell Script Analyzer

When we check PowerShell scripts in to our Git repository, one of the things that happens automatically is that the Visual Studio Team Services build agent kicks off the PowerShell Script Analyzer to check the code.

This is a module that the PowerShell team at Microsoft have create to help check for best practices in writing PowerShell. Some of the things that it picks up on are just good things to do for readability of scripts, like not using aliases, but others are more obscure, like having $null on the left side of a comparison operator when you want to see if a variable is null – there’s a good reason for that – just trust it. 😉

This means that scripts that don’t comply with the rules don’t get to be automatically deployed into production, which is a good thing, but it also can block someone else’s working code from getting released. That being the case, it might be worth checking your PowerShell before checking it in. Fortunately that’s only going to add seconds on to the process, and it’s quicker than waiting for the results from the build agent.

There are two basic ways to install Script Analyzer. If you install as an Administrator, it’s going to get the best coverage for use on that specific machine, or if you install it for the current user, it’s going to install in your home directory and follow you round to other machines.

Running PowerShell as an Administrator, type:

install-module psscriptanalyzer

Or, running with your normal user account, type:

install-module psscriptanalyzer -scope CurrentUser

PowerShell is going to pop up a warning, saying:

You are installing the modules from an untrusted repository. If you trust this repository, change its Installation Policy value by running the Set-PSRepository cmdlet. Are you sure you want to install the modules from ‘PSGallery’?

We aren’t going to worry about changing the trust, we just need to say ‘Yes’ to this and the module will be installed. (Always be very careful about doing this with any other modules!!)

Now that it’s installed, to check your script once you’ve saved it, you just need to run:

Invoke-ScriptAnalyzer c:\whatever\myscript.ps1

If it’s all good, you’ll see nothing in return (you can always stick a -verbose on the end to see what it’s actually checking as it does it), or you’ll get some feedback about which rules have been broken, which lines they are on, and some guidance on how to get into compliance, like this:

pssa
(
click on the image to see it full size)

If it’s not clear enough from the feedback, a quick web search for the RuleName should give you plenty to go on.

If you want to know more about Script Analyzer and how it works, it’s all open source on the PowerShell Team’s GitHub repository.

Learning to use Git

Using a source control repository is a key aspect of software development, Infrastructure as Code, and DevOps. There are a number of different options for source control, but the one that most of the industry has currently settled on is Git. You can read in our previous posts why we use Git and how we use a Git repository on Visual Studio Team Services.

There are many resources to get you started with using Git, so rather than re-invent the wheel, we thought it best just to provide a few pointers to some of the better ones that we’ve found:

  • Code School has a number of Git courses, including a free introductory one. Code School’s courses are really good because they are mostly interactive. They have free beginner courses for lots of other things that you might want to check out too.
  • Tutorialzine’s Learn Git in 30 Minutes is really well written, covering the key information and then offering links for further reading and a handy cheat-sheet.
  • Branching is one of the most interesting aspects of Git, and a good way to learn all about that is with the interactive tutorial at Learn Git Branching.

You don’t need to go through all of those, but any one of them should be enough to get you going with what we see as a vital skill in the future for sys admins as well as developers.

Setting up a Visual Studio Team Services Git repository

Creating a new repository in VSTS.

1. If you do not already have a VSTS project, you can create a new one from your team home page by clicking the New link under Recent Projects & Teams (if you already have a project, skip to step 3):

1

2. On the Create new team project page, be sure to select Git as the Version Control option. This will automatically create you a Git repository with your new project:

2

3. In the Project home page, you can access your repository by clicking CODE:

3

4. If you wish to create a new repository (because you had an existing project without one, or because you wish to add an additional one to your project), you can click the drop-down at the top left and click New repository:

4

Accessing the repository from your local computer.

First, you’ll need to install the git client; you can download the client from https://git-scm.com/downloads. The default installation options should be fine.

Cloning the repository using Visual Studio

If you’re using Visual Studio, you can clone the repository directly into it from the CODE page:

11

This will open Visual Studio; your repository will be shown in the Team Explorer pane. Click Clone Repository:

5

Then select a location to save your local copy of the repository, and click Clone:

6

Cloning the repository using the command line

If you wish to us a different editor, you can use the git command line tools to clone the repository. First, copy the URL to the repository from the CODE page:

7

Then:

  1. Open a PowerShell window.
  2. Create a directory for the local copy of the repository.
  3. Change directory to that directory.
  4. Type ‘git init’ to initialise a local git repository.
  5. Type ‘git remote add origin <Repository URL>’ to connect to the remote repository.

10

You can now access the repository from any editor and manage it using command line tools (or any tools that the editor provides). If you wish to use Visual Studio Code, simply click File->Open Folder and point it at the folder. If the git pane looks as follows, it’s worked:

9

Next steps

Git is now connected to the remote repository and ready to use. A future blog post will give an overview of how git works, and what the common commands that you need to learn are.