In the event that you require a change to be planned and implemented by another team within NUIT, the best practice is to submit a service request to that team who can then create and own the change ticket as appropriate.

1. NU Service triggers an email notification to change owners (of significant and major changes) when their change has been added to the CAB agenda for review. This email notification is to invite the change owner to attend the CAB meeting at a specified time slot. The subject of this email notification is: “NU Service Notification: Change {Id} has been accepted for CAB review, at time {CABReviewTime}”.
If you have an existing outlook rule set to filter out/re-direct notifications from NU Service then it is recommended that you modify/add a new rule to ensure you have visibility of any CAB invitation email notifications.
2. NUIT Analysts are advised to extend their change planning horizon to facilitate the timeliness of communications associated with their changes.
3. As a reminder ‘Peer Review’ is important to help both change owners and approvers know more about people’s views on the proposal, and is especially important for significant and major changes. Change owners can encourage their peers to submit a peer review within NU Service.
Examples of types of reviewer include:
In the recent inaugural CAB meeting, a few points came up that the group thought might be useful to share with others in NUIT – here are a few ‘top tips’:
It’s possible to add additional fields in any query in NU Service (such as ‘Search All Tickets’), both to the list of result but also to filters used to pare down the results list.
A couple of notes before we get started:
Adding fields to the results list
By adding an attribute to the results list, you can quickly get a view of tickets falling into a certain area by attribute.
Start by picking a query, then select the asterisk (*) at the end of the column headers: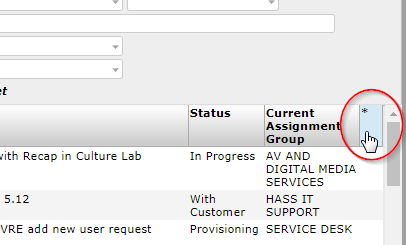
In the pop up box that appears, look for the attribute you want to add, select it, then click ‘Ok’. This list is a bit unwieldy and it’s not always obvious what the attribute will display, here are a few useful attributes:
Some of these attributes can be further broken down with the small arrow, but this can be a bit of a rabbit hole when looking for a specific attribute – if in doubt, get in touch with the SMO and we can help.
Adding filters to the filter list
By adding a filter into a query, you can reduce the overall number of results by restricting the entries for certain attributes.
As before, start by picking a query, remembering point 1 of the notes above. Against the filters already in place, right click on one and select ‘Insert Filter after…’: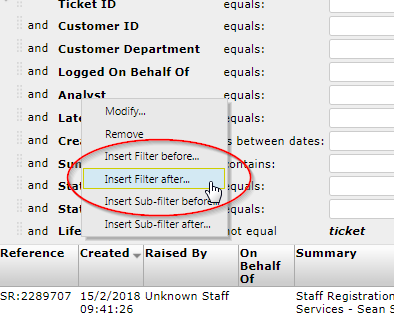
In the pop up box that appears, look for the attribute you want to add as a filter. As before, this list is a bit unwieldy and it’s not always obvious what the attribute will display, here are a few useful attributes:
Once you’ve selected the attribute, a different window will appear. From here, I’d suggest first selecting the ‘Show filter as prompt?’ box, which will make the attribute appear in the filter list, and consider changing the ‘Condition type:’ depending on what you’re searching for:

For the ‘Condition type:’, there are a few options available. For many attributes you’re able to pick from (not an exhaustive list):
For dates, we can select ranges as well (not an exhaustive list):
Once you’ve picked your condition and ‘Show filter as prompt?’, click OK and the attribute will be entered onto the filter list to help pare down your results.
Some of this isn’t super-intuitive, if you need any assistance with making queries easier to use or understand then please get in touch.
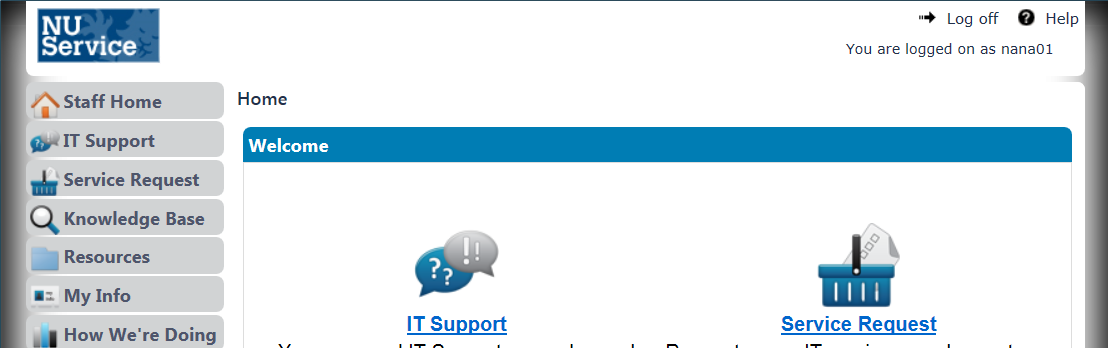
Internet Explorer’s compatability view can stop NU Service analysts from accessing Web Desk. The screenshot below illustrates this scenario – the analyst is taken straight to self-service and the ‘Switch to Web Desk’ link is not present in the top right corner.
Please note that clicking on this image (and all other images in this post) will display a larger version of the same image.
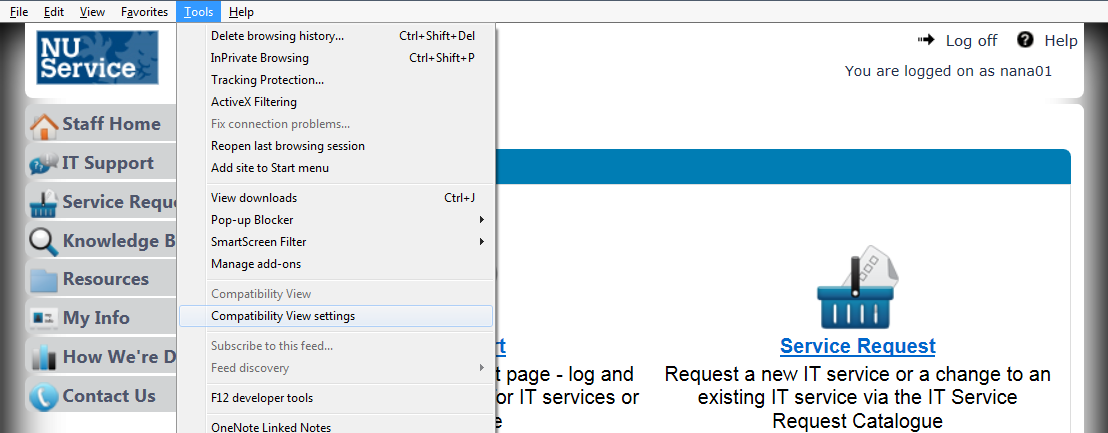
To switch off compatibility view, follow these simple steps:
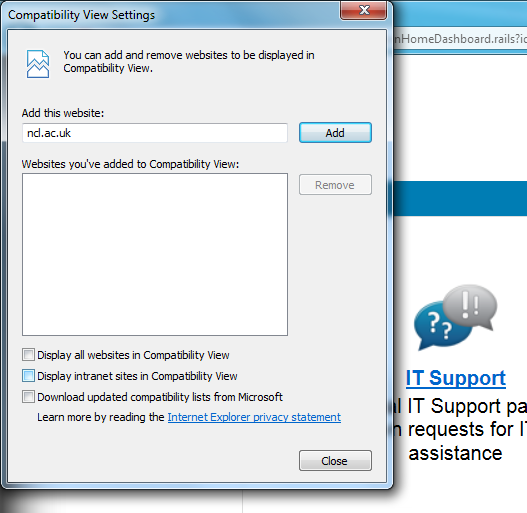
1. Go to Tools and then ‘Compatibility View Settings’. (It may be necessary to press the ‘Alt’ key in order to bring up the menubar containing ‘Tools’.)
2. Uncheck the ‘Display intranet sites in Compatibility View’ checkbox (and make sure that the ‘Display all websites in Compatibility View’ checkbox is also not ticked) and click ‘Close’.
3. The ‘Switch to Web Desk’ link should now be visible. (You might need to reload the page first.)
![]()
If you later require compatibility view to be on, you can follow the same steps as above but check the checkbox that you previously unchecked.
You can now add attachments and send via emails. Please see the instructions below.
Scenario 1 (Sending an attachment to a Support Group)
Scenario 2 (Sending an attachment to a Selected User)
Scenario 3 (Sending an attachment to the Raise User)
Scenario 4 (Sending an attachment to the Group and Raise User)
Scenario 5 (Sending an attachment to the Selected User and Raise User)
PLEASE NOTE:
1. The ticket reference number will not automatically be included in the email so it is important to include a meaningful description of the file and why you’re sending it.
2. You cannot send an attachment to Support Group, Selected User and Raise User at once.