Thing 8: Excel – some quick reminders

This week brings a tapas of excel goodies, do feel free to try out one or more of these offerings to suit your appetite.  You’ll need to download the thing8 sample worksheet [ thing8excel ] – but by all means do try this on your own data too.

Setting print areas

thing8-printareas

Be kind to the person you send your lovely data to.  Define the print areas and repeat the row titles if it spans more than one page.

Try this out on the Biscuits Consumed sheet

  • Set the print area to the first 4 columns
  • Use print titles to repeat the first row
  • Use View/Page break preview to check it is good.

Autofilter

Autofilter can help you explore your data. The “Biscuits consumed” sheet holds data from a follow on study catalysed from the biscuit world cup – this time participants chose one biscuit per day and gave it a score.

  • Select the 4 columns making up the table and click “sort and filter” and select “filter”

thing8-sortandfilter

  • Use the drop down menu on the column headings to try a few things out eg:

thing8-filter

  • sort the biscuits A-Z
  • select just the Fruit Club results
  • On the comments heading use “Text Filter” to look for all rows containing “choc”
  • Clear all filters before you go on…

Pivot Tables

We often get information that we need to summarise. Pivot tables can make this really easy.

On our biscuit example we might like to ask “how may times was each biscuit chosen?” and “what was the average score for each biscuit?”.

Here’s what to do:

  • select the first three columns
  • Click on the Insert Menu and select Pivot Table
  • accept the defaults to create a new worksheet

thing8-pivot

  • Drag “biscuit” from the field list to the rows area and drag score to the values area
  • If you like drag, score into the values area a second time, click on it and change the “value field settings” to give average of score.
  • See if it matches the Answer to Biscuits Consumed sheet.

Absolute and Relative Referencing

If I have not yet exhausted your appetite for Excel tapas, here’s one that has its own shortcut key (F4).

By default Excel always uses relative referencing.  If you copy a cell four rows down, any formulas in that cell are updated to point to the corresponding cells four rows down.  You might not always want this, and the good news is that you can override it by using $ in the formula.

To try this out have a look at the sheet labelled MyShares.  (This relates to an alternative reality where you have enough spare cash to have some shares and time to ponder how they will grow in a variety of scenarios).

We need to copy the formula in cell E5 to fill the other areas and work out how our shares may grow.  At the moment the formula is

=D5*E4

A fruit club goes to the first 3 people who can tell me by email where to add two $ signs!

(See this Microsoft article if you need a hint!)


Thing 7: Sending big files

We often have to send large files to folks by email. And I’ll bet you have had either bouncebacks telling you the recipients mailbox is full, or a message saying the email failed to send, or you get a phone call from the recipient saying they haven’t had the attachment, or even the email.

Frustrating, eh?

There are lots of easy ways around this, which mean you can send big files (without clogging up yours or anyone elses mailbox) like graphics heavy PDFs, high resolution images, image heavy PowerPoints or video/audio files really easily.

Can you think of a time when this would have been useful?

Why is this important?

Avoiding sending big files by email is a good thing. Even though many companies are moving towards cloud based email solutions with gigabytes more space per person than ever before, a couple of video files can easily eat up a great deal of space, which is annoying for the person whose inbox is being filled up, and furstrating for you as you may have to try sending the file more than once. And even then the quality may have been compromised.

By using a specific service for sharing big files you can ensure that the version of the file your recipient gets is the same quality as the one you send. Your email will sometimes compress the files without you necessarily being aware of this, which can mean that time (and inbox space!) is wasted as you attempt to ensure the recipient gets what is expected.

If you use a service like Dropoff, you will get a receipt to tell you that your file has been sent successfully, and when it has been picked up.

How can I send big files, then?

  1. You can use the University’s own Dropoff service: dropoff.ncl.ac.uk It works best with your campus login. One logged in you get three options. Usefully, you can also use the service to request big files from other people too!
    Choose Drop-off. You’ll get a screen like this:
    Screen Shot 2016-03-15 at 14.15.10
    Choose Next.
    You’ll get this:
    Screen Shot 2016-03-15 at 14.16.38Fill in the form, browsing to the file/s you want to send. Then click Drop off files and you’re away. You’ll get a drop off summary screen and once the file/s have been picked up you will get an email notification telling you who picked them up and when. There is further information on the NUIT website.
  2. You can also use Skype for Business/Lync. This is useful if you are involved in a Skype/Lync call and need to share a file quickly.  You can attach the file to a meeting in a couple of ways.
    sendingFilesWithSkype
  3. There are lots of other options like:
    1. Dropbox – this is popular and very easy to use, though for University business it is recommended to use the Dropoff service.
    2. Use a shared drive/filestore, save the relevant files to it and send a link by email to navigate to it – though the recipient must also have access to the shared space for this work.
    3. Create the files from scratch with collaboration in mind – see Thing 3

Practice sending and picking up big files

Pair up with someone in your office. Try sending a big file to each other using Dropoff or Skype for Business. Was it difficult? How easy is it to pick them up?

Thing 6: Get Outlook to work for you

outlook1

Is email a headache? This thing is a chance to step back from your inbox and think about what you could do to make it work for you.

A quick poll of LTDS colleagues  suggest that the following techniques work:

  • Use folders to hold emails on different topics
  • Colour code items to indicate whether actions are needed
  • Set reminder flags
  • Use rules to delete or move messages that fit particular conditions

Here are three scenarios by way of examples:

  1. You anticipates lots of emails from a particular source that you only need to look at once or twice a day.
    eg:  You have created a form that sends you an email or a Doodle poll and want to keep track of responses, but only want to look at this once every couple of days while it is open.
  2. You want to watch out for certain routine and regular communications and make sure you read them
    eg: You want to make sure you jump on Richard’s weekly update from the Strategy Group
  3. You are part of a small project team of 5 people and want to easily identify communications about this project.
    eg: I work with Angela and Catherine on the Dementia Care free online course, and with Steve, Kovila and Martin on the Cyber Security one. We sometimes use a mailing list and other times communicate with each other individually.

I’ve used these scenarios to illustrate a few things that are possible with rules.  Work through one or two, translating them to your own context. Or, if you like consult with one of the team’s uber-organised colleagues to help you fix something immediately useful to you.

If you are new to rules you may want to have a look at one or two Microsoft training videos.

Scenario 1: Lots of emails from a source that you only need to look at infrequently.

This is crying out for a rule.  One option is to create a folder and move all responses automagically to the folder.

  • Right click on the email message

outlook2

And select Rules

outlook3

  • Then fill in the boxes and click OK.

outlook5

Scenario 2: Watch out for important communications and flag them

Let’s highlight all strategy group updates and flag them.

  • First off find one in your inbox and right click on it.
  • Click advanced options

outlook7

  • Click Next to move on to “What do you want to do with the message?” screen and select “flag message”
  • Click “follow up at this time”

outlook6

  • Select when you want it to go red

outlook8

  • Click through the dialogue boxes to make the change.

Now these will be flagged – you can tick them when read and digested and move them to folders if you want to keep them.

Scenario 3: Colour code items from particular people

Outlook  gives us the possibility of creating custom categories.  You can edit categories in use in Outlook and add new categories, by clicking  the arrow at the bottom of the Categorize button.

outlook9

But, helpfully, you can also do this on the fly in the process of creating a rule.

Here’s what I want to do: assign all emails from the Lynne, Catherine and Angela to a new category “Dementia”.

Create the rule;  in the “Which conditions?” box select the “from”

outlook10

You can add extra people to the list in the rule description box by clicking the underlined value:

outlook11

Then  click next to go onto “What do you want to do with the message?”

outlook12

  • Click category in the bottom part

outlook13

  • Add a new category

outlook14

Now, presto, everything from this project team is signaled on my inbox.

For your blog/comments on this post

Which strategies do you use to manage email?  What have you done/will do as a result of thinking about this thing?

Thing 5: naming conventions (aka “The joy of an ordered sock drawer”)

We all know that giving files sensible names when we save them saves time, just as pairing your socks before they go in the drawer brings a certain joy later.

In this thing we’ll dare to look at our own file naming practice and see what we can learn.

First off let’s be realistic:

If you start a new project or venture chances are you’ll give it a folder and then start saving stuff. But, you don’t always know how many things you will need to save as the venture progresses.  So it’s normal for the filing structure to evolve to a degree.

Quiz

I’m going to invite you to have a go at helping me rename some of my files and sort out some ideas.

We’ll use some examples taken from the project we have just started to develop a Cybersecurity MOOC.

dodgyFileNames-NMD

.. and we’ll do this via a Typeform Quiz – so please click this link below before reading on:

GO to Quiz 

A few pointers

  • Filenames should be meaningful, and if you are collaborating with others they need to be meaningful all round.
  • If dates go in the names then do think about these being “sortable” in some way.
  • “2016-03” will often be better than “March”
  • Avoid spaces (totally) on files on the web – they’ll generate URLS with % signs in.
  • Whilst Windows is not fussed if you call something “stuff.txt” or “Stuff.txt”, it’s a different story on many of our unix webservers so lower case filenames are more web friendly.
  • Having a quick strategy for sending someone a pointer to a file is really useful to have up your sleeve.

Ultimately, in teams filenames and directory structures need to be negotiated, perhaps something for your next team meeting!

For you to thing about

Add a comment to this post or write a note in your own blog to share any top tips.  Please add any resources that you have found helpful.

Some of us, like me, know that we can do better. Following the shame of looking at my own sock drawer I have renamed my files.


Thing 4: Screen Sharing

Have you ever spent far too long explaining something to somebody, whilst trying to work out what they were actually seeing? If you have, then screen sharing may make your life easier.

In this thing we’ll have a look at screen sharing using Skype for Business and Skype. You need to team up with a colleague as it’s kind of difficult to screen share with yourself.

Skype for Business

Office2013 is now fairly standard across campus so we can be relatively sure that everyone has access to Skype for Business (previously Lync).  You don’t need a web-cam or microphone to screen share, you just need to both be signed into Skype for Business.

We’re going to share a screens and permit our buddy to take control of our desktop. There are some step by step instructions below.  (If you’d rather dive in go to this Microsoft Article.)

If your buddy is an different office you may want to call them up on the phone while you do this.

  • Launch one of the applications you commonly talk to people about (EvaSys, Policy pages on the website, Blackboard, maybe even eportfolio)
  • Start Skype for Business, by searching for it in your Start Menu or Finder.
  • Sign in using your Office365 address campusid@newcastle.ac.uk  eg:

  • After Skype for Business loads, start typing in the name of your buddy…. I’ll pick on Graeme

skype1

  • Double click on your buddy’s name to start an instant message conversation.
    It’s polite to offer some suitable salutation at this point, you’ll need to press enter to send the message.

skype2

  • Once you have your buddy’s attention, click on the “Present” icon at the bottom of the Skype for Business window:

skype3

You’ll see we can present a variety of things….for now

  • click “Present Desktop”

Your buddy will receive a notification – they’ll need to click to accept the meeting content.

  • Entertain your buddy by clicking on a few things in your chosen application.

Now the scary bit.

  • On the sharing toolbar at the top of the screen click on “give control”  (NB: sadly Mac using colleagues  won’t have this option)

Your buddy will now be able to move around your desktop clicking things at will. If they become a little cavalier remember that you can use the sharing toolbar to Take back Control. 

  • Now, swap roles, ask your buddy to share her/his screen with you and see how they feel as you rearrange their icons.
  • Try out presenting “programs” – you may be more inclined to let someone take control here!

On a more serious note screen sharing (without taking control) can be a most excellent way of talking somebody through a difficult task.  The explainer and explainee get to see the same thing and confusion is much diminished.

Skype (Free)

A few releases back Skype had an update that brought screen sharing into the standard product.  If you haven’t tried this it’s worth giving it a go, check out the instructions

For your blog

Drop a line or two about how you got on with this, where you think this may be useful, and perhaps any notes on other screen sharing apps you may have used.


Thing 3: Collaborative Tools

Sending documents backwards and forwards for review is lets face it …. “so last century“.

This weeks thing offers a chance to experiment with documents that can be edited at the same time, with the bonus that there is always ONE (and one only) up to date live version.

onenote

OneNote

  • Open the document from the email we’ll send out on Tuesday (if we forget you can edit it through your browser with this link http://bit.ly/OneNoteThingy)
  • Follow the instructions to edit the notebook
  • Add in your review(s)
  • Add a thought or two to the summary

GoogleDocs

Now, I admit not everyone is a OneNote fan, so if you get to a point where you want to abandon ship then have a go at copying or writing your reviews in this GoogleDoc which is roughly equivalent.

The Good News

No blogging requirements this week.  It’s a collaborative exercise so we’ll use our Summaries collected in OneNote and GoogleDocs to come up with a team statement.  Any volunteers?

Thing 2: Bring news to you

Having to go off and look at websites/blogs for updates is a right old pain the neck.

Did you know that you can have them bring news to you?

Watch this video about something called RSS.

RSS_icon_largeYou might have seen this icon on websites, or in the address bar of your browser (Internet Explorer, Firefox, Chrome etc).

This indicates that a feed is available from that site for you to subscribe to.

Find some sites you might like to subscribe to (hint: The Learning and teaching blog…. or this blog…). What about BBC Education News? Or HEFCE? What about the @ncllt Twitter?

Using a feed reader

You might prefer to collect all your news into one place. Options include:

Both are easy to set up and use and have free options. You can also set each one to email you when there is new content to read. So you don’t even have to remember to check out your Feedly/Flipboard/Netvibes account.

To subscribe from your browser

You can also subscribe from your browser:

  • Internet Explorer
  • Firefox – find the RSS feed of the site you want to subscribe to. Click on it. You will get a dialog box like this:
    Screen Shot 2016-03-14 at 12.17.07


Click on Subscribe now, save to a folder and that’s it. To access your feeds go to Bookmarks in the Firefox toolbar and go to the folder you saved your feed to.

Your own blog that you set up in Thing 1 will also have a RSS feed, if it is not a private blog. You might like to share it with friends/colleagues. Why not jot down your thoughts/notes on having the news come to you on your blog? You might like to have a look at Nuala’s post on this Thing.

If you want to find out more about how RSS, the Library has written a comprehensive LibGuide: Keeping up to date with new information

Thing 1: What is a blog?

noun: blog; plural noun: blogs
a regularly updated website or web page, typically one run by an individual or small group, that is written in an informal or conversational style.
verb: blog; 3rd person present: blogs; past tense: blogged; past participle: blogged; gerund or present participle: blogging
add new material to or regularly update a blog.
“it’s about a week since I last blogged”

Take a look at this Common Craft video:

The first ‘thing’ we are going to do is create a blog each for our 23 Things.

  • Only people with the link can see or comment on this LTDS Digiskills blog.
  • It is not indexed by search engines (such as Google).
  • So do feel free to comment – share your thoughts with our team. It is unlikely that anyone else will stumble across the blog.

We hope this gives you confidence to play around with blogging, but we’ll show you how to keep your own blog private if that’s what you would prefer. Blogs can also be used as reflective diaries (though we’ll be talking about reflective diaries, which form part of ePortfolio, in Thing 15). After all a reflective diary could also be thought of as your own personal news, recorded for yourself to come back to.

Why do I need a blog?

It’s important to have an understanding of what a blog is, and how they can be used so that if asked, any one of us could update or edit the Learning and Teaching Blog.

This is necessary as the Learning and Teaching blog contains a great deal of material, and anyone in the team should be able to respond quickly to requests for changes, or if we spot any inaccuracies ourselves.

We’ll be using this LTDS Digiskills blog to present each of our 23 digiskills things, and by having your own blog, we hope to encourage you to practice writing and editing for the web, as well as perhaps reflecting on your own learning as you progress.

You might find it useful in collecting material for your PDR, or indeed in updating your CV.

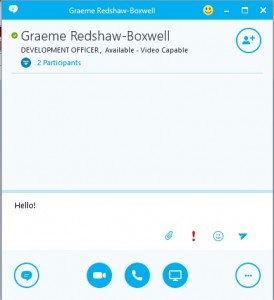
Before you create your own blog, we’d like you to get used to how commenting works.

  • Make a comment on this post. You can say anything. Scroll to the bottom of the post until you see Leave a reply. Click the link. Fill in the comment box, don’t forget to click Leave Comment!
  • We’ll have to manually approve your first comment. After that your comments will not need approval. Try refreshing your page. What has changed?

How do I create my blog?

There are several options:

  • If you already have a blog, you might like to check your settings and see how public or private you prefer to have it.
  • If it is a University provided blog, its link will probably start with https://blogs.ncl.ac.uk.
  • If you don’t already have a blog, you can create one easily on the University blogging service. This is free to staff, managed by the University and uses software called WordPress.

Your blog is yours:

  • You can decide how public or private you prefer to keep it.
  • No one is going to need to look at it.
  • You won’t be marked on it.
  • It can remain private to you, alone.

Or you can share it so that others can comment. It is up to you. If you do decide to share your blog, then add another comment below with the link, and we’ll add it to the Blogroll in the menu at the top of this page.

Make sure you read the whole page before creating your blog. When you click on the link you may be asked for your campus username and password again.

Next – edit your profile

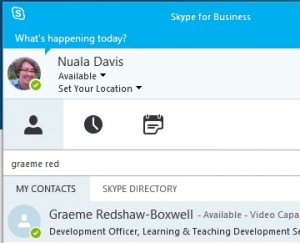
Up in the top right of your screen you will see a message like this:

Screen Shot 2016-03-10 at 11.17.21


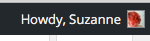
If you hover over it you’ll see this drop down:

Screen Shot 2016-03-10 at 11.17.42


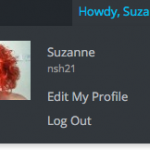
Click on Edit your profile and update the information about yourself.

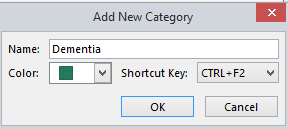
To change your settings, go to Settings/General in the menu to the left:

Screen Shot 2016-03-10 at 11.24.46

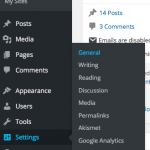
Here you can change the title and tagline for your blog.

You might like to change the site language here to English (UK) too.


Next go to Settings/Reading.

Here you can change who can read your blog.

Scroll down to Site visibility:

Screen Shot 2016-03-10 at 11.29.41


Choose the setting you prefer from the options.

  • Allow search engines to index this site: your blog is public. Google will find and index it. I is likely to appear in search results.
  • Discourage search engines from indexing this site: your blog is public but generally, the people who will be able to find it are the people you give the link to.
  • Visible only to registered users of this network: anyone in the University can see your blog. It is not visible to the outside world.
  • Visible only to registered users of this site: Useful for group blogs. Only people registered with the blog can see it. It is private to this group.
  • Visible only to administrators of this site: only you and selected NUIT staff can see your blog. It’s essentially private. No one in NUIT will be looking at it. Unless you break the terms of use.

If you find it hard to choose, talk to your neighbour – what are the advantages of each setting?

Click Save Changes.

Now have a go at writing your first post

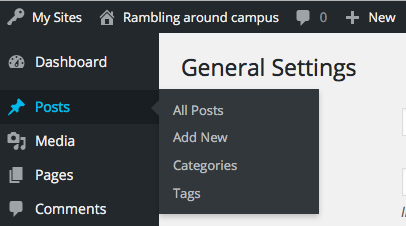
You can either click on Posts/Add New in the left menu, or click on  +New in the menu at the top of the page:

Screen Shot 2016-03-10 at 11.33.49


If you are struggling for something to write, you can perhaps think about how you think a blog may or may not be useful in your role, or if you have an idea for something to go on the Learning and Teaching blog, then you could draft it on your own blog first.

There is a Newcastle University Blog Service User Guide. Download the PDF and save it somewhere. Then have a go at changing some other settings. You could change the theme, add a photo to your profile,

We are here in this session to help too – do ask Nuala, Suzanne, Graeme, Claire or Katie if you have any questions.
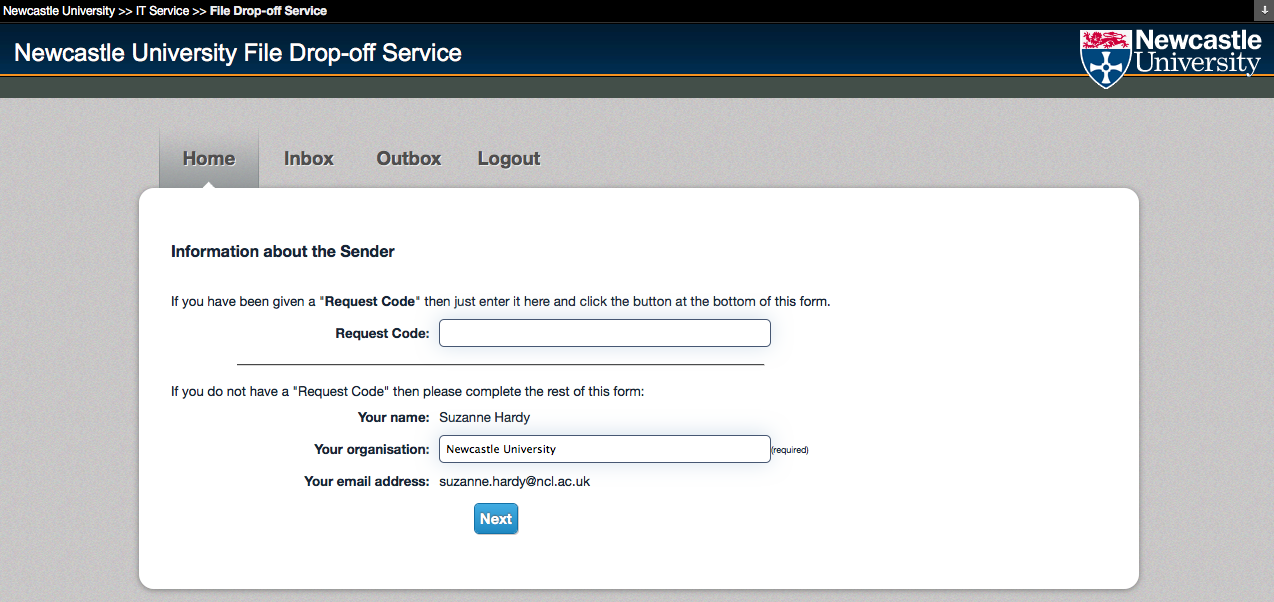
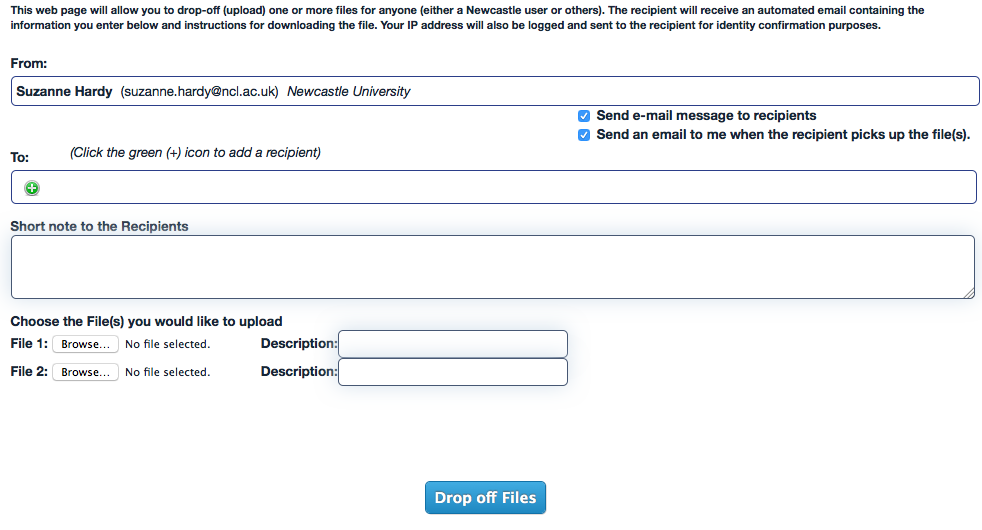