Monthly Archives: November 2016

Stu Brew – Our very own student run brewery

stu-brew-logo

Stu Brew is Europe’s first student-run microbrewery based at Newcastle University.  We are managed by students for students through Newcastle University Students’ Union. There are over 120 students involved in Stu Brew. The brewery is capable of producing around 800 pints in one day and the beer is sold at a variety of pubs and bottle shops throughout the North East.

The Brewery

Our brewery is where all the magic happens. The brewery is made up of a number of stages. The brewery can be seen in the picture below which shows all the different vessels.

stubrew

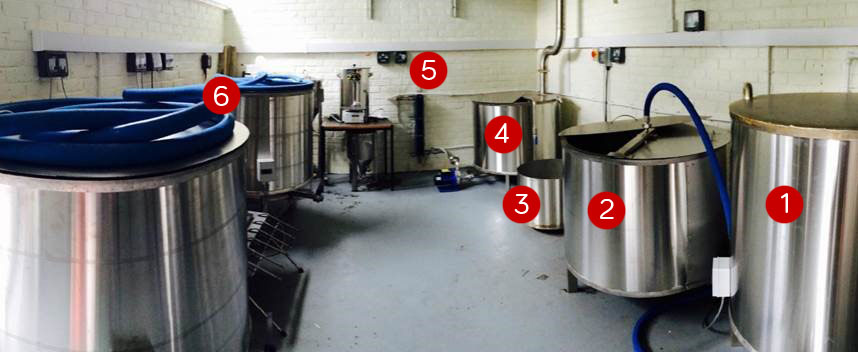
  1. Hot Liquor tank: This is where all the water that is needed for the brewing process is heated up to around 77°C . Our brewery uses around 500 litres of water per brew!
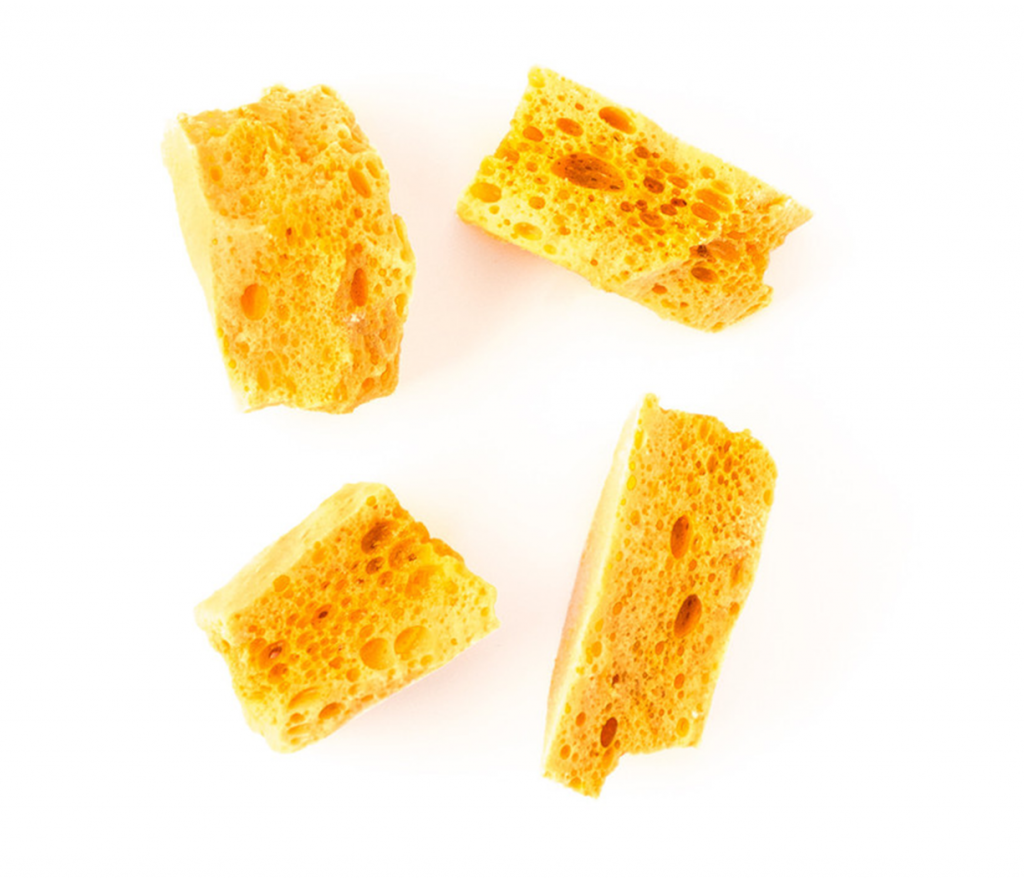
  2. Mash Tun: This is where the hot water is mixed with grain to extract all the sugars that are used to make the beer. Different types of grain are used to create different styles of beer. We have made over 15 different styles of beer with many more to come.
  3. Whirlpool: The grain is separated from the sugar rich water which is known as wort in this stage
  4. Kettle: The wort is boiled for an hour killing off any bacteria that may infect the beer. Hops are added at various points in the boil to add different flavours to the beer. For example adding hops at the start of the boil gives the beer its bitterness whereas hops added towards the end of the boil yield more aromatic flavours.
  5. Heat Exchanger: This is used to cool the boiling wort down to 20°C.
  6. Fermentation: The yeast is added to the beer which reacts with the sugars within the wort and converts them into alcohol. After about 72 hours this reaction is complete and the beer is then put into casks and is ready to be sold and drunk!


#TryThisTuesday: Invisibility Cloak

Glass is transparent (see through) but we can still see it. In this experiment we will show you how to make it vanish!
1. Fill a large glass bowl or container with cooking oil.

20161108_160935

2. Put a smaller glass bowl inside the large one.


3. Look from the side, can you see it?

The Science

This happens due to the refraction of light and how the speed of light changes when it passes from one state of matter to the other.

Light travels through different objects at different speeds. It travels faster in air than in water or glass. We can see glass normally as light passes from air to glass and slows down and changes direction. This distorts (changes) how we see other objects through the glass, telling the brain there must be a transparent object in the way.

The bowl disappears when we put it in cooking oil, as light travels at the same speed in cooking oil and glass. The light doesn’t change direction so your brain doesn’t know that the light has traveled through the glass, making it disappear!

#TryThisTuesday: Submarine

This week’s experiment will show you how a submarine works using just a water bottle and a ketchup sachet.

  1. Take a large (2 litre) plastic bottle and fill it with water
  2. Test a few ketchup sachets in a bowl of water to see if they float, not all of them will have an air pocket in.
  3. Add an unopened sachet of ketchup to the bottle. The sachet should float, but if it doesn’t, try adding some salt to the water. Salt increases the density of water, making the sachet float better.
  4. Make sure the bottle is full of water to the top.
  5. Screw on the top very tightly and squeeze the bottle hard.

The sauce submarine will sink to the bottom. If you let go it will float back up.

You can challenge other people to get the sachet to the bottom, lots of people will try and shake it or turn it upside down!

The Science

This experiment is all to do with how things float, or the buoyancy of an object. Water pushes up on the ketchup packet with the force equal to the weight of the water that the ketchup packet pushes out the way.  If the displaced water is heavier than the sachet, then it will float because it is less dense than the water.

When you squeeze the bottle you apply pressure to the liquid inside. Liquids cant be compressed (squashed) so the pressure is transmitted to the sachet. The ketchup sachet has some nitrogen gas in (to keep it fresh). The gas is compressed and the sachet sinks and therefore displaces less water and sinks. As soon as you let go the sachet expands again and floats.

Submarines use similar systems to allow them to sink and float easily.


#TryThisTuesday: Lava Lamp

This week’s experiment will show you how to create the 1960’s invention – the lava lamp – at home!

You can create your lava lamp in a beaker, a glass or a plastic bottle, whatever you have lying around that you can see through.

  1. Start by filling your container 1/4 full with water and add some food colouring of your choice.20161108_160122
  2. Add oil until its nearly full to the top. Wait a minute or two and the oil should separate out and sit above the water.20161108_160212
  3. Drop in a Alka-Seltzer or any other effervescent (fizzy) tablet and watch the bubbles rise.

The Science

Oil floats on top of water because it is less dense and water molecules stick closely together due to their hydrogen bonds, making it difficult for the oil to mix in.

The tablet is more dense than the oil and the water so sinks directly to the bottom. There it reacts with the water to produce the gas, carbon dioxide (CO2). CO2 is less dense than both the water and oil so it rises to the top, carrying some water molecules with it, these are the bubbles that you can see. The bits dropping back down are the water molecules sinking again once the gas has escaped.

A real lava lamp uses wax that is heated by a bulb. The hot wax expands, becomes less dense than the water and so rises. When it cools, it shrinks, becomes denser and sinks.

Celebrating Marie Curie

Marie Curie was born 149 years ago today. We think she is one of the most inspiring female scientists as one of the first women to make an outstanding contribution to science. Her work overturned established ideas in physics and chemistry and helped overcome societal barriers for women.

Marie Sklodowska was born in Poland in 1867. In 1891 she went on to study physics and maths at Sorbonne University in Paris. She met Pierre Curie, professor of the School of Physics, who she married in 1895, becoming Marie Curie.

The Curies worked together investigating radioactivity, the process where atoms decay by emitting radiation. With help from other physicists they discovered new elements, polonium (named after her home country, Poland) and radium in 1898. This work was extremely difficult as they were constantly exposed to radioactive elements, which made them feel ill, an effect known as radiation sickness. They received the Nobel Peace Prize in Physics for their work in 1903. Marie Curie was the first woman to win a Nobel Prize.

Unfortunately, Pierre died from being knocked down by a carriage in 1906. Marie Curie took over his professor post and became the first woman to teach at Sorbonne University. She received a second Nobel Peace Prize in 1911 for her work in chemistry where she determined a way to measure radioactivity.

Her research was crucial in development of X-rays. Marie developed small mobile X-rays that were used in World War One to diagnose injuries. She worked with her daughter at the front line to help diagnose injuries.

Marie Curie died due to exposure to radioactivity during her work in 1934. The Marie Curie Hospital was opened in 1930, specialising in radiological treatment of women suffering from cancer. The Marie Curie charity was established in 1948 which now offers care, support and guidance for people with a terminal illness.

marie-curie-blog-copy


The Science of Fireworks

We all know the history of Bonfire Night, but do you know the science?

The Explosion

All fireworks are essentially a combustion reaction, like fire, that produces light and heat.

Fireworks tend to have a long fuse that burns slowly so you have time to light the fuse and run away before the big bang! The fuse first reaches a compartment containing gunpowder, it ignites this causing the firework to launch into the night. There is a delayed fuse to ignite the next explosion, this heats the “stars”.

The stars in a firework are individual compartments containing a different composition of chemicals, depending on the desired colour and effect of the firework. The stars may even be arranged inside the shell of the firework so that they burst in a certain formation to form a shape.

The Colours

Firework displays always use a range of striking colours, the variety of colours comes from the use of different chemicals. Elements such as barium, copper and lithium burn with a coloured flame and are chosen for use in fireworks due to the bright colours they produce.

fireworks

The Sound

When the chemicals inside the firework’s shell are heated they convert from a solid to a gas. The gas takes up more space than there is available inside the shell so it bursts out creating a loud BANG.

Crackling noises come from fireworks which contain lead. When lead oxide is heated and vapourised, the vapour atoms produce crackling noises.

The whistling sound that you hear when the fireworks shoot up in the air, comes from the firework tube itself, not the chemicals. When the tube is partly empty, it will vibrate the air passing through it, causing a whistle.

How can you write your name with a sparkler?

I’m sure you’ve all held a lit sparkler at some point and twirled it around in the air to see a trail of light lingering in the air for a few seconds. The truth is the light isn’t really still there but your eyes play a trick on your brain to make you think that it is. Image result
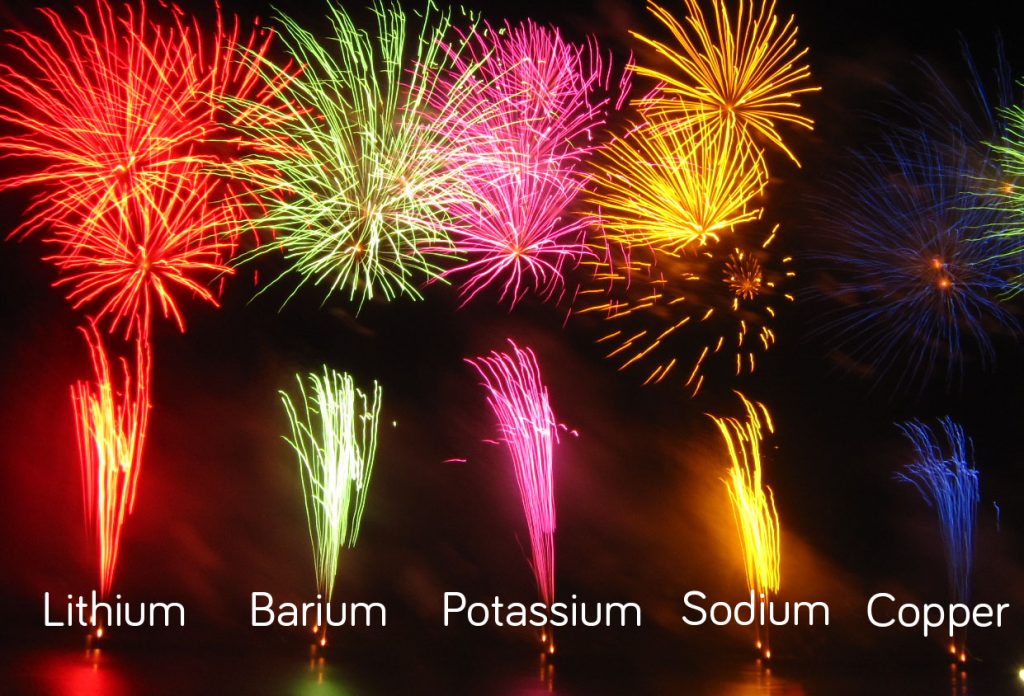
Our eyes don’t react as quickly as you might think when our view changes, they usually keep the old view around for a fraction of a second. This is known as visual persistence and it’s what allows us to view a series of still images as movement. The effect is increased in the case of the sparklers due to the very bright light emitted form the sparks contrasting against the dark background. This makes the light appear to last longer.


fireworks

#TryThisTuesday: Honeycomb

honeycomb

Honeycomb or Cinder Toffee not only makes a great Bonfire Night snack, it’s also a fun and quick science experiment! Here’s our simple recipe for the honeycomb reaction:
1. Grease a baking tray with butter and set aside.
2. Mix 100g sugar with 2.5 tablespoons of golden syrup in a pan. Mix the two well before you heat the pan.


3. Gently heat the pan, try not to stir the mixture at this point just let it gently begin to melt.
4. Once you can see the sugar start to melt you can push the sugar around to ensure in melts evenly and doesn’t burn.
5. When all the sugar has melted turn up the heat so the sugar begins to boil and forms an amber coloured caramel
6. Turn off the heat and add one teaspoon of bicarbonate of soda, beat the mixture quickly as it begins to bubble up to incorporated all the bicarb then tip onto the greased baking tray.


7. Leave to set for 30-60 minutes then enjoy!

The Science

The heat causes the bicarbonate of soda (NaHCO3) to break down and release the gas, carbon dioxide (CO2). The gas gets trapped within the sugar, this results in the bubbles in your honeycomb.

honeycomb