Tag Archives: chemistry

STEM Students answer Children’s Questions #7

When visiting schools and museums our Street Scientists often get asked a variety of questions from curious children. Here are the answers to some of our favourite questions!

This week, we’re answering questions on Chemistry.

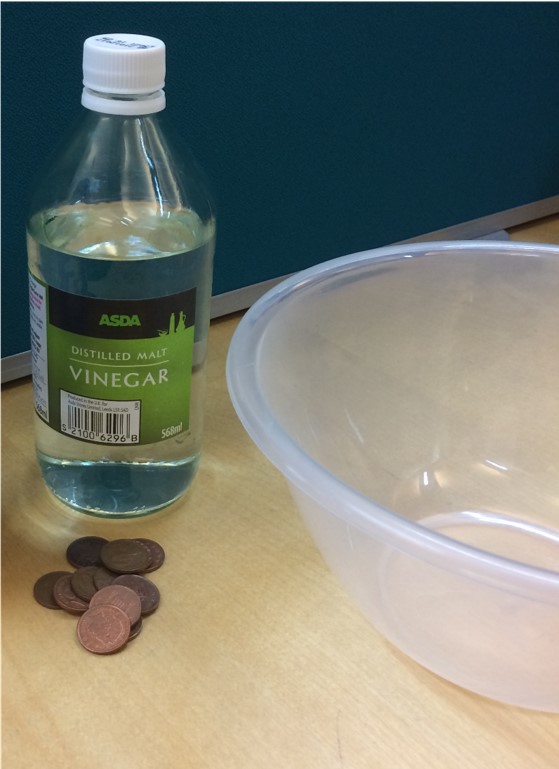
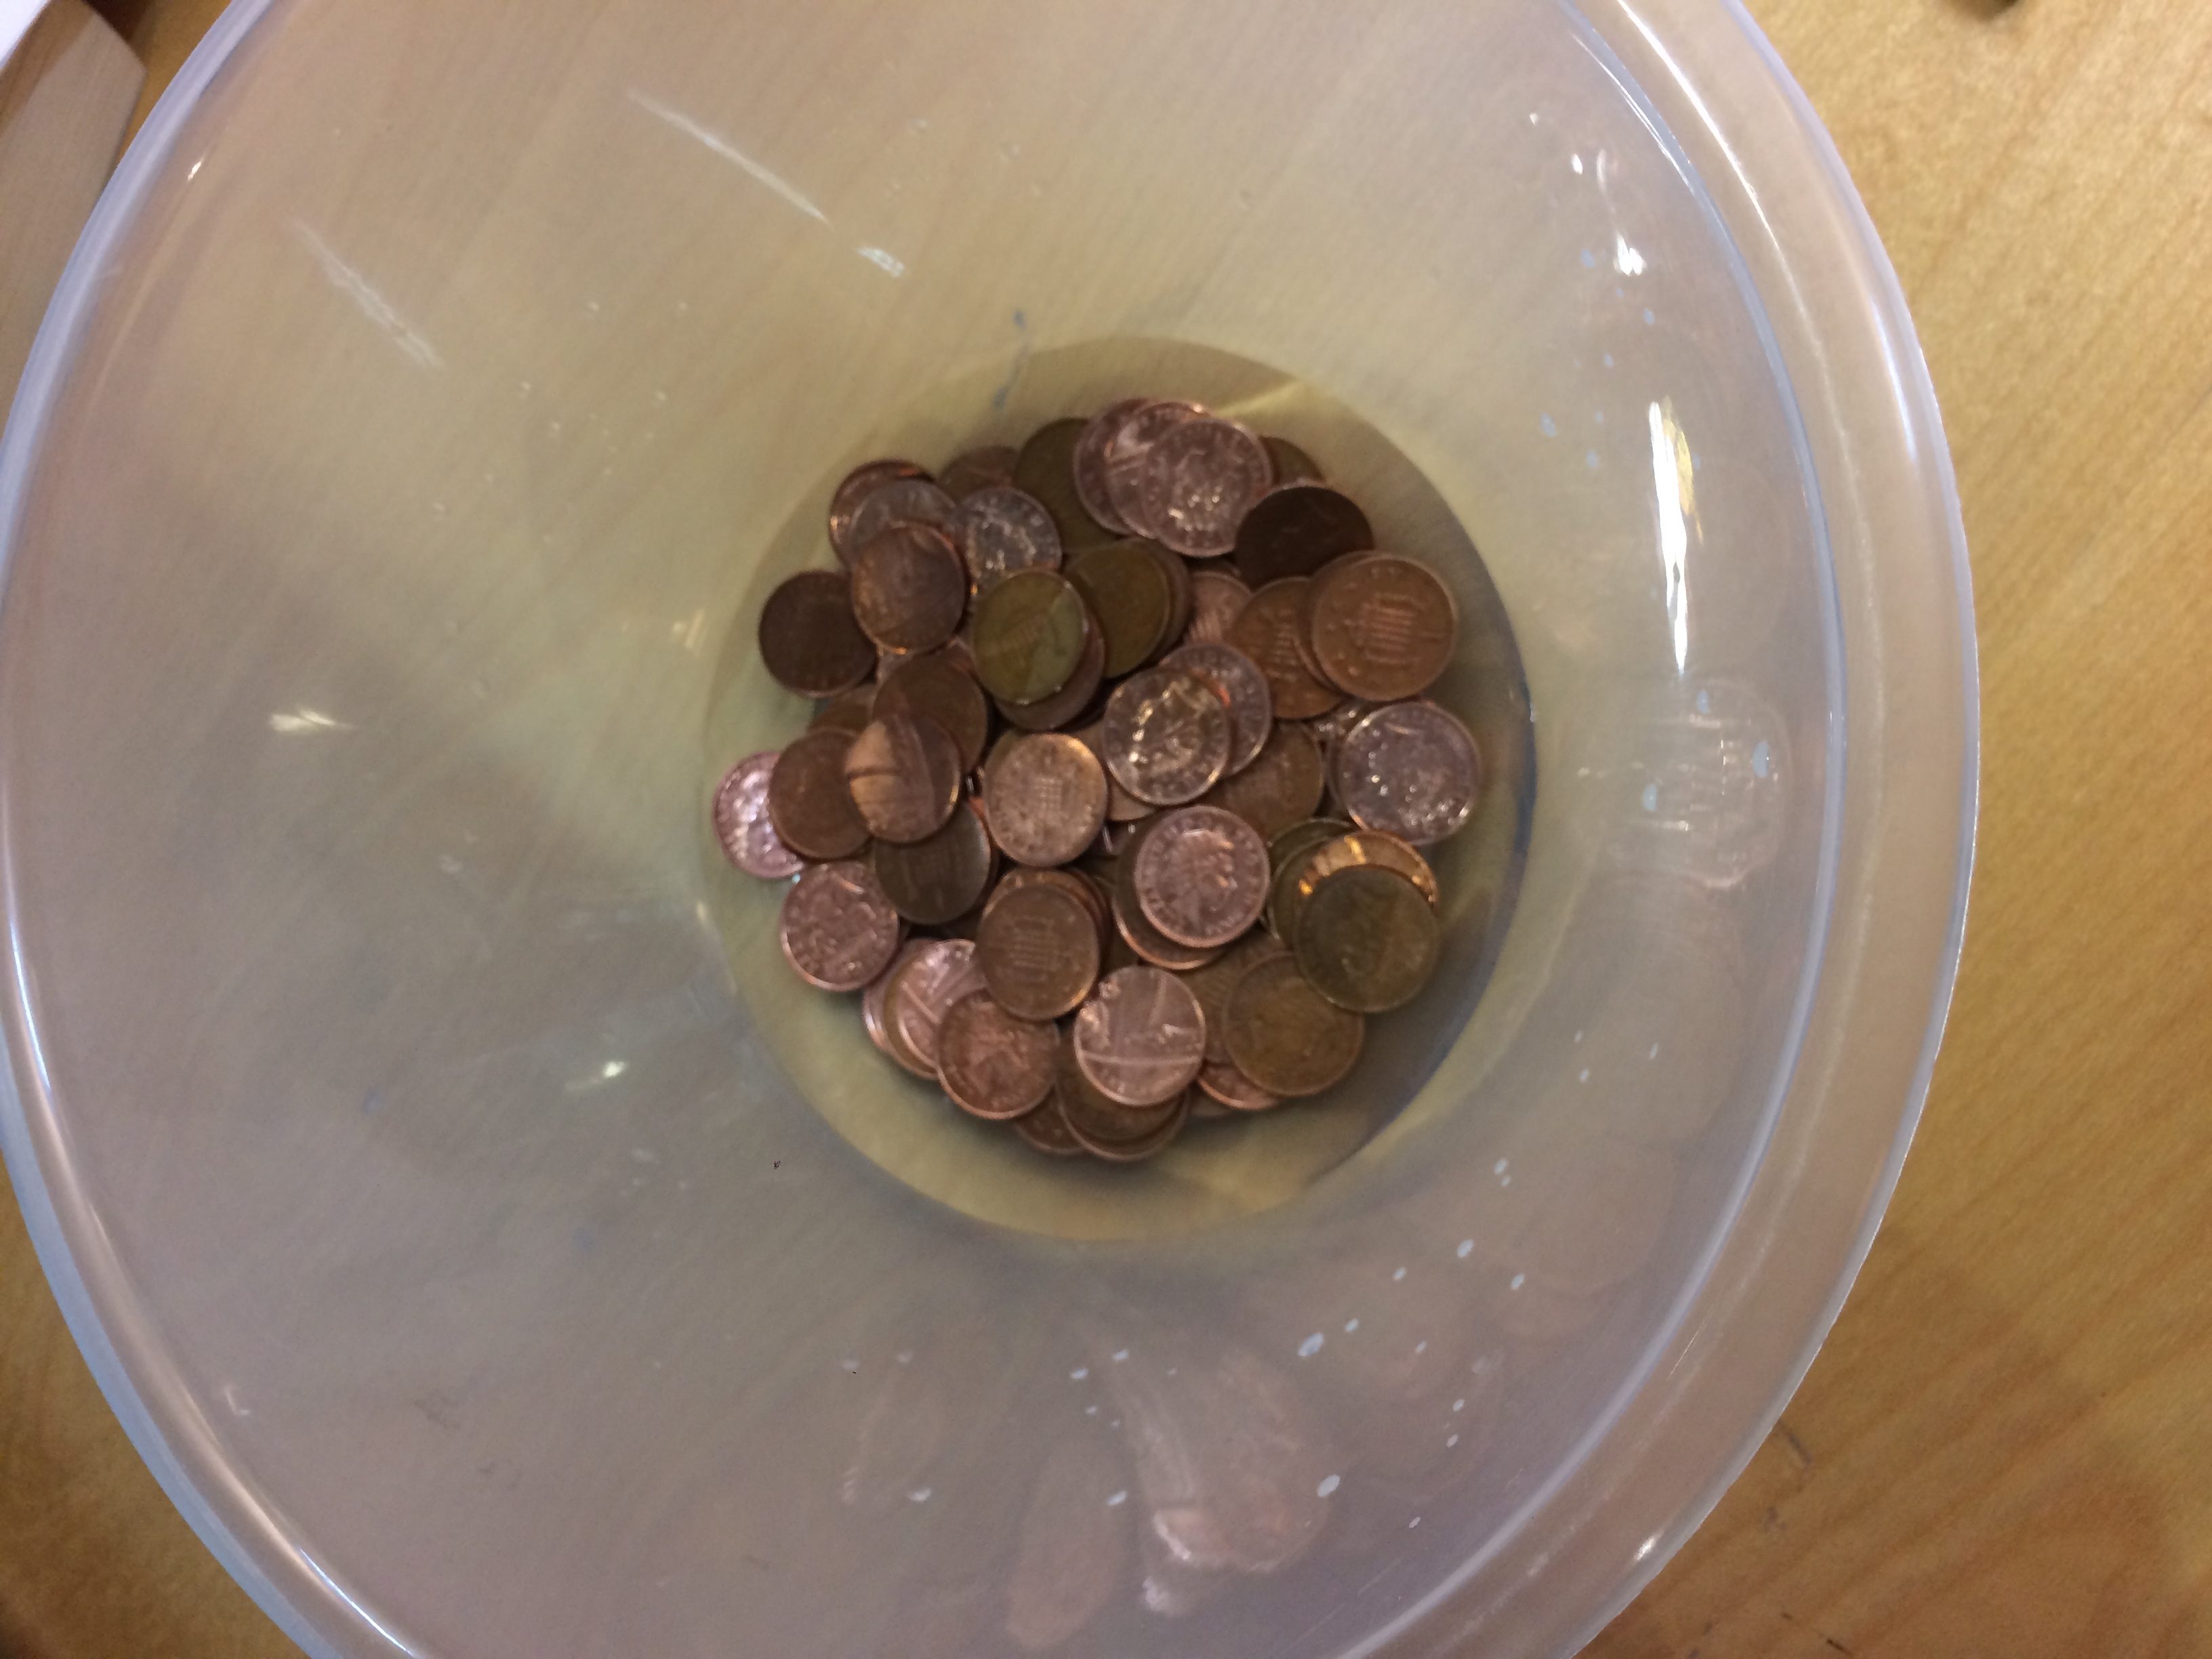
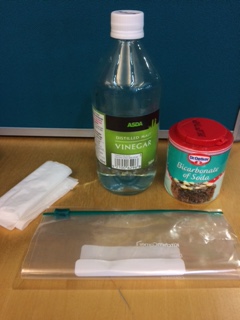
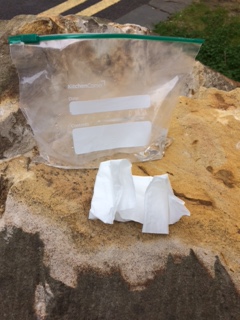
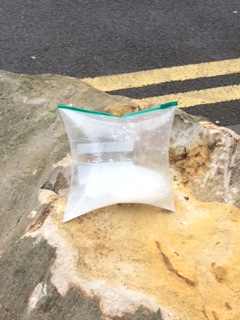
What happens when a chemical reaction happens and can it be reversed?

-asked by Charlie, 11, from Burnside Primary School

A chemical reaction is a process of transformation of one set of chemical substances to another. When chemical reaction happens, the atoms of the chemical substances (initially called reactants) are rearranged resulting in different substances we call chemical products. No atoms are lost or gained during the reaction, so the total mass of reactants will be the same as total mass of the products.

There are some reactions that are reversible, meaning the chemical products can go back to become reactants. However, there are also reactions that are irreversible, meaning once the reaction occurs, the products cannot be converted back into reactants again.

An Irreversible reaction is like baking. Once the egg, flour, butter, and milk are mixed and baked into a cake, they cannot go back to their original form. An example of an irreversible reaction is combustion process. Combustion involves burning an organic compound (such as wood) and oxygen to produce carbon dioxide and water. Carbon dioxide and water are stable products and therefore they cannot go back to become wood and oxygen.
-Aurelia, Dentistry Student


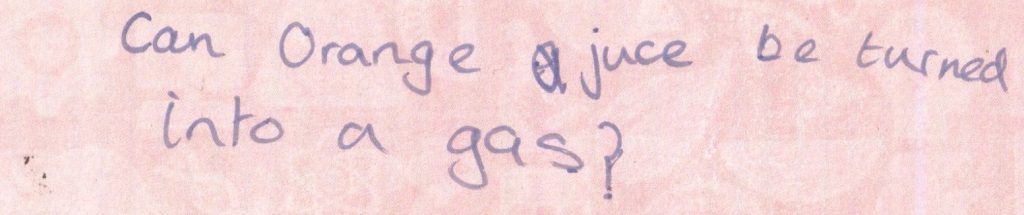
Can orange juice be turned into a gas?

-asked by Emily, 11, from Burnside Primary School

Orange juice is a mixture of liquid (water) and solid components (i.e. natural sugars, vitamins and other minerals). If you were to heat orange juice to a temperature above 100°C, the water component of the orange juice would evaporate meaning that the liquid water would change into a gas. However, the sugar, vitamins and minerals would be left behind. 
– Jenny, Dentistry Student


What is the most dangerous chemical?

-asked by Alfie, 11, from Burnside Primary School

There are so many dangerous chemicals out there! The dangerous chemicals are usually toxic, volatile, corrosive, or explosive. One of the most dangerous chemical known to mankind is Chlorine Trifluoride which is also called substance N. This was studied by Nazi scientists during The World War II for military purposes. It is a colourless, poisonous, corrosive and extremely reactive gas. It is so volatile and will react with almost anything! It has been known to set fire to glass, sand, rust, and humans! It is usually transported in the form of condensed liquid which is pale- greenish yellow in colour. The United States tried to transport a huge amount of Chlorine Trifluoride before in a tanker and it was a bad move. The tanker spilled in a warehouse and set fire to it. The whole floor was gone, leaving a few feet of dirts and soil underneath. This compound is now of interest for rocket fuels and nuclear reactor fuel processing.
– Aurelia, Dentistry Student


Why does Carbon Dioxide not turn into water since it’s ice?

-Nathan, 11, from Burnside Primary School

Carbon dioxide does not turn into water even though it is ice because water and carbon dioxide are two different compounds each with their own chemical composition, which means that they have different properties. Carbon dioxide, whether it be in gas or solid (a.k.a. dry ice) form, is made of one carbon and two oxygens. Therefore, it is known as CO2. Whereas water in either gas, liquid or solid state is made of two hydrogens and one oxygen and is therefore known as H2O.

COand H2O are very different from each other and when they are frozen, they form different solids because H2O freezes to form regular ice at 0°C and COgas freezes at -78°C to form dry ice. When regular ice melts, it changes from a solid to a liquid and will leave a puddle. On the other hand, dry ice is so called because when it is exposed to temperatures greater than -78°C it does not melt, it actually sublimes, meaning it changes from a solid straight to a gas and leaves no liquid or puddle behind (hence “dry” ice). 
– Jenny, Dentistry Student


If you have any questions that you would like our team to answer, please leave a comment below!

A Year in Industry as a Chemical Engineering Student

Chemical Engineering student, Rosie, gives us an insight into her placement year, working for AstraZeneca.

After my 3rd year of studying a 4 year integrated masters in Chemical Engineering, I worked as a Process Engineer at AstraZeneca pharmaceutical company for a year. The first thing I learnt from this experience is that a Chemical Engineer and a Process Engineer are the same thing. I actually think Process Engineer better describes the profession which is all about designing, developing and improving processes that make chemicals. AstraZeneca researches, develops and manufactures medicines for cancer, respiratory, kidney and cardiovascular diseases. I worked in the department that develops the process and technology used to manufacture the medicines.

During this year in industry, no two days were ever the same. My role included a variety of tasks and responsibilities allowing me to develop my technical skills as an engineer and increase my confidence to work in a professional environment. I also developed a lot of skills that will help me function in a graduate role, such as communication and time management, which are essential for effective teamwork. In the pharmaceutical industry, chemical engineers are involved in work to develop the manufacturing process, as well as facilitating manufacture of material at varying scales for clinical trials or commercial supply.

I worked on a project to develop the manufacturing process for a cancer medicine, completing a lab based investigation to gain understanding of a filtration process in the current manufacturing route. A normal day would mostly be spent in the lab. I ran a set of experiments over several weeks, each taking a whole day. The experiment aimed to measure change in concentration of a liquid when recirculated through a filter. There were 4 key stages in the experiment; set up the equipment, run the experiment while taking regular samples, shutdown and clean up the experiment, and then analyse the samples. Once the lab work was complete, all the results were analysed to draw conclusions from the project. I then shared my conclusions and learnings from the project through oral presentations and written reports, in order to maximise the learning of the company from my project.

Rosie and her colleagues on their placement year at AstraZeneca

I also worked as part of a team to facilitate the manufacturing of pharmaceuticals for clinical trials. The work I completed involved assessing the safety of the manufacturing process. Chemical plants have to adhere to very high regulations on pollution and emissions from manufacturing activities, and my work included checking any release of chemical from process into the environment is within the limits. I was also involved in altering the manufacturing site to install all equipment required to manufacture this particular medicine.

Despite being in a professional environment, I found there was still a strong social aspect with my co-workers. Admittedly this was not comparable to attending university with thousands of other students in a city, however at AstraZeneca there were social events at an office level and entire department level. There were also around 20 other students completing the Year in Industry, and I made some good friends and enjoyed exploring the city of Manchester which was only a short train ride away.

International Day of Human Space Flight

On this day in 1961 Yuri Gagarin, a Soviet citizen, became the first human to travel into space, leading mankind into an era of space exploration. Hundreds of astronauts have since travelled to the stars, but only a small handful of them have been British. Seven people born in the UK have become astronauts, although all but 2 hold dual nationality or American citizenship’s.

British Astronauts

  1. Helen Sharman

    Born: Sheffield
    Citizenship: British
    First launch: 18th May 1991
    A unique astronaut in many respects, Helen’s route into space wasn’t typical. Having studied Chemistry at university, Helen was working as a chemist for Mars chocolate company when she responded to a radio advertisement saying “Astronaut wanted: no experience necessary.” A scientific background, an ability to learn foreign languages and a high level of fitness helped Helen beat nearly 13,000 other applicants to take part in Project Juno, a collaboration between the Soviet Union and private British companies to send a group of astronauts to the Mir Space Station. At just 27 years old at the time of her flight, Sharman is the sixth youngest person to fly into space and remains the only female British astronaut to date.

  2. Michael Foale

    Born: Louth
    Citizenship: Dual – British/American
    First launch: 24th March 1992
    Born in Louth to a British father and an American mother, Michael considers Cambridge to be his home town. It was at Cambridge University that he studied, achieving both an undergraduate degree and a doctorate before moving to Texas to pursue a career in the U.S Space Program. Throughout his career at NASA, Michael became the most experienced British-born astronaut in the history of human space flight as a crew member of a total of 6 missions, totalling 375 days in space.

  3. Piers Sellers

    Born: Crowborough
    Citizenship: Naturalized citizen of the United States
    First launch: 7th October 2002
    During his school years Piers trained as a Royal Air Force cadet to pilot gliders and powered aircraft. After studying an undergraduate degree at Edinburgh University, Piers earned a doctorate in biometeorology from the University of Leeds before moving to the United States to begin a NASA career as a research meteorologist. In 1984 he began applying to become an astronaut, but this was hindered by his lack of US citizenship. In 1991 he became a citizen of the United States and in 1996 he was selected as an astronaut candidate by NASA. Throughout his career Piers spent over 35 days in space.

  4. Nicholas Patrick

    Born: Saltburn-by-the-Sea
    Citizenship: Dual – British/American
    First launch: 9th December 2006
    Born in Yorkshire, Nicholas studied an undergraduate and masters degree in engineering at Cambridge University, during this time he learned to fly as a member of the Royal Air Force’s Cambridge University Air Squadron. After a move to Massachusetts, where he initially worked as an aircraft engineer, he pursued Mechanical Engineering at Massachusetts Institute of Technology. In June 1998 Patrick was selected as an astronaut candidate by NASA. Before his retirement from NASA in June 2012, Nicholas clocked up just over 26 days in space.

  5. Gregory H. Johnson

    Born: South Ruislip
    Citizenship: American
    First launch: 11th March 2008
    Although born in England, Gregory grew up in America. He earned an undergraduate degree in aeronautical engineering from the United States Air Force Academy in 1984, before going on to complete a Masters in flight structures engineering at Columbia University. Johnson was a pilot in the United States Air Force before being selected by NASA for astronaut training in 1988. During his career at NASA, Gregory spent a total of one month in space, in this time he orbited the earth nearly 500 times and travelled over 12 million miles.

  6. Richard Garriot

    Born: Cambridge
    Citizenship: Dual – British/American
    First launch: 12th October 2008
    Born in Cambridge to American parents, Richard’s life in the UK was short-lived as he was raised in the United States from 2 months old. Nevertheless we shall still claim him as our own, in which case he is the only British “space tourist”. Richard earned his fortune as a video games developer. Keen to follow in the footsteps of his astronaut father, Owen Garriot, in 2007 Richard used his fortune to buy a $30 million ticket to space. Richard’s space “holiday” lasted 12 days. He spent his time on the International Space Station conducting a variety of experiments. These included studying the effects of space flight on the human body for NASA and the European Space Agency.

  7. Tim Peake

    Born: Chicester
    Citizenship: British
    First launch: 15th December 2015
    Finally, our most recent astronaut and only the second, after Helen Sharman, to travel under the British flag. Tim began his career as an Officer in the British Army Air Corps. After many successful years as a helicopter flight instructor and test-pilot, Tim retired from the army in 2009 – the year he was selected as an ESA astronaut. Years of training and various missions on earth culminated in a six month trip to the International Space station throughout the start of 2016. Whilst aboard the ISS, Tim ran a virtual version of the London Marathon, completing it in 3 hours 35 minutes and becoming the second person ever to complete a marathon in space.

    The sky isn’t the limit when you choose to pursue a career in STEM. Find out about Newcastle University’s UK Space Agency funded research here.

#TryThisTuesday Halloween Special!

Slime Two Ways

Happy Halloween! Here’s two of our favourite ways to make spooky slime with things you’ll find lying around the house, or in your local supermarket.

Magnetic Slime

Step 1

Ask an adult to help you remove the ink tube from the highlighter using a pair of scissors and squeeze the ink into the bowl. You might want to wear some plastic gloves to avoid getting the ink all over your hands!

Step 2

Add the liquid glucose and mix (we added Halloween confetti at this point for an extra spooky edge!)

Step 3

Gradually add cornflour and mix to get a slimy consistency, then add iron filings and mix, adding more as necessary.

Step 4

Move the magnet on the outside of the cup, and watch as the slime creeps up the side!

Step 5 (optional)

If you have access to a black light, shine this at the cup to make your slime glow in the dark!


The science!

The cornflour and liquid glucose mix together to create a non-Newtonian fluid, a fluid that changes in viscosity (how runny it is) with a change in pressure applied to it.

When the iron filings are added and dispersed throughout the slime this makes the mixture magnetic!

The black light emits ultraviolet light which is invisible to the naked eye, but when shone on the highlighter it emits a brilliant glow!

Reversible blood slime

Step 1

Carefully cut open the lining of the nappy and shake out the crystals from inside onto a sheet of paper. You may get some cotton coming out too so just be careful to take this out before step 2!

Step 2

Put the crystals from the nappy into the bowl or container, you’ll only need about a tablespoon full, and add about 250ml water and a splash of red food colouring

Step 3

Stir the mixture and watch closely as the water is absorbed by the crystals and begins to look like a thick slime! Again, we added Halloween confetti to ours to make it even more mysterious!

Step 4

To reverse this process, and turn the slime back into water and food colouring, all you have to do is add salt and mix and watch as the process takes place.


The science!

The crystals that are in the lining of nappies are known as a hydrogel. The hydrogel here is a polymer (a long chain of repeated molecules) called sodium polyacrylate and is superabsorbent, meaning it expands when it comes into contact with water and can hold a huge amount of liquid!

When the salt is added, the polymer collapses due to the a change in the ionic concentration of the solution and so the water-holding ability of the hydrogel is broken.

#TryThisTuesday: Rock Candy

This weeks Try This Tuesday takes a while, but you end up with a tasty treat!

You will need:

  • A wooden skewer or chopstick
  • Peg
  • 1 cup of water
  • 2-3 cups of sugar
  • A narrow glass or jar

pic

Clip the wooden skewer into the peg so that it hangs down inside the glass and is a couple of centimetres off the bottom.

Put the water into a pan and bring it to the boil. Pour about a quarter of a cup of the sugar into the boiling water and stir until it dissolves.

Keep adding more and more sugar, each time stirring it until it dissolves, until no more will dissolve. This might take quite a while!

When no more sugar will dissolve remove it from the heat and leave it to cool for about 20 minutes.

Pour the sugar solution into the glass or jar almost to the top. Then put your skewer back into the glass so it hangs down and doesn’t touch the sides.1st

Leave your glass in somewhere it won’t be disturbed. The sugar crystals will grow over 3-7 days. Once these have grown you can eat them!finished-product

The Science

By mixing the sugar and water together when they were really hot, you have created a super saturated solution. This means that the water contains much more sugar than in could in normal circumstances. As the water cools back down the sugar leaves the solution (mixture) and becomes sugar crystals again, forming on the skewer.

Supersaturated solutions are used in real life. In a sealed fizzy drink the drink is saturated (full) with carbon dioxide, as the carbon dioxide is put in using pressure. When you open the drink, the pressure of the carbon dioxide is decreased, which causes your drink to be supersaturated as there is much more carbon dioxide dissolved than there would be at normal pressure. The excess carbon dioxide is given off as bubbles.

#TryThisTuesday: Exploding Lunch Bag

Today we are going to make an explosive lunch!

You will need

  • One small (sandwich size) zip-lock plastic bag
  • Bicarbonate of soda
  • Warm water
  • Vinegar
  • A tissue

img_4727

Do this experiment outside, or at least in the kitchen sink. Put about a quarter of a cup of warm water in the bag with half a cup of vinegar.

Put three teaspoons of the bicarbonate of soda into the middle of the tissue and fold it up into a little parcel.

img_4779

Partially zip the bag closed but leave a little space to add the bicarbonate of soda parcel in. Put the tissue parcel in the bag and quickly zip the bag completely closed.

Put the bag on the ground and step back. The bag will start to expand and hopefully pop!

img_4782

The Science

The bicarbonate of soda and the vinegar eventually mix together, the tissue just gives you enough time to get the bag shut. A reaction takes place between the alkaline bicarbonate of soda and the acidic vinegar, this is know as an acid-base reaction. The reaction produces carbon dioxide, which begins to fill the bag. After a while the bag can no longer hold any more gas so it pops!

The reactions between acids and alkalis are used lots in real life too. Farmers can treat acidic soil with alkaline lime fertilisers to neutralise the soil and allow plants to grow. It’s also a good way to treat a wasp sting; wasp stings are alkaline so you can treat them by putting vinegar on the sting.

#TryThisTuesday: Milky Fireworks

For this week’s experiment you will need to raid your fridge and kitchen cupboards to get some milk, food colouring and washing up liquid.

Pour some milk into a dish or bowl, this works better with full fat milk (we’ll tell you why later!). Add small drops of your food colouring wherever you like in the milk.

20170509_142618

Get some washing up liquid on the end of a spoon or cotton bud and gently tap the spots of food colouring with it. 20170509_143248

The food colouring should burst out into colourful stars and wavy shapes. This happens because the washing up liquid molecules have a hydrophobic tail, these means that they don’t like water so try to get away from it by seeking fat molecules. The milk (especially if it is full fat milk) contains lots of fat molecules. So the washing up liquid moves around in the milk seeking out this fat and takes the food colouring along with it, creating these funky patterns.

This is why we use washing up liquid to clean our dishes. The hydrophobic, fat-loving parts cling to grease and fat. The head of the washing up molecules are hydrophilic, meaning they love water. The heads cling to the water and the tails cling to the grease, this pulls the grease and dirt from your plates and washes them away with the water, giving you sparkly clean dishes.


#TryThisTuesday: Easter Eggsperiments

As Easter is coming up we’re treating you to four experiments instead of one this week! And a little video showing Ellie and Clare demonstrating each of them (or at least attempting to!)

1. Hard-boiled Egg Test

Our first eggsperiment requires a hard boiled egg so we’re going to show you how you can test if an egg is hard boiled or not.

Lay a hard-boiled and a normal egg flat on their sides and spin them. Put your finger on the eggs to stop spinning them and then let go. The one that starts spinning again is the raw egg.

This is all due to momentum. When you spin the eggs you spin their insides too. In the hard boiled egg, the insides are fixed to the shell so it behaves as you would expect. In the raw egg the insides continue to spin after you’ve stopped the shell. When you let go, the momentum of the spinning yolk carries the shell and the whole egg starts spinning again.


2. Egg in a Bottle

Now we know which is our hardboiled egg, we need to peel it for next experiment. This one requires a glass bottle, a match and of course, the egg.

If we place the egg on top of the bottle it doesn’t look like it’s going to fit in. But if we light the match and drop it into the bottle then after a second place the egg on top, the egg will squeeze into the bottle.

The match heats up the air in the bottle, causing it to expand slightly. The egg creates a seal so more air cannot enter. As the air cools inside the bottle it decreases the pressure and forces the egg into the bottle.


3. Naked Bouncy Egg

To make a naked bouncy egg you will need an egg, white vinegar and a beaker. Place your egg in the beaker and pour in enough vinegar to cover the egg. Leave you egg here overnight.

The egg shell is made mostly of calcium carbonate, this reacts with the acid in the vinegar and dissolves to leave a naked egg. It also produces carbon dioxide gas, so as your egg is soaking you may see little bubbles of CO2 forming around it.

After a day, carefully remove you egg from the vinegar and wipe away any remaining shell. You should see that it’s now quite rubbery and bouncy as well.


4. Bouncy Elastic Egg Drop

For this final eggsperiement you can use your bouncy naked eggs but we’re cheating a little bit and using rubber eggs. For this you will need to take two rubber eggs and join them together with a piece of elastic or a string of elastic bands.

When you hold your eggs next to one another and let go they both hit the floor at the same time as you might expect. But what do you think will happen if we just hold the top egg and let the other hang below it, which will reach the floor first when we let go?

Gravitational acceleration is the same no matter the weight or mass of an object, but when we add elastic between the eggs, this adds an extra force that speeds up the drop of the higher up egg as the elastic pulls them together.


#TryThisTuesday: Homemade Ice cream!

This week we’re making ice cream but instead of using an ice cream machine, we’re going to make it using science!

You will need:

  • Two Ziploc bags – one small, one large
  • 100ml double cream
  • 50ml milk
  • 40g sugar
  • Vanilla extract
  • Ice
  • Salt

p1020737-2

  1. Measure out the milk, cream and sugar and place them into the smaller Ziploc bag.
  2. Add a dash of vanilla extract  then zip up the bag.
  3. Fill the larger bag 2/3 full with ice.
  4. Pour a generous amount of salt onto the ice.p1020738-3
  5. Making sure the small bag is tightly zipped up, place it inside the bigger bag with the salt and ice.
  6. Gently shake the bag for 5-10 minutes, be careful not to rip the bag!
  7. Leave the ice cream to sit inside the ice and salt bag for another 10 minutes
  8. Open up your bag and enjoy!

p1020740-2
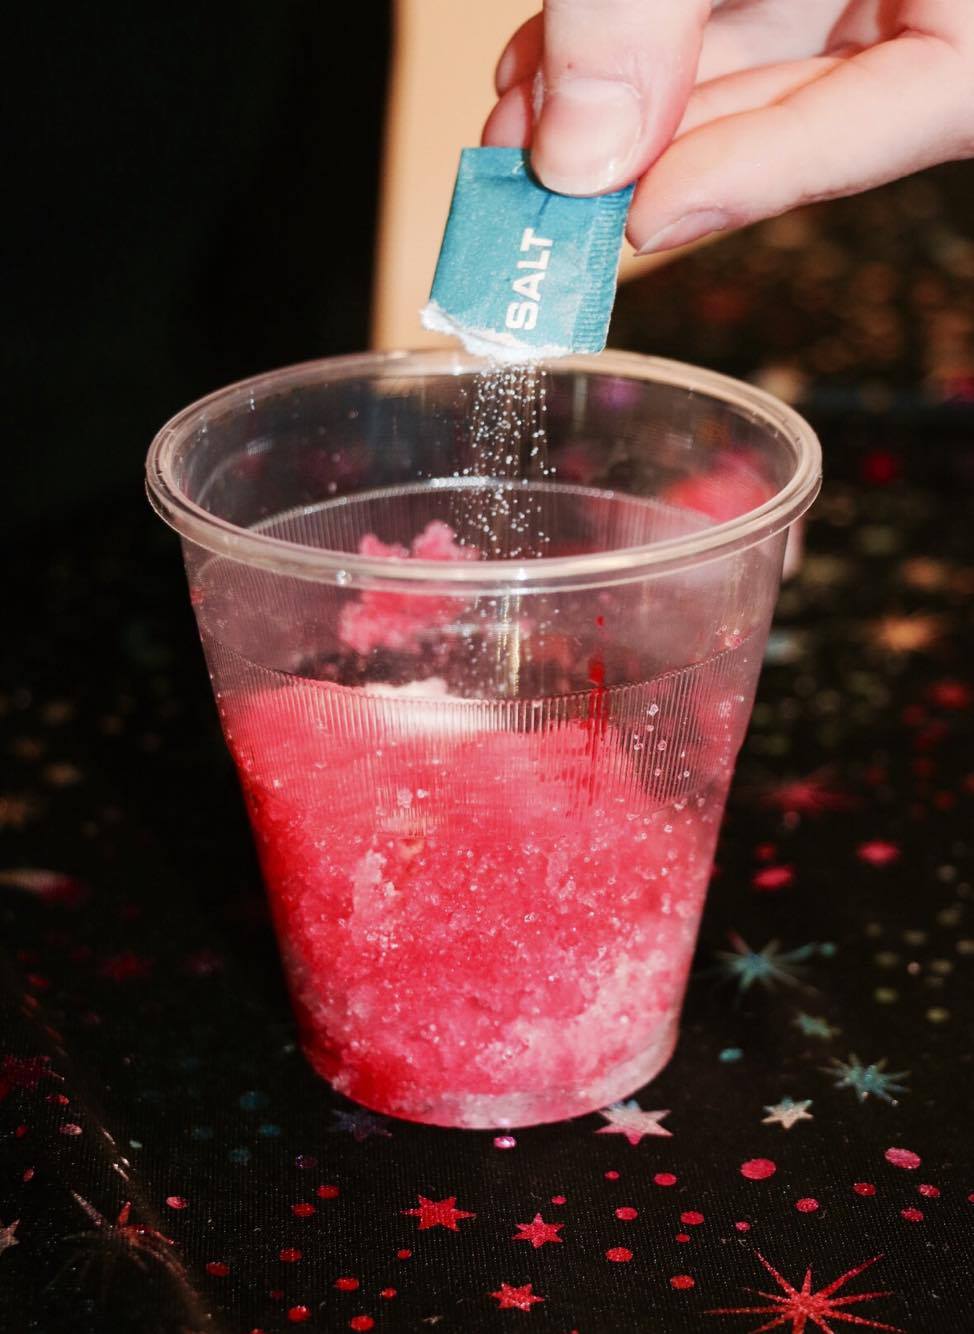
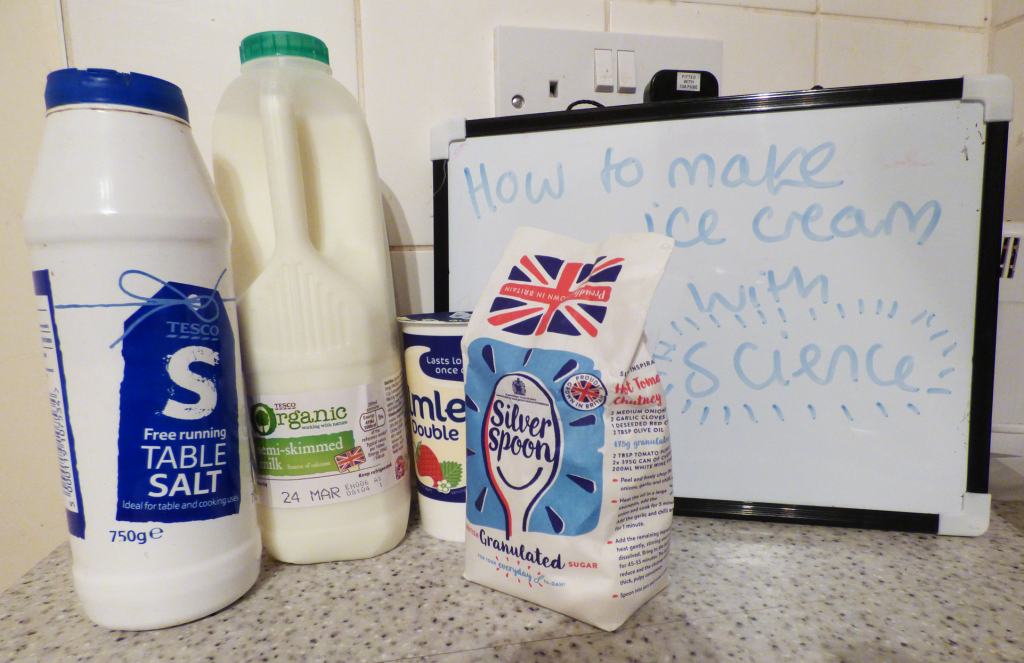
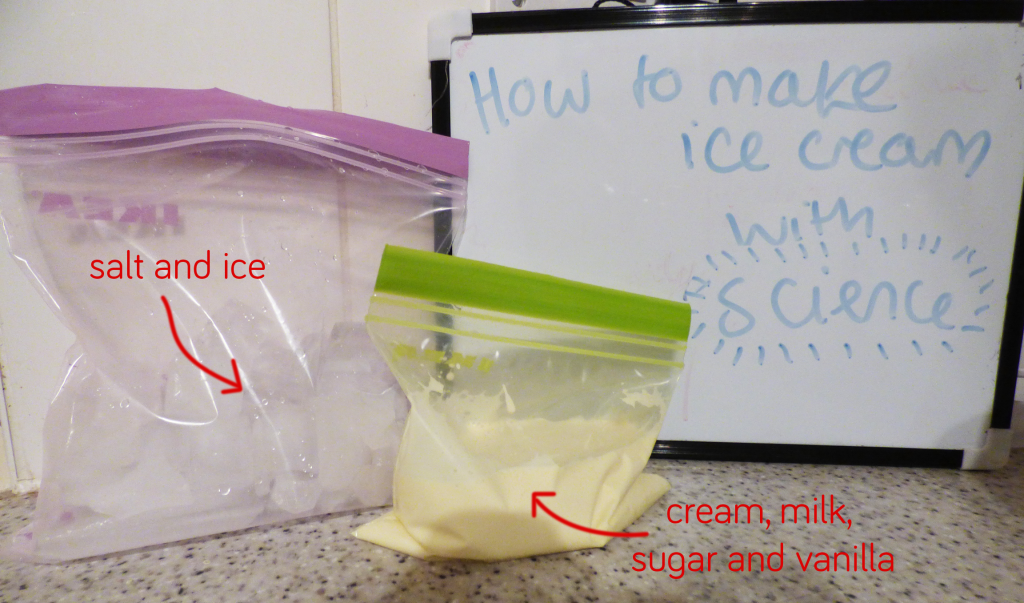
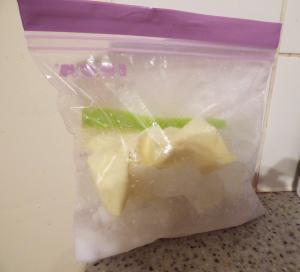
Try making different flavours of ice cream by swapping the vanilla extract for strawberry or mint extract or even cocoa powder for chocolate ice cream. You could also try adding chocolate chips.


How does this work?

Water, as I’m sure you know, freezes to make ice at 0oC. But your freezer at home is around -18oC, so how are we making the ice cold enough to freeze your creamy mixture? The secret is in the salt.

Ice is in a constant state of melting and refreezing and melting and refreezing. When we add salt, the salt particles block the path of the melted ice, stopping it from freezing back on to the rest of the ice but ice can still melt. Therefore more ice is melting that freezing.

Now you may be thinking that surely if the ice is melting that means it is getting warmer? It’s actually the opposite. For ice to melt it needs to break the bonds that are formed between the H2O molecules. This breaking requires energy which it gets in the form of heat. When a molecule melts away a bond is broken, taking heat away from the surrounding, causing the temperature to drop.

This is also the reason that salt is put on icy roads – it stops water forming ice.

#TryThisTuesday: Making coins shiny again

New coins are always bright and shiny but they quickly become dull and tarnished. Today we are going to make our coins shiny again!

You will need 100ml of vinegar, some tarnished copper coins and a bowl.vinegar

Pour the vinegar into the bowl and add the salt. Mix until the salt is dissolved.

img_4336

Try dipping a coin in and holding it there for 5 minutes. See how half becomes really shiny!

half

Put all your coins in and leave for 30 minutes. If you put lots of coins in the vinegar may turn green.img_4337

Make sure you rinse all the coins with clean water.

The Science

Coins become dirty due to oxygen in the air reacting with the metal to form copper oxide. They become darker as they age as the oxide layer increases. Vinegar is an acid (acetic acid) which can be used to clean up surfaces and remove the unwanted oxides. Acids release positively charged hydrogen atoms, also known as Hydrogen ions (H+) which react with the negatively charged oxygen in copper oxide and produce water (H2O). The copper that was linked to the oxygen dissolves leaving a nice shiny surface.

If your vinegar turned green this is due to all the copper dissolving and producing copper acetate.

Real World Applications

Iron that is used to make cars, trucks and boats can also react with the oxygen in the air and oxidise, producing rust. If a car gets rusty, mechanics can use phosphoric acid  to remove it. It reacts with the rust, removing the oxide and replacing it with a layer of iron phosphate. This also protects the metal from rusting further.

Phosphoric acid is also found in coca cola, which is why it is so good at dissolving your teeth!