Category Archives: Try This Tuesday

#TryThisTuesday: Colourful Flower Bouquet

Last week, Street Scientist, Ailie, showed us how to make a colour wheel with kitchen roll. Now we’re going to use that same technique to create a colourful bunch of paper flowers.

How can we use the process of capillary action, and the coloured water we made last week, to do something creative? First, you need to make 6 flower heads out of kitchen roll by folding and cutting as below.

  1. First fold the sheet in half to make a rectangle.
  2. Fold the rectangle in half to make a square.
  3. The fold the square in half diagonally to make a triangle.
  4. Fold the triangle in half again.
  5. Cut the top of the small triangle into a round petal shape
  6. Unfold the sheet to reveal your flower.
  • Cut another sheet in half and twist it up to form a stalk. Then pinch the end of your flower head and tape the stalk to the flower.
  • Place the stem of each flower into one of the cups of coloured water from earlier. Put something underneath the flower heads to soak up any extra water, or do it outside if you can.
  • Come back in an hour and the water should have moved, by capillary action, throughout the whole flower. You can now remove the stems from the cups and leave them to dry.
  • Scrunch all the dried flowers you’ve made together, tape around the top of the stalks, and you’ve made a beautiful multicoloured bouquet.

#TryThisTuesday: Walking Water

Our Try This Tuesday series of experiments to try at home is back with a colourful water-based experiment from Street Scientist, Ailie.

You will need:

  • Red, yellow and blue food colouring
  • Kitchen roll
  • 6 Clear cups, roughly the same size
  1. Add water to three of the cups so they are 3/4 full. Then add 5 drops of red food colouring to one cup of water, blue into the second and yellow into the third.
  2. Place the cups in a circle with the empty cups in-between the ones with water in (You may want to put some paper underneath the cups if you are worried about spills).

3. Take 6 sheets of kitchen roll and fold them twice to make a thick strip as below. You may want to cut them to be a bit shorter if you are using small cups, I cut off the bottom 1/5th.

4. Place one end of each strip of kitchen roll into one of the cups with water in and the other end into an empty cup next to it. Can you predict what colours might form in the empty cups?

5. Wait an hour then check back in to see if your experiment is working! Mine looked like this:

Eventually the empty cups will be as full as the cups feeding into them!

Colour Theory

Did you notice something the 3 colours you started with had in common? They are the primary colours. Therefore, mixing them creates the 3 secondary colours – purple, green and orange.

This gives us a simplified version of a colour wheel. The colours opposite each other on the wheel, and in our cup circle, are ‘complimentary’ meaning they contrast one another i.e. purple and yellow.

If we were to add more empty glasses in between the colours we have here we would make tertiary colours!

The Science

The water moves up the paper towel through a process called capillary action which is the ability of water to flow through narrow spaces, even against gravity! Capillary action works as molecules in liquid like to stick together (cohesion) and also like to stick to walls of a tube (adhesion). Together these forces act to propel the liquid through the tube or narrow space. The narrower the space, the quicker the water moves and the higher up it can go.

Plants rely on capillary action to move water all the way up from their roots to the leaves at the very top, where it is needed for photosynthesis (the production of glucose for energy). Just as humans have blood vessels to carry important substances around our body in the blood, plants have a tissue called xylem which is made up of millions of tiny tubes. Water moves up through the tiny cubes by capillary action, without wasting any of the plant’s energy.

One way to easily see capillary action working in the xylem is to cut the very bottom off the stem of celery or cabbage and put it into some water with food colouring. Given enough time, you will see the coloured water move to the top of the plant and stain the leaves. When a plant has been picked it is no longer undergoing photosynthesis and producing energy, therefore we have shown that the water is moving up to the top of the plant by a passive process.

Kitchen roll is designed to be very absorbent meaning it is able to hold lots of liquid – great for kitchen spills. To be able to do this, there are lots of little spaces in-between the fibres in kitchen roll which fill with water. Together they form the narrow spaces which the water uses to move up the tissue and into the adjacent empty cup. There, the colour mixes with the water from the cup on the other side to form our secondary colours.

Can you figure out how to make a colourful bunch of “flowers” out of your kitchen roll using this method? Check back for next week’s Try This Tuesday and we will show you!

#TryThisTuesday Crystal Christmas Decorations!

Crystal Christmas Decorations

It’s the most wonderful time of the year… and for this #TryThisTuesday Christmas Special, we’re making beautiful decorations for your Christmas tree using science!

Step 1

Mould your pipe cleaners into the desired shape, we chose to make a Christmas tree out of green pipe-cleaners, and a snowflake out of white pipe-cleaners

Step 2

Carefully fill a large container with boiling water then add the salt bit by bit, stirring continuously, until the water is saturated.

This means that the salt stops dissolving and instead sits at the bottom of the water, as the water can no longer hold any more salt crystals.

Step 3

Tie one long piece of string around your decorations in a row

Step 4

Dip the decorations in the water, and suspend over the container (as shown in the picture)


Step 5

This next part will take some patience!

Over the next 24 to 48 hours, watch as the crystals develop around the fibres of the pipe-cleaners, and see your beautifully festive decorations develop!

Step 6

Tie a piece of string around the top of your decoration and hang on your tree!

The Science

Salt crystals are formed due to ionic bonding, meaning they form a specific pattern which is always a square shape. When salt is dissolved into water, the water molecules separate the salt molecules. This means that even when it looks like the salt has disappeared in the water, it is actually there all along.  This happens especially well in hot water, as the heat means the water can hold many more salt molecules than cold water. As the water cools and evaporates, the salt crystals bond again as the water can no longer hold all the salt. The crystals stick to the pipe-cleaners because as the water evaporates, it takes some of the salt with it which clings to our suspended decorations, leaving beautiful crystal ornaments!

Bonfire Night | The Science of Fire

Remember, remember the 5th of November, gunpowder, treason and plot! We see no reason why the science of fire should ever be forgot!

For this bonfire night, we are looking into the gravity defying properties of water using fire!

Step 1

Pour the water into your container and add the food colouring to colour the water to whatever colour you like, we chose blue.

Step 2

Place the candle in the middle of the water but make sure the wick and wax of your candle stays dry.

Step 3

Get an adult to help you light the candle and make sure the wick is burning for about 20 seconds before moving onto step 4.

Step 4

Place your glass/plastic cup over the candle, this will push all the water away from the candle

Step 5

Wait for a few moments and watch the candle go out and the water rise on the inside of the cup!

The science!

First of all, why does the candle go out?

Fire needs three things to burn; oxygen, fuel and heat. These three things make up the fire triangle which you can see below.

If one of them is taken away, the fire is put out. By putting the cup over the candle, the oxygen is taken away from the fire so it goes out!

But… it doesn’t go out straight away. This is because there is still some oxygen trapped inside the cup but once the fire has used up all the oxygen there is none left so the candle goes out.

So, why does the water in the cup rise after the flame goes out? When the candle is lit, the particles in the air take in some of the heat from the flame and get hotter. When the particles get hotter, they have more energy so move faster and this increases the pressure inside the cup.

After the flame has gone out, the particles cool down and move more slowly and this decreases the pressure in the cup. The pressure outside the cup is then higher than inside the cup so the water is pushed inside the cup until the pressure outside the cup is the same as the pressure inside the cup.

#TryThisTuesday Halloween Special!

Slime Two Ways

Happy Halloween! Here’s two of our favourite ways to make spooky slime with things you’ll find lying around the house, or in your local supermarket.

Magnetic Slime

Step 1

Ask an adult to help you remove the ink tube from the highlighter using a pair of scissors and squeeze the ink into the bowl. You might want to wear some plastic gloves to avoid getting the ink all over your hands!

Step 2

Add the liquid glucose and mix (we added Halloween confetti at this point for an extra spooky edge!)

Step 3

Gradually add cornflour and mix to get a slimy consistency, then add iron filings and mix, adding more as necessary.

Step 4

Move the magnet on the outside of the cup, and watch as the slime creeps up the side!

Step 5 (optional)

If you have access to a black light, shine this at the cup to make your slime glow in the dark!


The science!

The cornflour and liquid glucose mix together to create a non-Newtonian fluid, a fluid that changes in viscosity (how runny it is) with a change in pressure applied to it.

When the iron filings are added and dispersed throughout the slime this makes the mixture magnetic!

The black light emits ultraviolet light which is invisible to the naked eye, but when shone on the highlighter it emits a brilliant glow!

Reversible blood slime

Step 1

Carefully cut open the lining of the nappy and shake out the crystals from inside onto a sheet of paper. You may get some cotton coming out too so just be careful to take this out before step 2!

Step 2

Put the crystals from the nappy into the bowl or container, you’ll only need about a tablespoon full, and add about 250ml water and a splash of red food colouring

Step 3

Stir the mixture and watch closely as the water is absorbed by the crystals and begins to look like a thick slime! Again, we added Halloween confetti to ours to make it even more mysterious!

Step 4

To reverse this process, and turn the slime back into water and food colouring, all you have to do is add salt and mix and watch as the process takes place.


The science!

The crystals that are in the lining of nappies are known as a hydrogel. The hydrogel here is a polymer (a long chain of repeated molecules) called sodium polyacrylate and is superabsorbent, meaning it expands when it comes into contact with water and can hold a huge amount of liquid!

When the salt is added, the polymer collapses due to the a change in the ionic concentration of the solution and so the water-holding ability of the hydrogel is broken.

#TryThisTuesday: Virtual Treasure Hunt

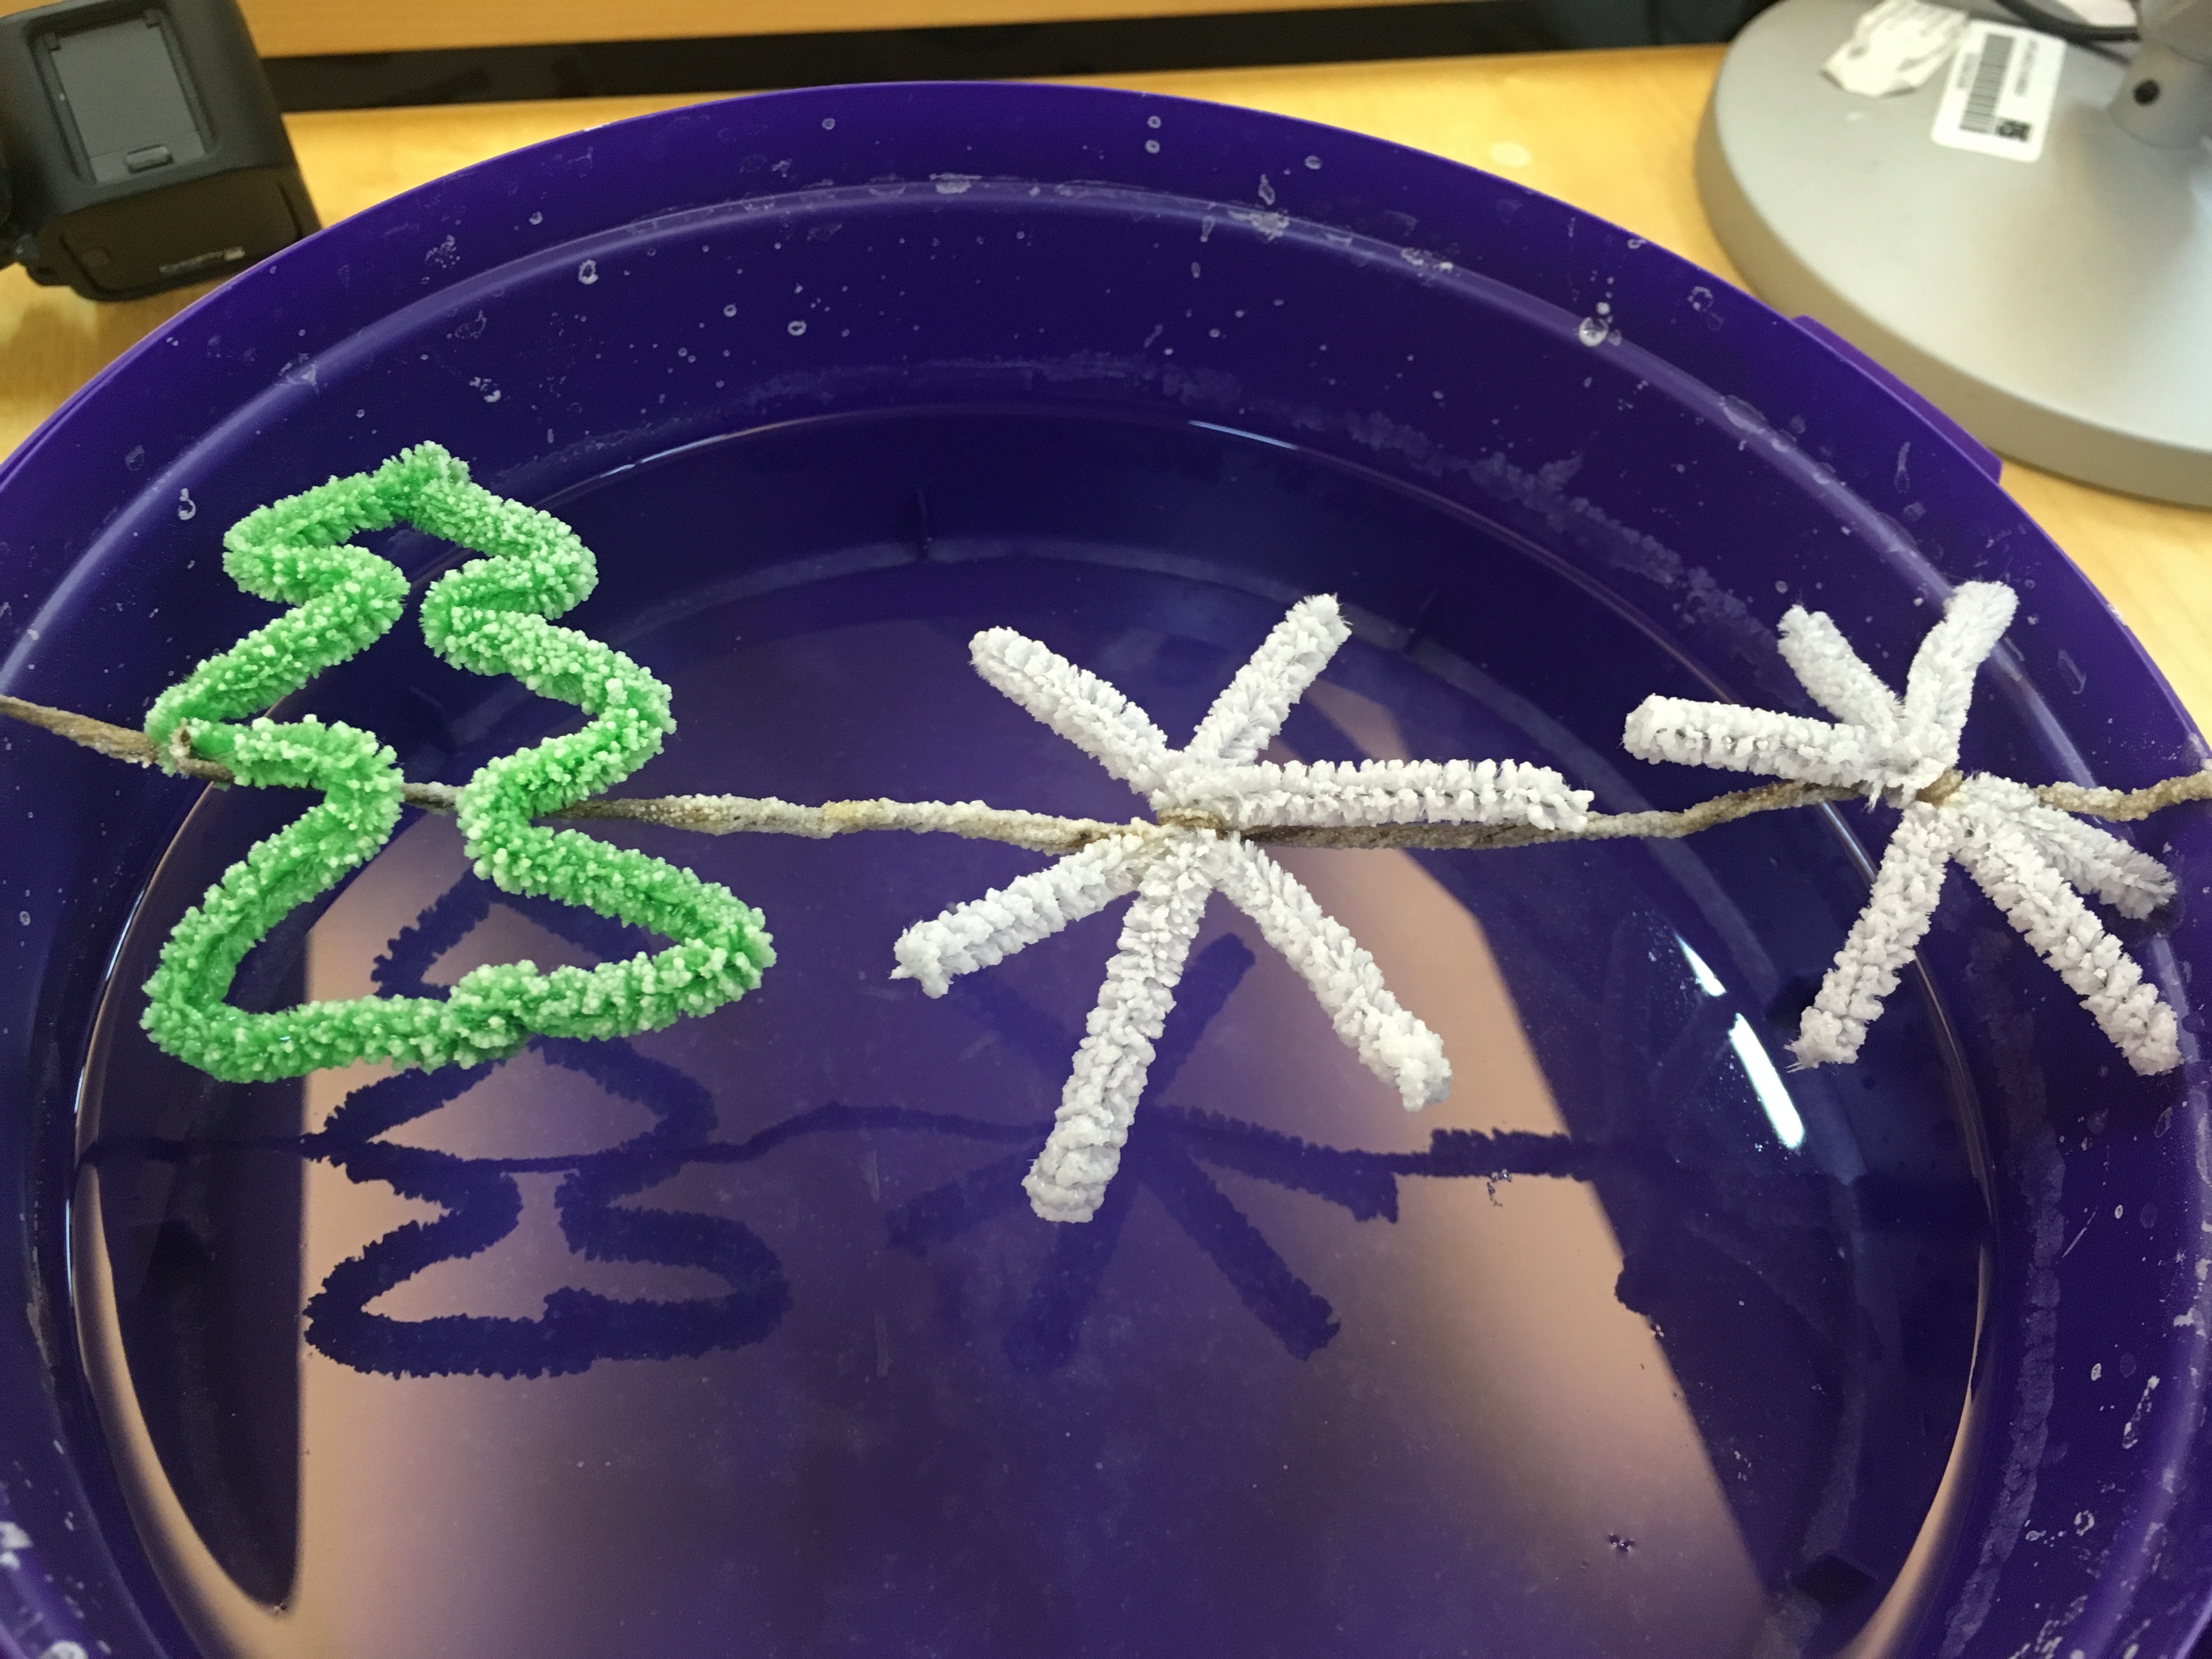
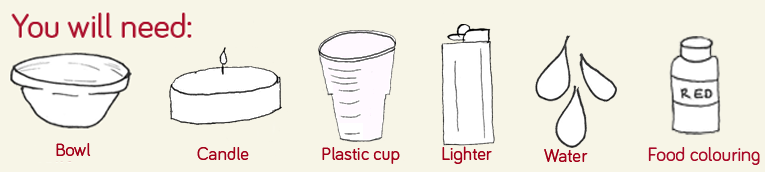
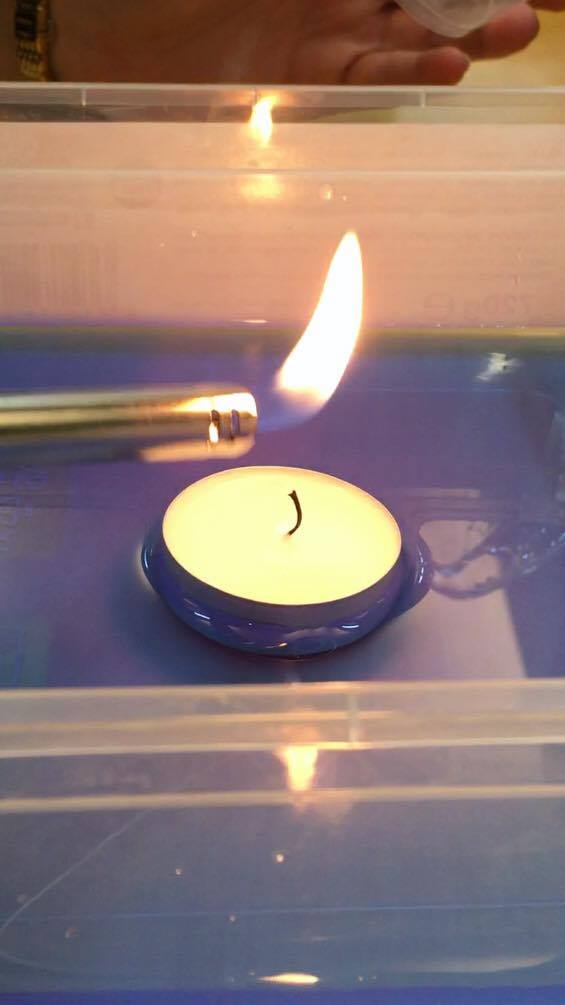
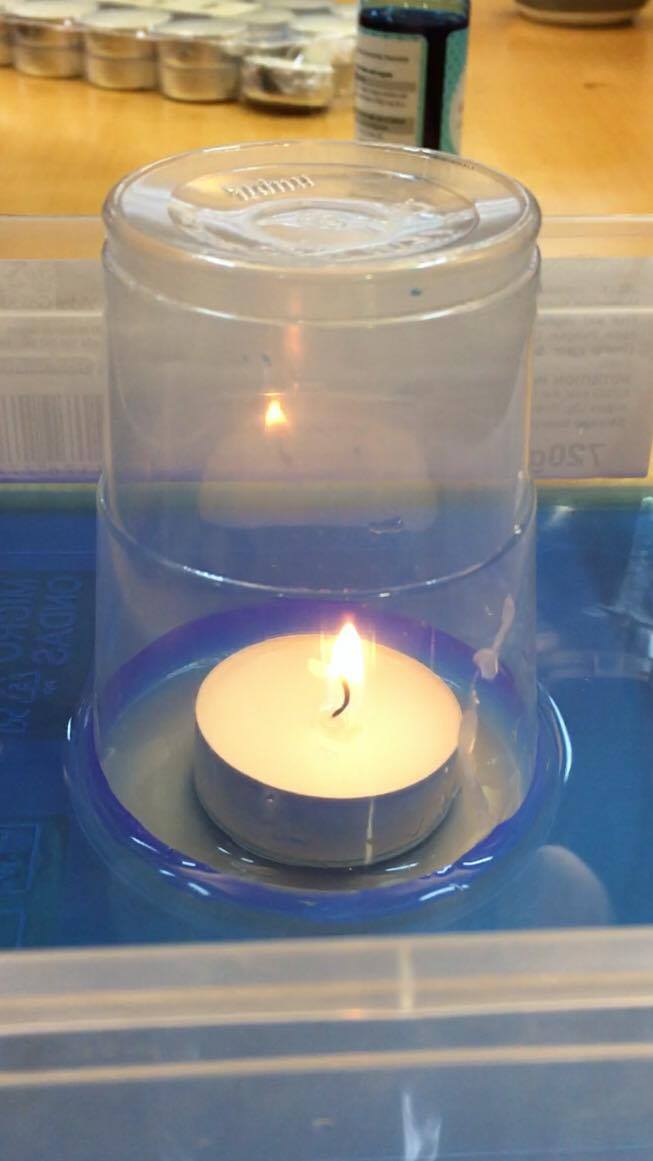
To celebrate International Talk Like a Pirate Day we have put together a virtual treasure hunt that you can do from a phone or computer.

For this treasure hunt you will need to solve clues to find co-ordinates to the next stop . The first three people to make it to the end of the hunt will win the treasure of a Street Science Busking Kit which is filled with equipment to make amazing science demonstrations at home!

Using Co-ordinates

Geographic co-ordinates allow every place on Earth to be identified with a set of numbers. The system that we’re using for this treasure hunt gives every point a latitude number and a longitude number.

If you were to draw a line from your point on the globe into the centre of the Earth and another from the centre of the Earth to the Equator, the angle between these two lines gives you the Latitude.

Longitude is measured slightly differently.  There is an invisible line running from the North Pole to the South Pole through the Royal Observatory in Greenwich, London, known as the Prime Meridian.  All points along this line have the longitude 0. The longitude of other points are calculated as the angle east or west from the Prime Meridian.

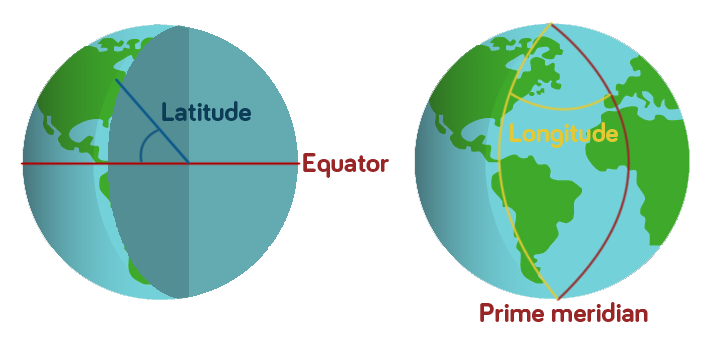
So Newcastle Upon Tyne, where we’re starting our treasure hunt from, has the co-ordinates 54.97, -1.61 because it is 54.97 degrees from the Equator and 1.61 degrees to the west of the Prime Meridian. Going west of the Prime Meridian or south of the Equator gives the co-ordinate a negative value.


The Treasure Hunt

Try to solve the clues to find the co-ordinates for the next place. Once you’ve got co-ordinates type them into Google maps (just like this: 54.97, -1.61 with latitude first) and make a note of where you’ve got to.

This will test your research skills as well as your maths skills, feel free to use Wikipedia and a calculator.

Destination One

The latitude for the first place is 57.14 divided by the number of universities in Newcastle Upon Tyne.

The longitude is  equal to 10 – 90.65.

Where are you?


Destination Two

To find the latitude of our second destination, take the last two digits of the year the first man walked on the moon, half this number then add 3.32

The longitude can be found by taking the year Newcastle University became independent from Durham University away from the year that the oldest part of the university (the School of Medicine and Surgery) was established and adding 6.52.

What amazing feat of engineering are you near?


Destination Three

For the latitude of our next place, take away 3.1 from the distance that Destination Two stretches in miles.

The longitude can calculated by the number of different countries that students at Newcastle University have come from divided by -2.

Which wondrous forest have we arrived at?


Destination Four

The latitude of this place can be uncovered by multiplying the number of countries that share Destination Three by 5 then adding 1.234

The longitude is equal to the number of reptile species that have been discovered in our previous destination divided by 63 then add 0.053

What amazing discoveries were made here?


Destination Five

The above place is often known by an abbreviation of four letters. If you convert these letters to numbers (eg. a=1, b=2, c=3 etc.) and square the second number, then add 0.197 you will have the latitude of our next  destination.

To find the longitude, convert the first letter of the abbreviation to a number and take this away from 58.274.

Which incredible man made structure are you looking at now?


Destination Six

For the latitude of our final place – where the treasure is buried – you will need to divide the total height of the structure we just saw (in metres) by -46.1.

To find the longitude, simply take away 16 from the number of floors in this structure.

Where is our treasure buried?

If you think you’ve cracked it, either send us an email to stem@ncl.ac.uk or comment below with the six places the co-ordinates led you to!


#TryThisTuesday: Rice Bottle

Our #TryThisTuesday this week, is a challenge for you. The task is to fill a dry bottle with rice and lift it up using only a pencil.

Have a go or challenge your friends, once you think you’ve cracked it (or given up) scroll down to see how we did it!

The Solution

Take the lid off the bottle and push the pencil half way into the rice. Take the pencil out again and push it back in, repeat this about 10 times. Eventually, when you pull the pencil to take it out, the bottle will lift up with it!

This occurs due to the force of friction acting on the pencil and holding it in place. When you first pour the rice into the bottle, it will arrange itself with lots of gaps but every time you insert the pencil you push the rice down making it more compact or dense. Some grains may even break or change shape under impact with your pencil. The more you do this, the greater the surface area of rice that comes into contact with the pencil. This gives a greater force of friction. Friction is a force of resistance between two objects when they  move past each other. The force is so strong at this point that it doesn’t allow the pencil to slip past the rice and so the rice (and the bottle) moves with the pencil as you lift it.

In the Real World…

This works in a similar way to quicksand. If you were to step onto quicksand, you would compact the particles, making them move closer together and lock around your foot, pulling you in. The friction makes it difficult for you to pull your foot out. Don’t worry too much though – quicksand is much denser than a human being so you wouldn’t be able to completely sink in it. As we learnt from our ketchup packet submarine and the oil and water experiment – less dense substances float above denser substances so you would stay above the surface of quicksand!

#TryThisTuesday: Bending Water

This week’s experiment is quick and simple but sure to amaze!

You will need:

  • A balloon
  • An indoor tap
  • Clean dry hair

Method:

  1. Turn the tap on so there is a very thin but constant stream of water flowing
  2. Rub the balloon on your hair until you form static (about 10 seconds, until your hair begins to stand on end)
  3. Slowly bring the balloon close to the flowing water while being careful not to actually touch the water
  4. Watch the water bend towards the balloon!


The Science

When you rub the balloon on your hair, tiny electrons are collected on the balloon. These electrons have a negative charge. This causes the balloon itself to have an overall negative charge, therefore it is attracted to things with a positive charge (opposites attract!). The flow of water has a positive charge, therefore the attraction is strong enough to pull the water towards the balloon.

This is known as static electricity!

#TryThisTuesday: Cup Drop

For the week’s science demonstration, you will need a metal mug or screw, a pencil and string.

cupdrop

  1. Tie one end of your string onto the handle of the mug and the other to your bolt.
  2. Hold onto the screw and pick up your pencil with your other hand.
  3. Lift up the string with the pencil and hold it about half way along the string, on the same level as the screw, allowing the cup hang down.

What do you think will happen from this position if you let go off the screw?

You may think that the cup will simply fall to the floor due to the pull of gravity and the string will pull the screw along, leaving you holding a pencil mid-air.

In reality, nothing (hopefully) hits the floor. You are right in thinking, gravity wants to pull the cup down, but it also wants to pull the screw down too. As the cup begins to drop it pulls the string, pulling the screw in towards the pencil, as the screw is being pulled from two directions it ends up swinging towards them. As it has a bit of weight behind it, it builds up enough momentum to go around the pencil a few times, wrapping the string around it.

So now the string is wrapped around the pencil and the cup still hasn’t dropped. If you try to pull the screw now, you’ll see why. It’s difficult to move the string. This is due to the force of friction. Friction is a force that occurs between two objects, it is the resistance that occurs when they move over each other. As the string is wrapped around the pencil a few times, there is a larger area of string touching the pencil, so a greater force of friction. This keeps the string in place to stop it sliding off, allowing the cup to hit the floor.

Try this out with your family and friends, see if you they can guess it correctly!

#TryThisTuesday: Rock Candy

This weeks Try This Tuesday takes a while, but you end up with a tasty treat!

You will need:

  • A wooden skewer or chopstick
  • Peg
  • 1 cup of water
  • 2-3 cups of sugar
  • A narrow glass or jar

pic

Clip the wooden skewer into the peg so that it hangs down inside the glass and is a couple of centimetres off the bottom.

Put the water into a pan and bring it to the boil. Pour about a quarter of a cup of the sugar into the boiling water and stir until it dissolves.

Keep adding more and more sugar, each time stirring it until it dissolves, until no more will dissolve. This might take quite a while!

When no more sugar will dissolve remove it from the heat and leave it to cool for about 20 minutes.

Pour the sugar solution into the glass or jar almost to the top. Then put your skewer back into the glass so it hangs down and doesn’t touch the sides.1st

Leave your glass in somewhere it won’t be disturbed. The sugar crystals will grow over 3-7 days. Once these have grown you can eat them!finished-product

The Science

By mixing the sugar and water together when they were really hot, you have created a super saturated solution. This means that the water contains much more sugar than in could in normal circumstances. As the water cools back down the sugar leaves the solution (mixture) and becomes sugar crystals again, forming on the skewer.

Supersaturated solutions are used in real life. In a sealed fizzy drink the drink is saturated (full) with carbon dioxide, as the carbon dioxide is put in using pressure. When you open the drink, the pressure of the carbon dioxide is decreased, which causes your drink to be supersaturated as there is much more carbon dioxide dissolved than there would be at normal pressure. The excess carbon dioxide is given off as bubbles.