Tag Archives: milk

#TryThisTuesday: Milky Fireworks

For this week’s experiment you will need to raid your fridge and kitchen cupboards to get some milk, food colouring and washing up liquid.

Pour some milk into a dish or bowl, this works better with full fat milk (we’ll tell you why later!). Add small drops of your food colouring wherever you like in the milk.

20170509_142618

Get some washing up liquid on the end of a spoon or cotton bud and gently tap the spots of food colouring with it. 20170509_143248

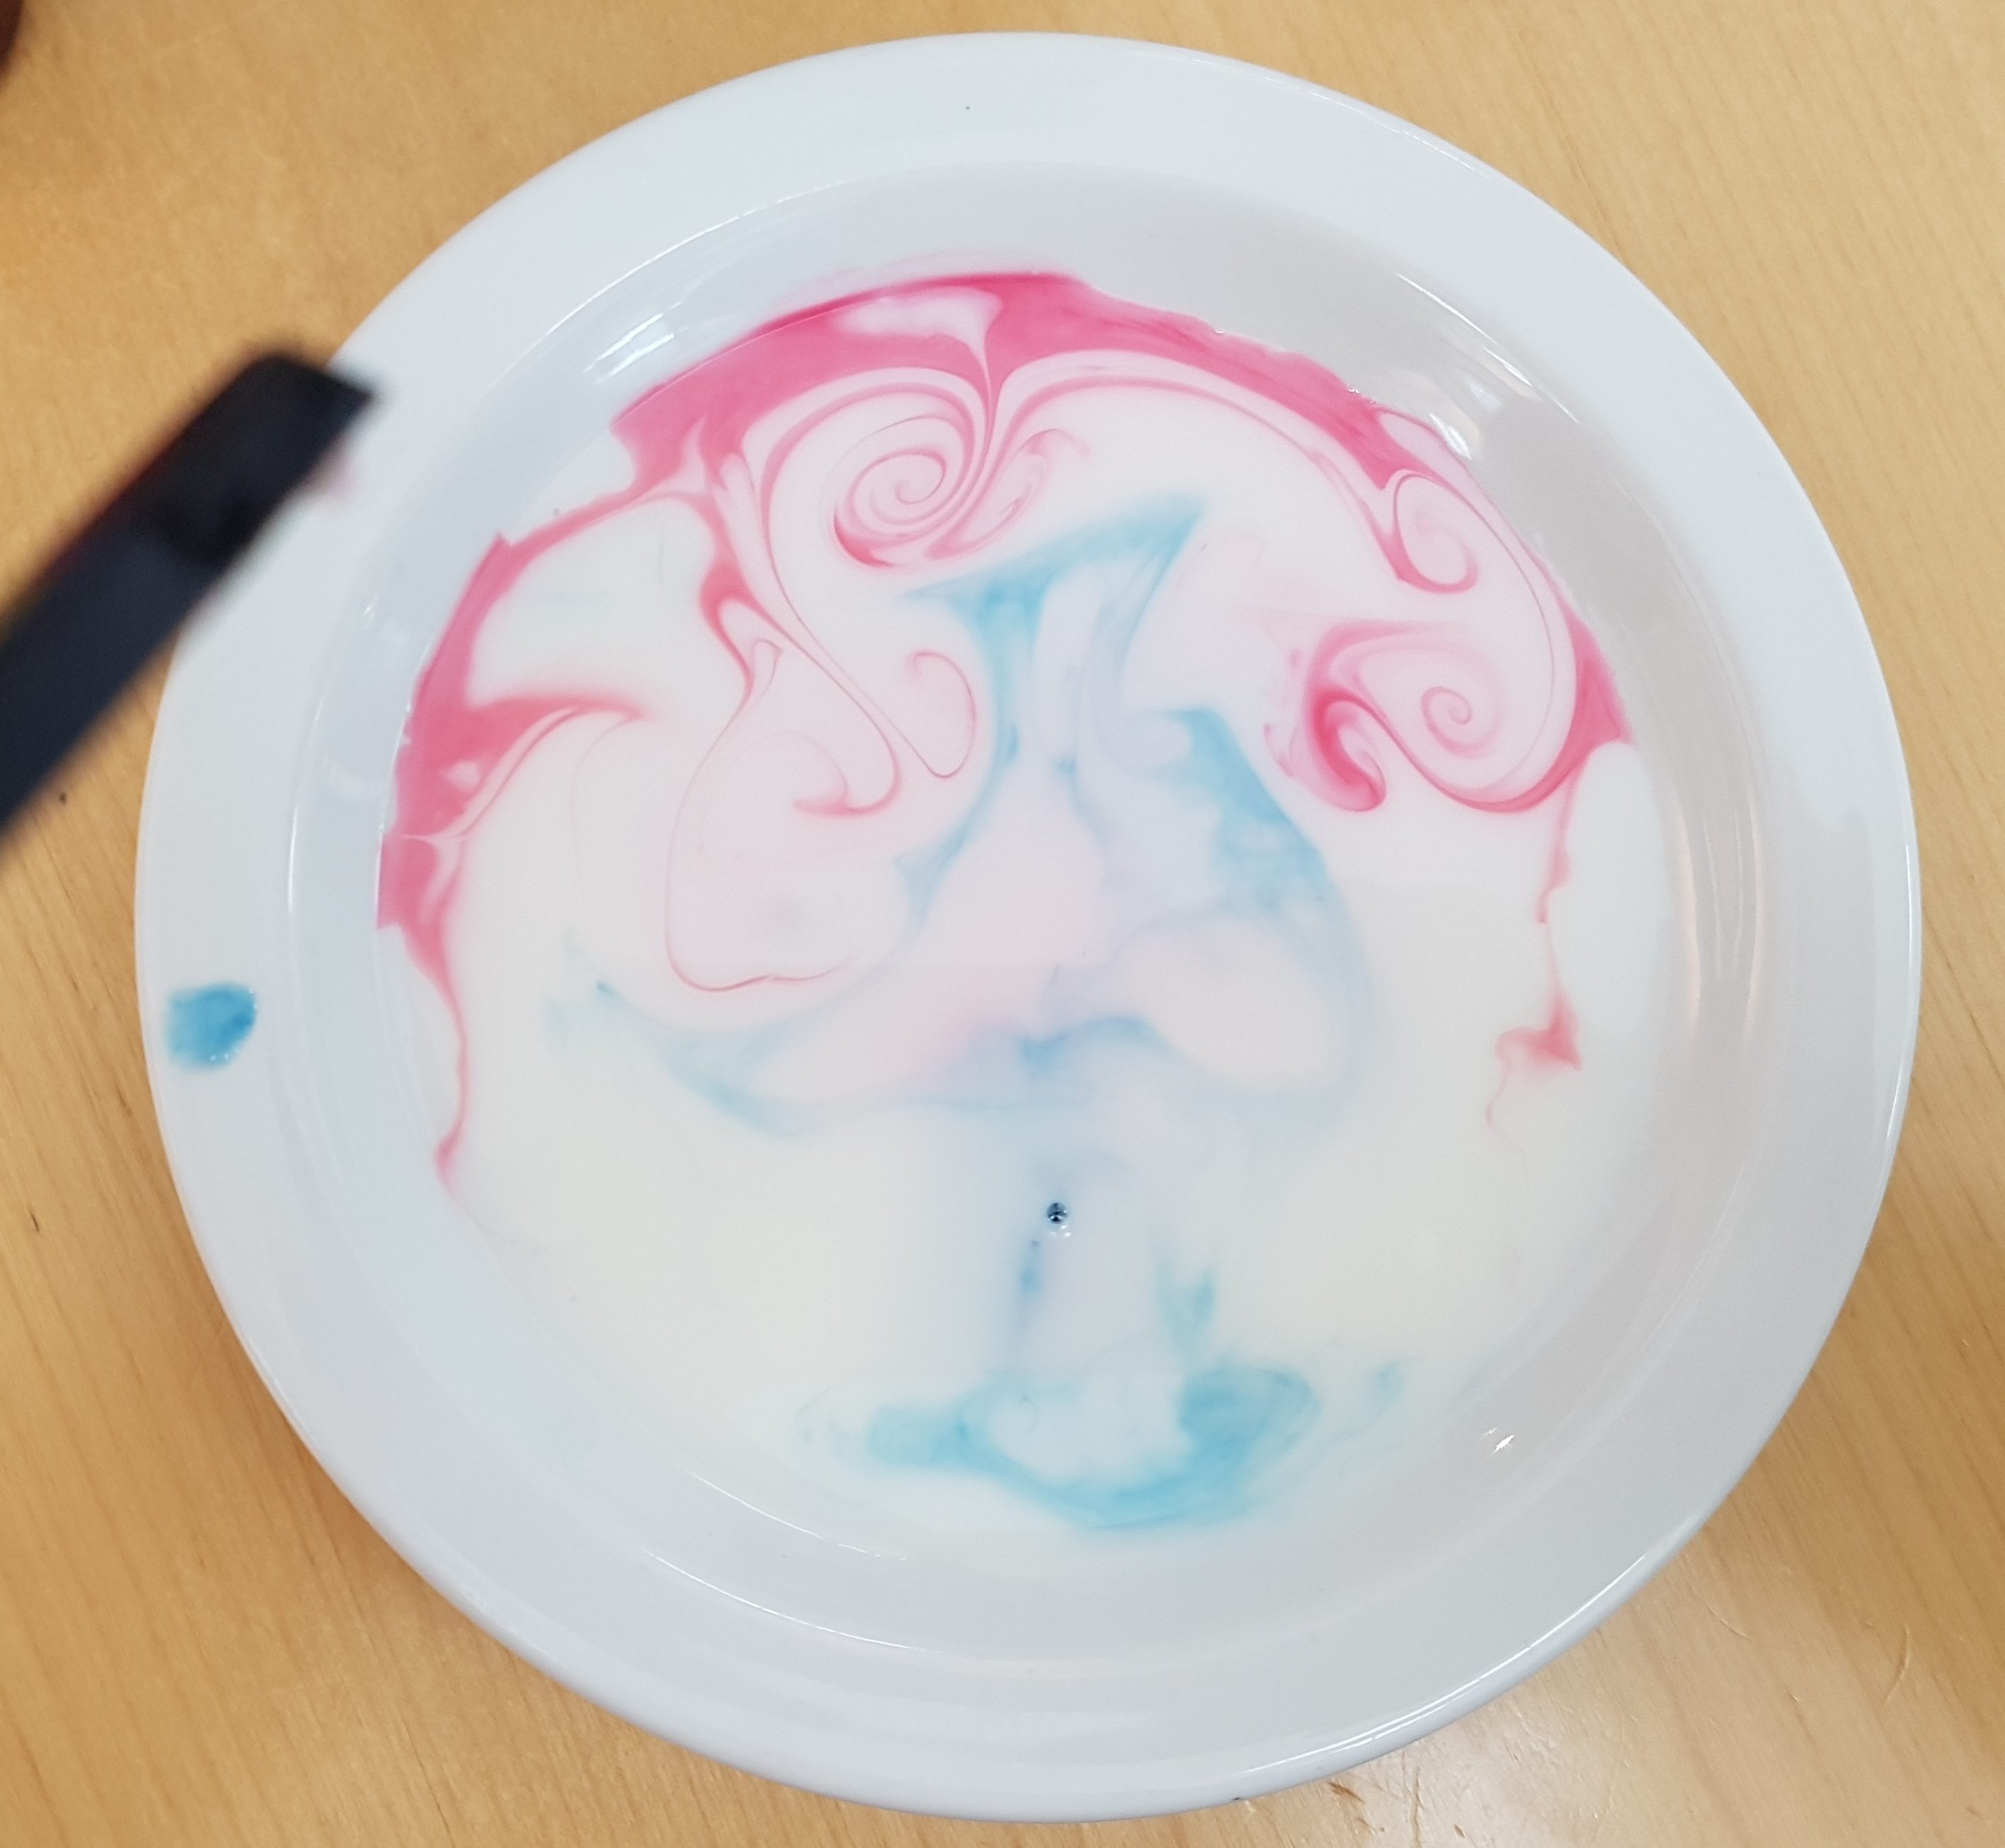
The food colouring should burst out into colourful stars and wavy shapes. This happens because the washing up liquid molecules have a hydrophobic tail, these means that they don’t like water so try to get away from it by seeking fat molecules. The milk (especially if it is full fat milk) contains lots of fat molecules. So the washing up liquid moves around in the milk seeking out this fat and takes the food colouring along with it, creating these funky patterns.

This is why we use washing up liquid to clean our dishes. The hydrophobic, fat-loving parts cling to grease and fat. The head of the washing up molecules are hydrophilic, meaning they love water. The heads cling to the water and the tails cling to the grease, this pulls the grease and dirt from your plates and washes them away with the water, giving you sparkly clean dishes.


#TryThisTuesday: Homemade Ice cream!

This week we’re making ice cream but instead of using an ice cream machine, we’re going to make it using science!

You will need:

  • Two Ziploc bags – one small, one large
  • 100ml double cream
  • 50ml milk
  • 40g sugar
  • Vanilla extract
  • Ice
  • Salt

p1020737-2

  1. Measure out the milk, cream and sugar and place them into the smaller Ziploc bag.
  2. Add a dash of vanilla extract  then zip up the bag.
  3. Fill the larger bag 2/3 full with ice.
  4. Pour a generous amount of salt onto the ice.p1020738-3
  5. Making sure the small bag is tightly zipped up, place it inside the bigger bag with the salt and ice.
  6. Gently shake the bag for 5-10 minutes, be careful not to rip the bag!
  7. Leave the ice cream to sit inside the ice and salt bag for another 10 minutes
  8. Open up your bag and enjoy!

p1020740-2
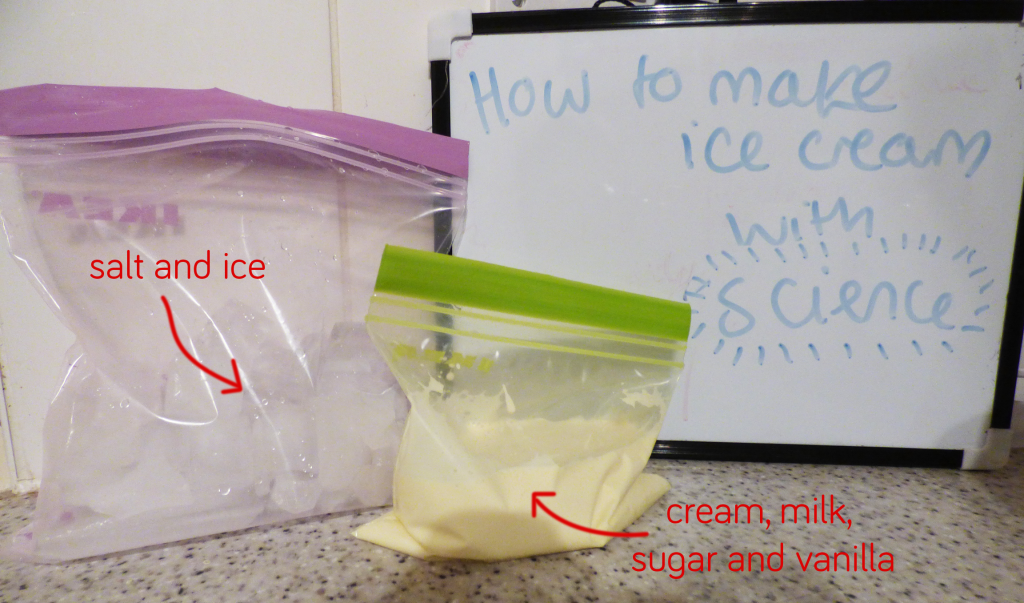
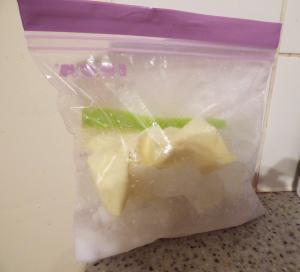
Try making different flavours of ice cream by swapping the vanilla extract for strawberry or mint extract or even cocoa powder for chocolate ice cream. You could also try adding chocolate chips.


How does this work?

Water, as I’m sure you know, freezes to make ice at 0oC. But your freezer at home is around -18oC, so how are we making the ice cold enough to freeze your creamy mixture? The secret is in the salt.

Ice is in a constant state of melting and refreezing and melting and refreezing. When we add salt, the salt particles block the path of the melted ice, stopping it from freezing back on to the rest of the ice but ice can still melt. Therefore more ice is melting that freezing.

Now you may be thinking that surely if the ice is melting that means it is getting warmer? It’s actually the opposite. For ice to melt it needs to break the bonds that are formed between the H2O molecules. This breaking requires energy which it gets in the form of heat. When a molecule melts away a bond is broken, taking heat away from the surrounding, causing the temperature to drop.

This is also the reason that salt is put on icy roads – it stops water forming ice.

#TryThisTuesday: Making Plastic from Milk and Vinegar

plastic

Yes – you really can make plastic from just milk and vinegar!

First of all just measure out 120ml of milk (it can be any type, we used semi-skimmed). Either heat your milk in your microwave or in a pan on the hob. It needs to get to around 50 degrees C so 1 or 2 minutes in the microwave should do it.

Next add 2 tablespoons of white distilled vinegar to the hot milk and stir – you should see clumps start to form.

Sieve the mixture to remove the excess liquid. Remove even more liquid with a paper towel or piece of kitchen roll.

You should be left with a clump of plastic which you can mould and shape as you please. It should begin to set in an hour.

image4

The Science

Plastics are polymers meaning they are made up of long chains of repeated molecules (called monomers). The monomer that we have used is called casein and is found in the milk. When the milk is heated the casein molecules unfold. Adding the vinegar causes them to reorganise into a long chain polymer – making it a plastic.

It might look quite different to the plastics you’re used to today but up until the end of World War II in 1945, casein plastics were commonly found.