How to Find the Most Important Pages on Your Website

If you attended our Planning and Writing Web Content training you’ll recall we cover the topic of core pages during the day. These are the most important pages on your website.

We know that more than a few people struggled to identify these core pages on their own sites. Especially once they’d left the cosy confines of our training sessions, with one of our content officers on hand to help out…

It’s not an easy concept to master as many of our websites are split into sections that could arguably all be seen as important. But here’s a method you can easily follow:

Start with a purpose

Traditionally, websites were created at the University because there was a service, a school, institute, centre or whatever. Sites existed simply because they could – so they often didn’t start with a well-defined purpose.

No one stopped to ask ‘what are we trying to achieve with this website?’

The downside to this is if websites don’t have a defined purpose, then they can literally host ANYTHING. Sorry for shouting, but it’s true. Thousands of pages of unrelated content, hundreds of pictures, videos, power point presentations, blah blah blah – you name it, we’ve seen it.

It’s better to focus on your audience’s wants and needs.

So we have a specific undergraduate website, rather than a Marketing and Student Recruitment site with undergraduate content.

Create your site purpose

  1. List your website users/audiences. For example potential staff, media, international students, researchers.
  2. List the tasks your users come to your website to do. For example contact staff, apply for a course, check event times.
  3. Think about the business goals your website is supporting. For example, recruit staff, encourage collaboration, share news, advertise courses.

These lists are your new BFF and invaluable, they’ll form the basis of your site purpose statement.

Identifying your core pages

The next step is to identify those core pages that will support your site purpose.

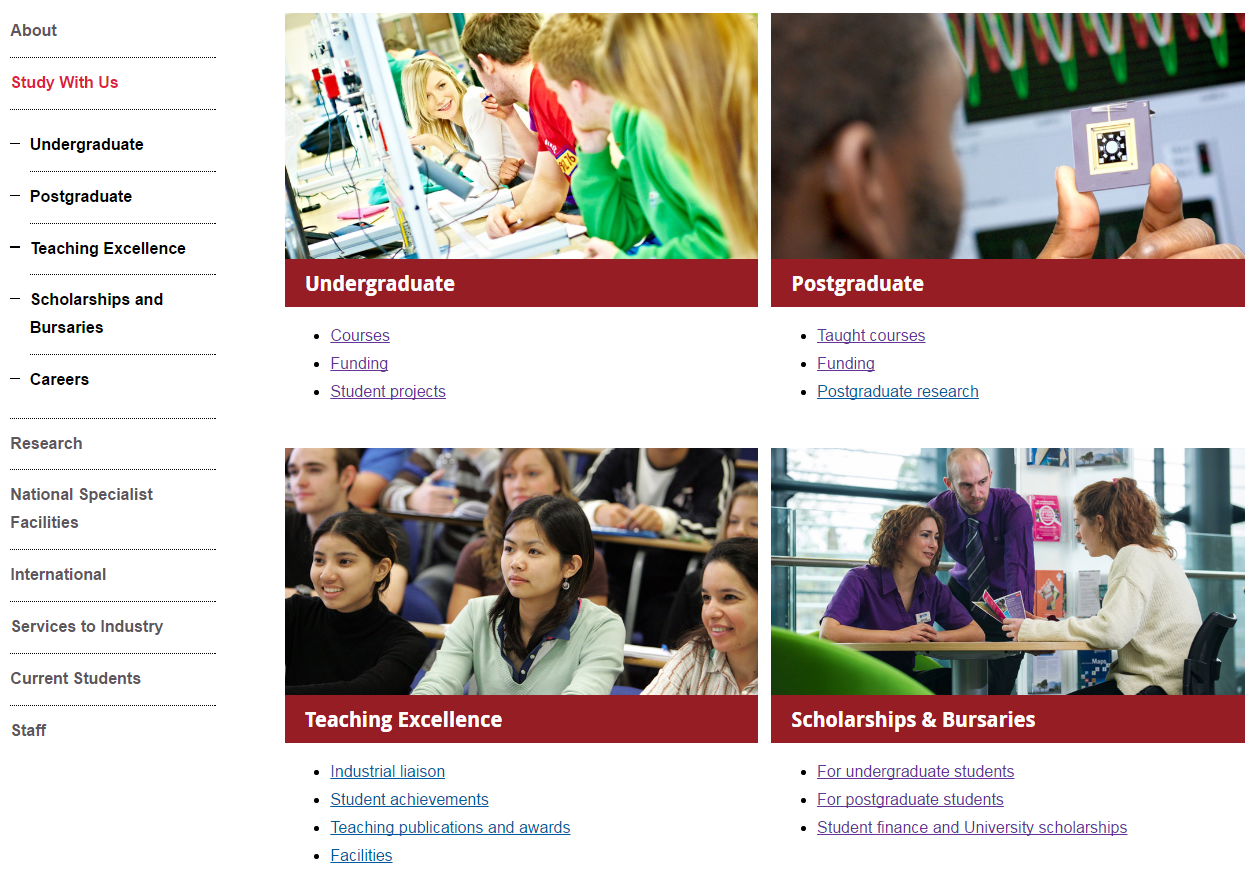
Start with your list of user tasks and your list of business goals. Your core pages are those where these two elements meet – where your user can complete a task and you can convey your message.

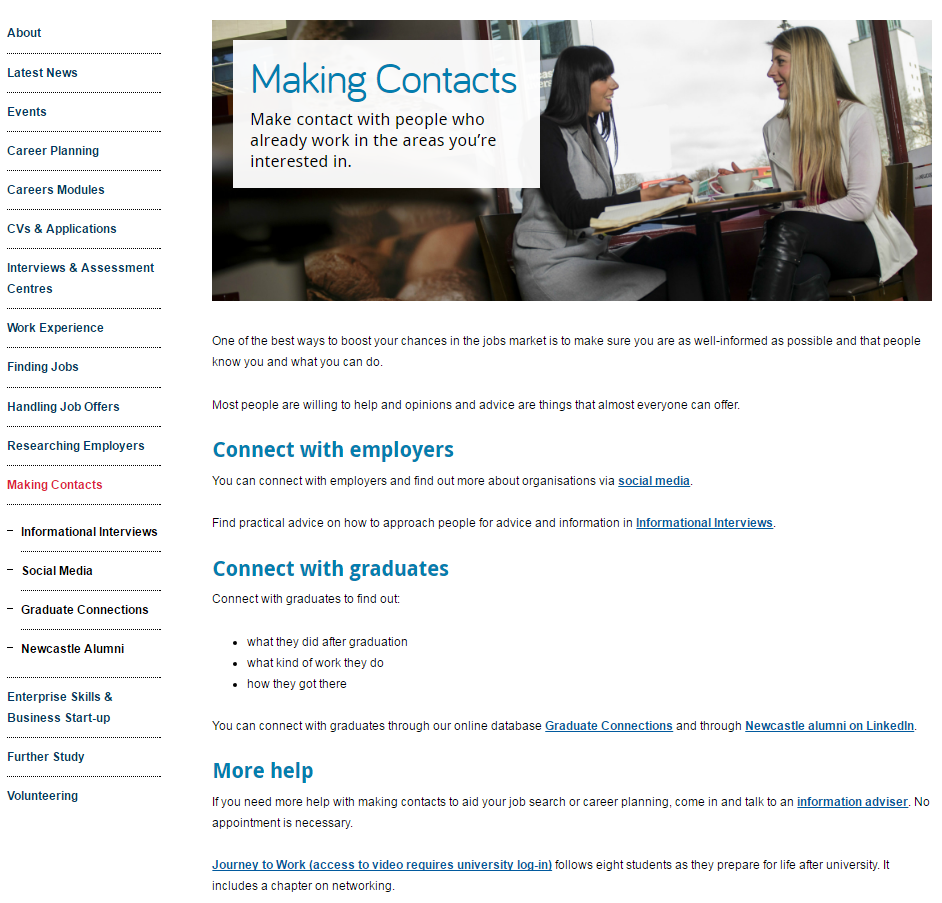
For example, on a school site users often want to contact staff. One of our University-wide business goals is to enable collaboration, so our staff profile pages are core pages.

Another core page example would be a page about a CPD (or any) course. Users want to know what, where, when and the cost – we want them to apply, contact us, sign up – our business goals.

This exercise combined with data from analytics to show your most visited pages can help you identify your core pages quite easily.

Now you know…get going!

Set aside a few moments to make those lists, and use them to identify your core pages.

We can even help you plan content for these VIP pages. Download a core page template from our website. It’s straightforward and quickly helps you focus on what should/shouldn’t be there.

You can even use your core pages to prioritise what work to tackle next on your website.

Let your core pages help you decide what’s important and what’s not.

Once you know who you’re creating your website content for, and understand what they want to do/know – focus effort on these core pages and by default, you’ll create a better website.

Related posts

How to Use the Core Model to Improve Your Web Content

Share this post:
Share

Best practice example: mastheads

Each batch we put through the go live process has examples of excellent content. In this new series of blog posts, we’ll use these to highlight best practice examples.

Last time we looked at using grid boxes for section openers. This time I want to show you three different examples of best practice for mastheads.

Mastheads

Like grid boxes, mastheads are used for section openers. These are pages that give an introduction for a particular section (eg Research, Study with Us, About Us).

They help create visual hierarchy, and so should only be used for top level sections of your site (the pages that appear in the side menu when you’re on the homepage).

Example one: Accommodation

masthead on the Accommodation website

This example is from the Accommodation website. It uses a masthead page to give a brief introduction to the section, and point users towards some key pages.

Mastheads work well in places where you want to give a teaser for the section, but not go into too much detail.

At a glance, users can see how to get to key information.

The image gives a visual clue about the content of the section. It shows students who look like they really do live in the accommodation, rather than visiting for the first time.

We’ve prioritised the information, providing links to some of the core pages for current students – how to extend your stay, swap or transfer your room, and what to do at the end of your contract.

We’ve also added a sub-heading to introduce a sub-set of key information: how the Accommodation service can support students after first year. This quickly introduces a new topic that they might not have heard about, and shows them where to find more information.

Example two: Careers

masthead on the Careers website

This longer example is from the Careers website. It uses a masthead page to give a more comprehensive overview of the section.

The image links very clearly to the title of the page. The shape of the photo also leaves enough space for the title box.

The sub-headings give a clear indication of how the section can help the user, and help to direct the user to appropriate information quickly and easily.

Although there is more text in this example, the page has been structured in a way that supports it. There are clear links to all pages within the section and the sub-headings work well to help users scan for information.

Hyperlinks are also used very well in this example. They’re placed at the end of sentences, which supports visitors using mobile devices. They’re not all clumped together, which would make them difficult to use on a mobile.

Example three: Postgraduate

masthead on the Postgraduate website

This last example is from the Postgraduate website. It uses a masthead page to support longer text and more information.

Mastheads can also be a good option if pages in the section have very specific information, and you need a catch-all page to introduce key information that won’t appear on the other pages.

There is a lot of text on this page, but users are directed to core pages by two, clear hyperlinks. Scanning is supported through short paragraphs, and bold phrases.

To improve scannability even more, we could introduce some sub-headings and bullet lists to break up the text, add white space and support scanning.

You can also support the text by using other content pieces, such as images, videos or quotes. The quotes in this example help to break up the text, and they’re relevant to the main content. They help to quickly support the message of the section.

Learn more

You’ll learn how to create and manage these pages in our T4 training sessions.

If you’re stuck, we can help you work out what format will work best for your navigational pages.

Have a look at :

Share this post:
Share

A Quick Guide to…Dates and Times

We’ve standardised how we write dates and times on our sites. This makes it easier for visitors to work out when things are happening.

It also makes scanning a page for key information much quicker.

In the latest of our Quick Guide series, here’s a timely reminder of our best practice for dates and times:

Dates

Dates have no punctuation.

The order should be day month year eg Thursday 4 August 2016.

A date range should look like this:

  • 2011 to 2012
  • Friday 28 February to Monday 3 March

Sometimes space is an issue, eg in tables. In this case, it’s fine to use truncated months eg Jan, Feb, Mar.

We’ve also set standards for writing decades and centuries:

  • 1930s not 1930’s
  • 20th century not twentieth century

Times

We use the 24 hour clock.

This makes times accessible to international audiences.

Here are some principles for presenting times:

  • 17.30 not 5:30pm or 1730hrs
  • 00.00 not midnight
  • 12.00 not midday or 12 noon

For periods of time, you can use a hyphen between start and end times. For example, 10.00 – 11.30

Share this post:
Share

Best practice example: grid boxes

We’re often asked for examples of really good websites. The thing is, each site is different, depending on the type of site, their users, and their needs. Websites constantly evolve due to changing user needs, business goals or time-sensitive messaging.

So there’s not really one static best practice example that ticks all the boxes for everyone.

What we can do is point you in the direction of really good content usage to take inspiration from.

Each batch we put through the go live process has examples of excellent content. In this new series of blog posts, we’ll use these to highlight best practice examples.

Here’s a couple of examples of best practice for grid boxes from recent Go Mobile batches.

Grid boxes

Grid boxes are used for homepages and section openers. These are pages that give an introduction for a particular section (eg Research, Study with Us, About Us).

They help create visual hierarchy, so users can easily see where they are in your site. Because of this, they should only be used for top level sections of your site (the pages that appear in the side menu when you’re on the homepage).

boxes on the Study with Us section of the Malaysia campus website

Newcastle University Medicine Malaysia Study With Us section

This example is from Newcastle University Medicine Malaysia. It uses our ‘top task box – dark’ content piece.

This is basically four links, but presented in a visual, structured way. Visitors can immediately see what’s on offer. This is a good option when you want to give a quick overview of different services, for example.

For this Study with Us section, it was important that we had clear pathways signposted for four key groups of users: undergraduates, postgraduates, international students, and parents.

We wanted each group to feel catered for, supported, and have easy access to pages that would help them.

You can have some text above grid boxes. Keep it short, and don’t add any if it’s not needed. The boxes should take centre stage, and do a quick job of moving users on to core pages.

boxes on the Study with Us section of the Mechanical Engineering website

Mechanical Engineering Study With Us section

This example is from the School of Mechanical and Systems Engineering. It uses our ‘top task box – light’ content piece.

This box type gives you the option to include some hyperlinks (max. 4) below the image and main link. It’s a good option for pages where you know there are several core pages that you want to highlight.

In this example, we wanted to signpost prospective students towards the undergraduate pages, but knew that they’re likely to want to know about courses and funding in particular.

Light top task boxes are great for larger sections where you want to direct users explicitly to core pages.

Think about what the key messages for the section are, and what your user is looking for. Work out what are core areas (give them boxes), key pages within these areas (give them links), and what is additional information (don’t link them from your section opener).

Your additional information pages (in this case, the Careers page) will always be available within the section via the menu.

Learn more

You’ll learn how to create and manage these pages in our T4 training sessions. And you’ll find out how to identify your core pages in our training on planning web content.

If you’re stuck, we can help you work out what format will work best for your navigational pages, and help you with setting up grid layouts.

Have a look at :

Share this post:
Share

Decluttering Your Website: How to Prepare for Go Mobile

As we embark on phase 2 of Go Mobile, eager editors across the University are asking when their site will be going through the process. We’re thrilled that our editors are keen to get started.

We’re still finalising the schedule for phase 2. In the meantime, there’s plenty you can do to prepare your site for Go Mobile. In fact, the more you do beforehand the easier the process will be.

Delete, delete, delete

One of the most useful tasks you can do to prepare for Go Mobile is to delete any clutter from your site. Delete old versions of documents, images and logos that you’re no longer linking to in your content.

Similarly, delete old news and events items that are no longer relevant. If this information is still needed, rework it. For example, you could write a review of an event that has already taken place.

Check the currency of your content and consider whether it’s still relevant.

If content is out of date and no longer relevant to your site purpose it’s best to delete it. For more information about how out of date information can harm your website read Jane’s blog post: Why Deleting Old Stuff on Your Website is Good.

Check the accuracy of your content

It might seem like a dull task but ensuring that your content is accurate is crucial to the credibility of your site.

Users will be less likely to trust what you say if your content is littered with spelling and grammar mistakes, or if a link leads to nothing but a dead end. As pointed out by Kara Pernice from the Neilsen Norman Group, a link is a promise.

Tools like Siteimprove can help to find broken links and misspellings on your site.

Improve readability

The easier content is to understand the more accessible your message will be to your target audience.

Online readers are more task-focused and tend to scan content rather than read it all. Smaller screens increase this behaviour. So it’s essential to optimise your content for a smaller screen so that users can understand your content on any device they view it on. Part of this involves deleting unnecessary words.

For advice on optimising content for mobile take a look at our top five tips for writing for the web. An effective tool for identifying the readability of your writing is the Hemingway Editor.

Source new assets

As you’ll find out when you attend our Website Media Management training, images need to be larger in the new template. This is so that they retain their quality across all devices.

The majority of images that currently exist on your site won’t be big enough to work in the new template. Sourcing the original images will therefore give you a head start for when your site goes through Go Mobile. Check our Go Mobile Demo site for an idea of the new image sizes.

Go Mobile is an opportunity to check that your imagery is effectively supporting your messages. For guidance on sourcing imagery read Jane’s blog post on improving your website images and videos. For advice about editing images read Emma’s post: Editing Images for Use on Your Website.

Insights into Go Mobile

Find extra tips from editors who have already been through the Go Mobile process in our series of guest posts. Fiona Simmons from the Institute of Social Renewal talks about her experience of Go Mobile. Ivan Lazarov from the Press Office shares his reflections on the Go Mobile training.

Summary

So that’s a whistle stop tour of how you can prepare your site for Go Mobile. The most helpful thing you can do is to review your content. Make sure it will be readable on a mobile phone and delete old content and assets that are no longer relevant to your messages. Go forth and declutter!

Get in touch

Let us know in the comments if you have any questions about preparing your site for Go Mobile.

Share this post:
Share