The Role of the Go Mobile Project Manager

The aim of the Go Mobile Project Manager is to make everyone’s job as straightforward and focused as possible.

It’s no secret that a website development project is a complex process. When you’re managing client expectations, conscious of workloads of different people and trying to meet deadlines, it can feel like you’re trying to juggle chainsaws with one hand tied behind your back. That’s why good project management is essential for success.

We achieve this through good:

  • communication
  • planning
  • teamwork

Good project management

Here are some project management tips that help to keep the project on track.

Kick it off right. Work hard to get parameters and expectations agreed at the start.

Communicate. Agree milestones and deadlines throughout the project and keep everyone informed of progress.

Be flexible but realistic. If things change try to accommodate them but not to the detriment of agreed deadlines.

Standardise on what works well. If a particular approach saves time or makes the content build easier then make it part of the workflow.

Go Mobile

Your Go Mobile project manager will contact you well in advance of the start of your site’s development. This conversation alerts you to the resources required, timescales involved and process of change. We’ll ask you to consider:

  • who will be involved
  • if there’s any redundant pages that can be deleted
  • sourcing new photography
  • booking training on writing and planning web content, and how to use the new content management system

This is a good opportunity to devote some time to looking through your website and making decisions about structure and content.

The project manager for your Go Mobile development will be your point of contact and the person who will steer your site through the process. They will be like a GP who checks the heartbeat of the project at regular intervals. If there are any high blood pressure readings they’ll make sure they’re treated accordingly. The goal is to deliver a clear and useful website for your users.

Share this post:
Share

Big and (now) Beautiful

The Careers website is a vitally important part of the University’s web presence, and we’ve just finished a huge, six month long Go Mobile redevelopment.

Careers website homepage

New home page

It’s a big University service with multiple audiences, including:

  • prospective and current students
  • parents
  • old and new graduates
  • our academics and staff
  • employers

And these users have any number of different tasks they want to complete. From checking opening times, finding out about Recruitment Fairs or CV workshops, psychometric tests, researching occupations, and advertising jobs….

When one becomes four

The site was so big it’s now four separate websites. Why? Because like it or not, big isn’t normally beautiful on the web.

‘Big’ often means content has simply grown over the years, with more information added, and added…..and added. Simultaneously, moving or navigating around a big site is generally harder too. (And yes you’ve guessed, it’s even harder to navigate on a smaller mobile screen.)

If not diligently reviewed, big websites often suffer with duplicated or out of date information. More pages are added, so more navigation is needed. It’s a vicious circle.
But by the very nature of this information-led service, the Careers website had to hold a massive amount of content.

OK, but surely the most popular pages were easy to find? Well…no. it was big you see, so really hard to find some good stuff.

Alright, but it looked like it was part of the University right? …Oh dear.

The return of the 1980s

It’s fair to say the old Careers Service website was looking a bit….well, 1980s. And nothing like the rest of the University online. It was seriously overdue for a redevelopment!

Old careers homepage

Old home page

Because the site used an old template, they were also cursed with some of the longest webpages ever seen on planet earth. I kid you not.

This one example had a word count of 1,607. That’s FIVE A4 pages worth of content on one webpage.

Before:

Screenshot of old careers page which was very long

Old CV page

After:

Screenshot of new careers page which is much shorter

New CV page

While some pages are still quite long, the content is easier to scan read and navigate around using mobile.

So our Go Mobile project actually involved a major information architecture evaluation and wholescale restructuring, audience identification, and four separate website rebuilds.

Followed by extensive re-writing, editing, layout and format changes.

Oh, and then we made it responsive for mobile.

Now we have four new websites. Our external sites now boast tailored, audience specific content and fully responsive templates:

And information for Staff? Well that’s now an internal website of course (login required).

Share this post:
Share

Editing Other People’s Content

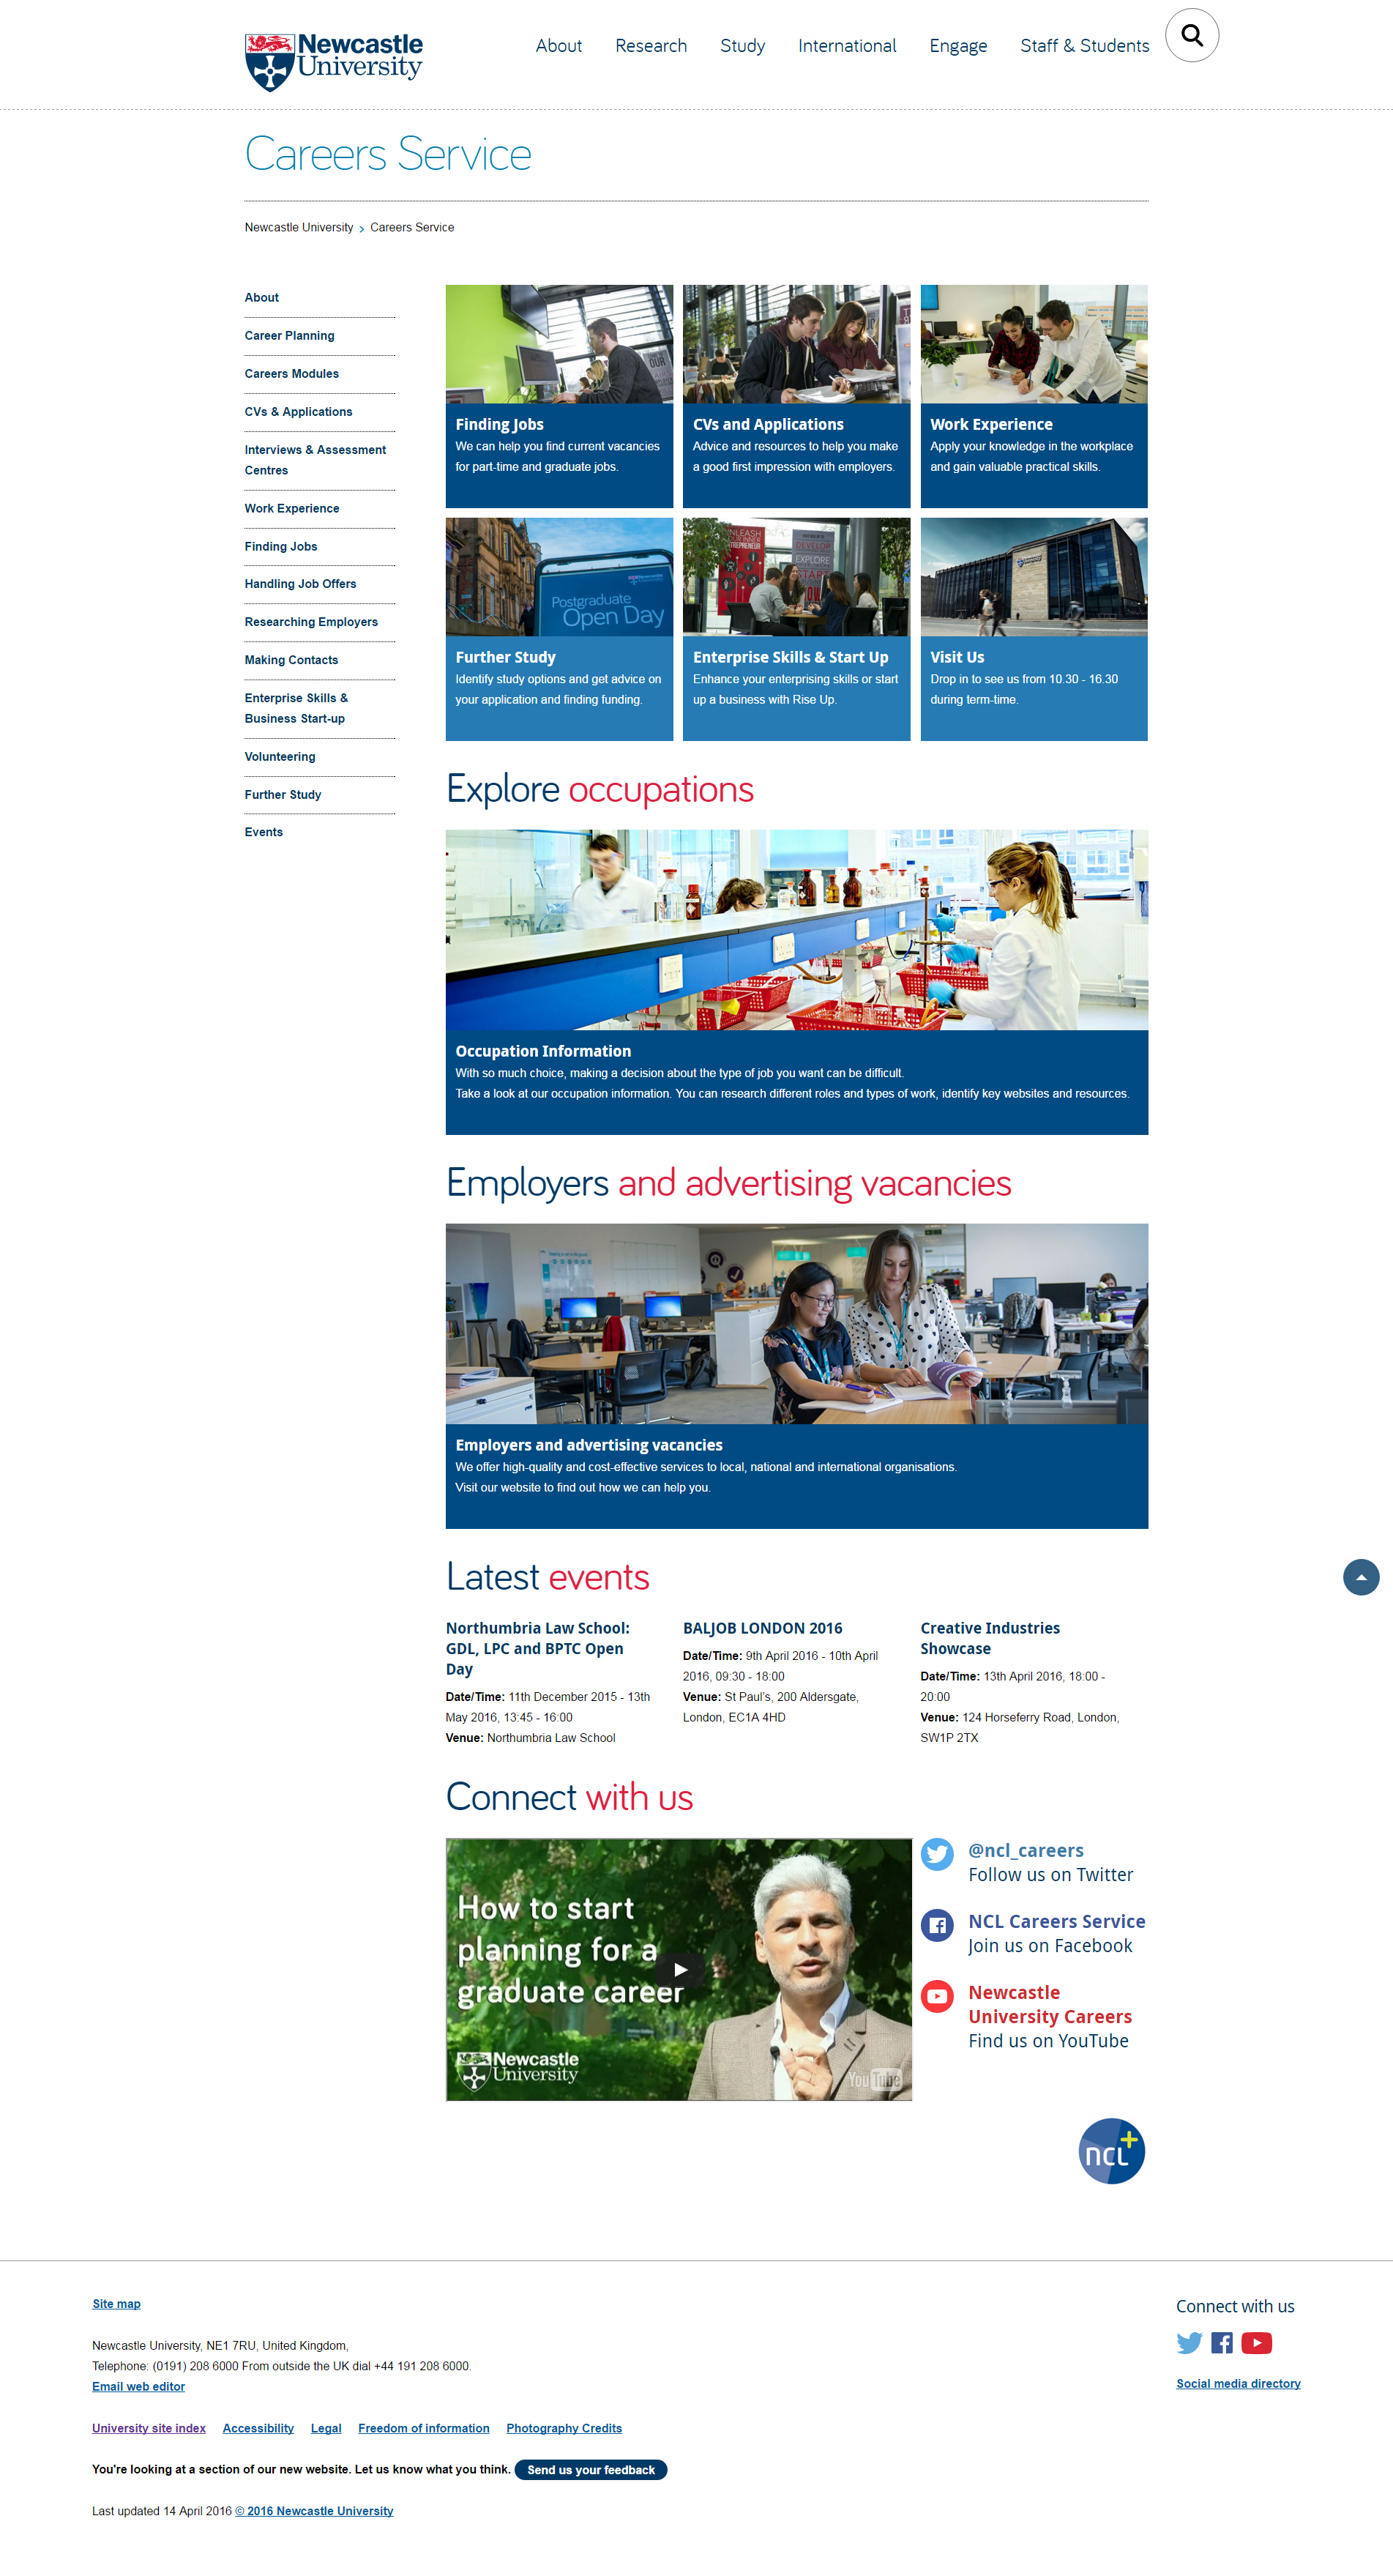
So you’ve attended our Writing for the Web training and you know all about the inverted pyramid and writing concise, scannable web content. Now you’re faced with a request to add some new content to the website…

It’s a wall of text – full of long sentences, a lot of jargon and it’s about a topic that you don’t have any subject knowledge of. A feeling of dread washes over you, questions start racing through your mind. How will I prioritise the information? How can I shorten sentences when I don’t really understand them? What are the important points that I need to emphasise with bold or a bulleted list?

In our recent Writing Web Content training there were a few questions about how to edit other people’s content – particularly how to prioritise and edit complex content.

In Corporate Web Development (CWD) we face this challenge on a daily basis. In this post I’m going to share my top five tips for editing other people’s content.

1. Find out the purpose of the content

For any webpage you create you need to know why you’re creating the page and how it fits into your site purpose.

You need to be able to answer the following questions:

  • who am I creating this page for? (your users)
  • what do the users want to find out? (their questions/tasks)
  • what does the organisation want the user to do after reading your content? (business goals)

Without these answers you’ll struggle to edit the content so it’s important to speak to the subject-expert or the person who provided the content.

Discuss with content author

Set up a meeting with, or speak to, the author of the content so that you can find out the purpose of the content.

initial face-to-face or verbal briefings need to give content creators an understanding of where their work will sit in terms of the wider project and give them the chance to ask initial questions

Jackie Kingsley, Sticky Content

Armed with the knowledge of who the users are, their tasks, and what the author wants to achieve, you’ll have the confidence to start prioritising and reconfiguring the content for the web – and deleting any unnecessary words!

It’s also important to get the agreed content purpose in writing and send to all involved. This acts as a written record so that you have something to refer to when editing and it makes it clear and transparent for everyone involved.

2. Agree deadlines

It’s important to agree on specific deadlines.

It’s impossible to keep your content production slick and manageable without well-enforced deadlines

Rhiannon Jones, Sticky Content

There might be deadlines for:

  • completing a first pass edit and sending content back to the author
  • the author and stakeholders to send amends
  • the author and stakeholders to sign off content
  • content to go live on the site

Again getting deadlines in writing (even if it’s just an email) gives you a written record to refer back to. Then, if additional content is needed or if the author misses the deadline for sign-off, the record shows there will be an impact on content going live.

3. Take ownership of the content

When editing other people’s content all the rules of writing for the web still apply. Often as editors we can feel nervous about changing someone else’s words but it’s important not to fall back into the role of a content-putter-upper.

You’re the one publishing the content so it’s important that you take ownership of it. Remember you will probably know more about writing for the web than the author so it’s up to you to edit the information so that it’ll work across devices.

Proofreading

If possible, get someone else to check the content after editing and before sending back to the author.

In an ideal world no one will proof copy they have created. That’s because it’s extremely difficult to see your own mistakes

Jackie Kingsley, Sticky Content

Again, if you’ve got the purpose of the content from the author in writing you can use this at the proofing stage.

Content can also be checked against the written brief during the QA process

Jackie Kingsley, Sticky Content

4. Ask the author to check for accuracy only

When you send the content back to the author for sign off, ask them to check for accuracy only. It’s important that the facts are correct, which may have been misinterpreted through the nature of editing. However, you don’t want lots of opinions about style, tone or format as the content has already been edited for the web.

I often find it helpful to compile a document of any content gaps or questions that I’ve come across while editing the content. You can also use this document to explain any editing choices you’ve made and why the edited content works better for different devices. Again, a written record makes everything clear and transparent.

5. Schedule time to review content

Often content is edited and polished before it’s published but then after it goes lives it’s left to languish on the site. Links become broken and content becomes out of date – resulting in frustrated users and the credibility of the site being questioned.

So whatever the content you’re editing, however small it might be, make sure you schedule in time to review it. Speak to the author about whether it is still relevant to their business goals and their users’ tasks.

Share your tips

And that’s my whistle stop tour of editing other people’s content.

Let us know in the comments if you’ve got a challenging editing situation, or share your tips for editing other people’s content.

Further reading and references

Related posts

Share this post:
Share

Online Task Management with Trello

If you’ve been to one of our Go Mobile training sessions you’ll have already been introduced to Trello. For the rest of you, today’s your lucky day. I’m going to give you an overview of this productivity tool and tell you about some of the ways we’re using it in the web team.

What is Trello?

Trello is quite simply an online task management tool. It’s flexible and can be used in many different contexts – just look at Trello’s inspirations board for evidence of this.

The basics

There are three essential things to get your head around before you start using Trello:

  1. Boards – every project you create in Trello is represented by a board
  2. Lists – you organise your project and its various stages using lists
  3. Cards – create a card for each task in your project. You can move cards around your lists as work progresses

To learn how to use Trello, check out their getting started guide.

Trello basics; boards, lists and cards

How we use Trello in the web team

In the web team we use Trello for collaborative task management. Here are a couple of examples of the variety of things we use it for.

The editorial calendar

We have a board set up as an editorial calendar for this blog. The lists map to stages in the production of a blog post. They are:

  • post ideas
  • planning
  • writing
  • ready for editing
  • scheduled

Each card has two people assigned to it; one writer and one editor. We use card comments to identify who is in which role. We archive cards when the post goes live.

The calendar power-up allows us to get a visual overview of what’s coming up on the blog.

Workload planning

We have one board used by the whole team for planning tasks that we identify as business as usual. As project requests come in they’re added to a list of tasks to assign.

In our weekly team meeting we review the board, and assign cards to individuals. We have one list per month so we can see what work needs to be done when.

We use checklists, comments and attachments to collaborate on tasks in Trello. This helps to cut down email and allows input from technical and editorial team members.

Conclusions

Trello helps us to keep an overview of everything the team is working on and to increase transparency. It’s easier to see the progress on a project when work is in a shared environment rather than trapped in individual inboxes.

If you’ve been inspired by this post, join Trello to kick-start your collaborative task management.

Share your experiences

Are you already using Trello? Let us know in the comments and share your tips and tricks.

Share this post:
Share