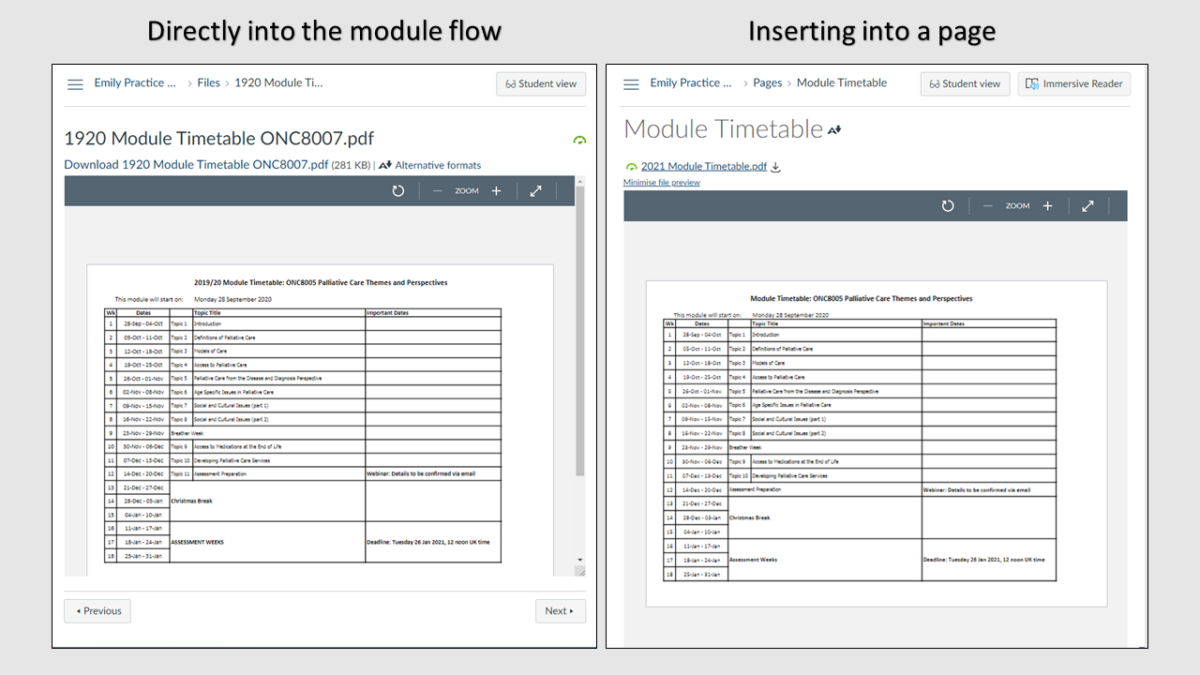
As the e-learning modules in FMS are now going live, the team have been looking at ways to manage uploaded files in Canvas.
There are two main ways to add files to your module flow in Canvas:
Directly into the module flow
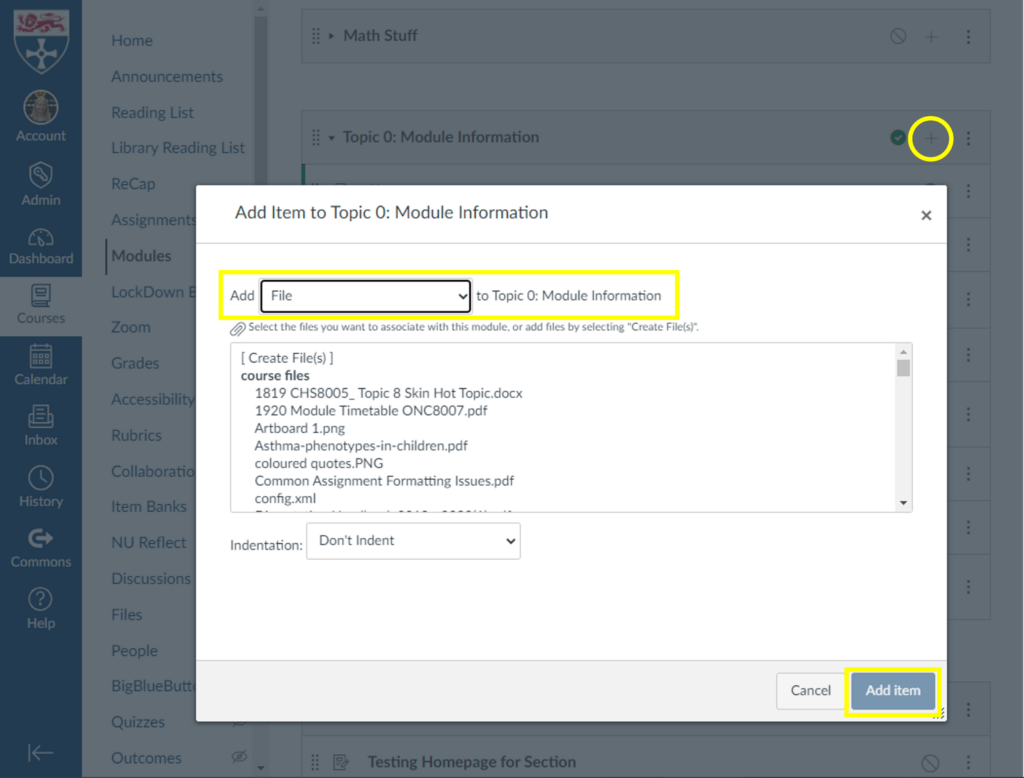
This method is by far the easiest and quickest way to add a file to your course, and is a great choice if the file will not require updates.
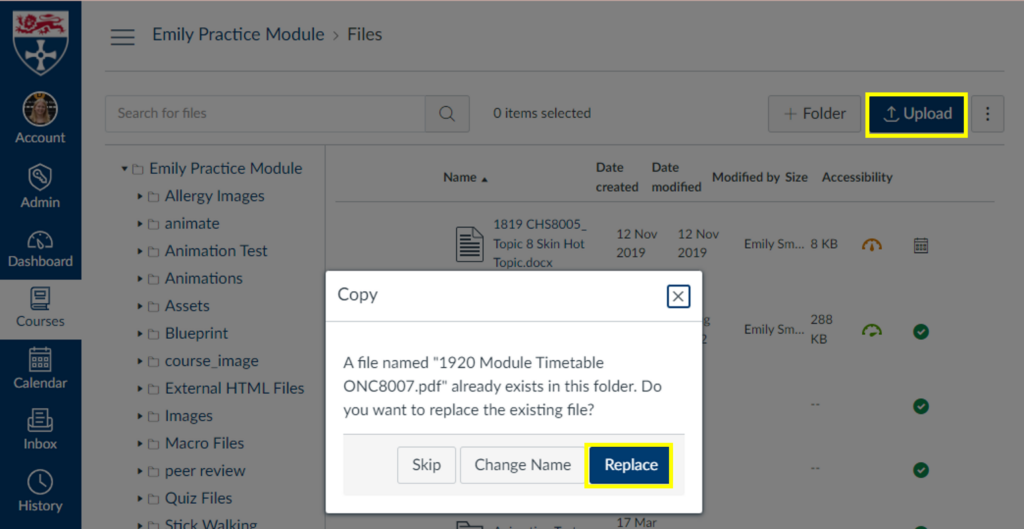
If you need to replace the file with an updated version, it is best practice to upload the new version directly to the files area and replace the original file. The file names need to be identical and uploaded to the same folder for the “replace” option to appear. Updating the file this way means any links to the file within the content will not need updated.
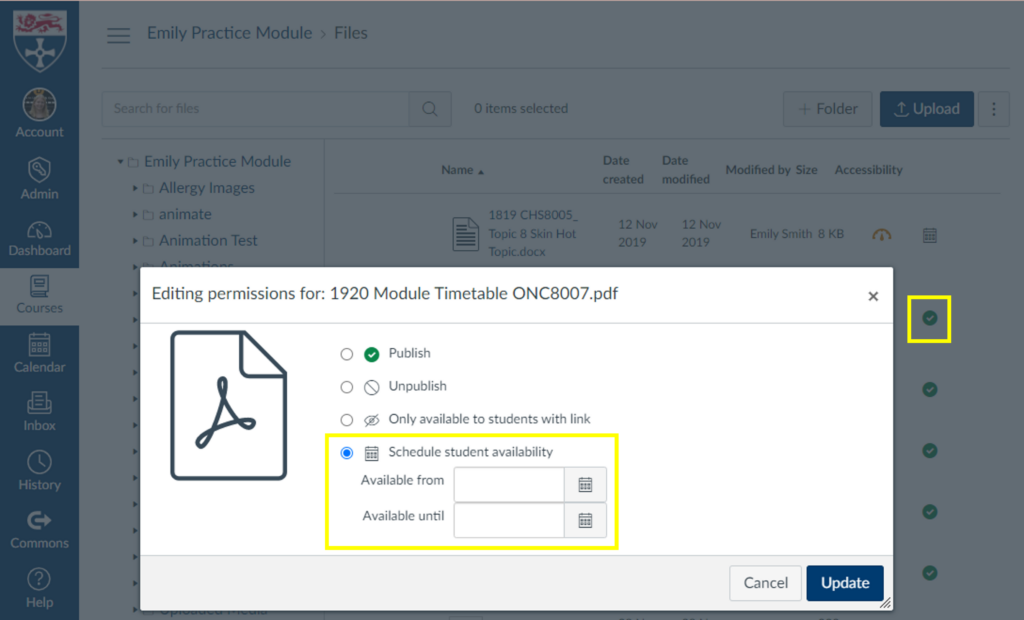
In the files area you also have the option to adjust the availability of files, including adding available from and until dates.
Inserted into a page
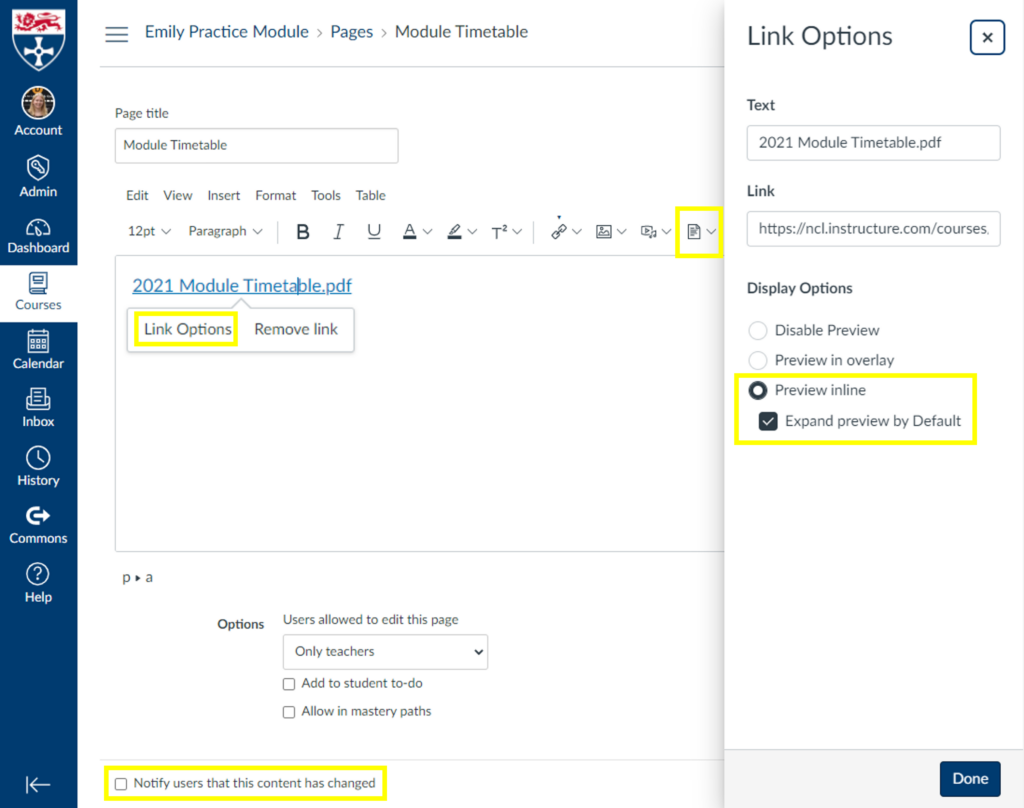
This is my preferred method for adding a file to a course. You can use ‘Link Options’ to make the file open a preview by default so the page has the appearance of a directly added file but you have the following benefits over adding the file directly:
- Able to add notes or comments above or below the file
- The page title does not have to be the file name
- Any links will be directed to this page so you can update the file/page as many times as needed and links to the content will still work
- You can create an archive at the bottom of the page for previous file versions
- Canvas can notify students of changes to the page/file
- You have access to the page history so you can roll back to previous versions
- You can add multiple files to one location
- You can add a to-do deadline to the students to do lists and calendars
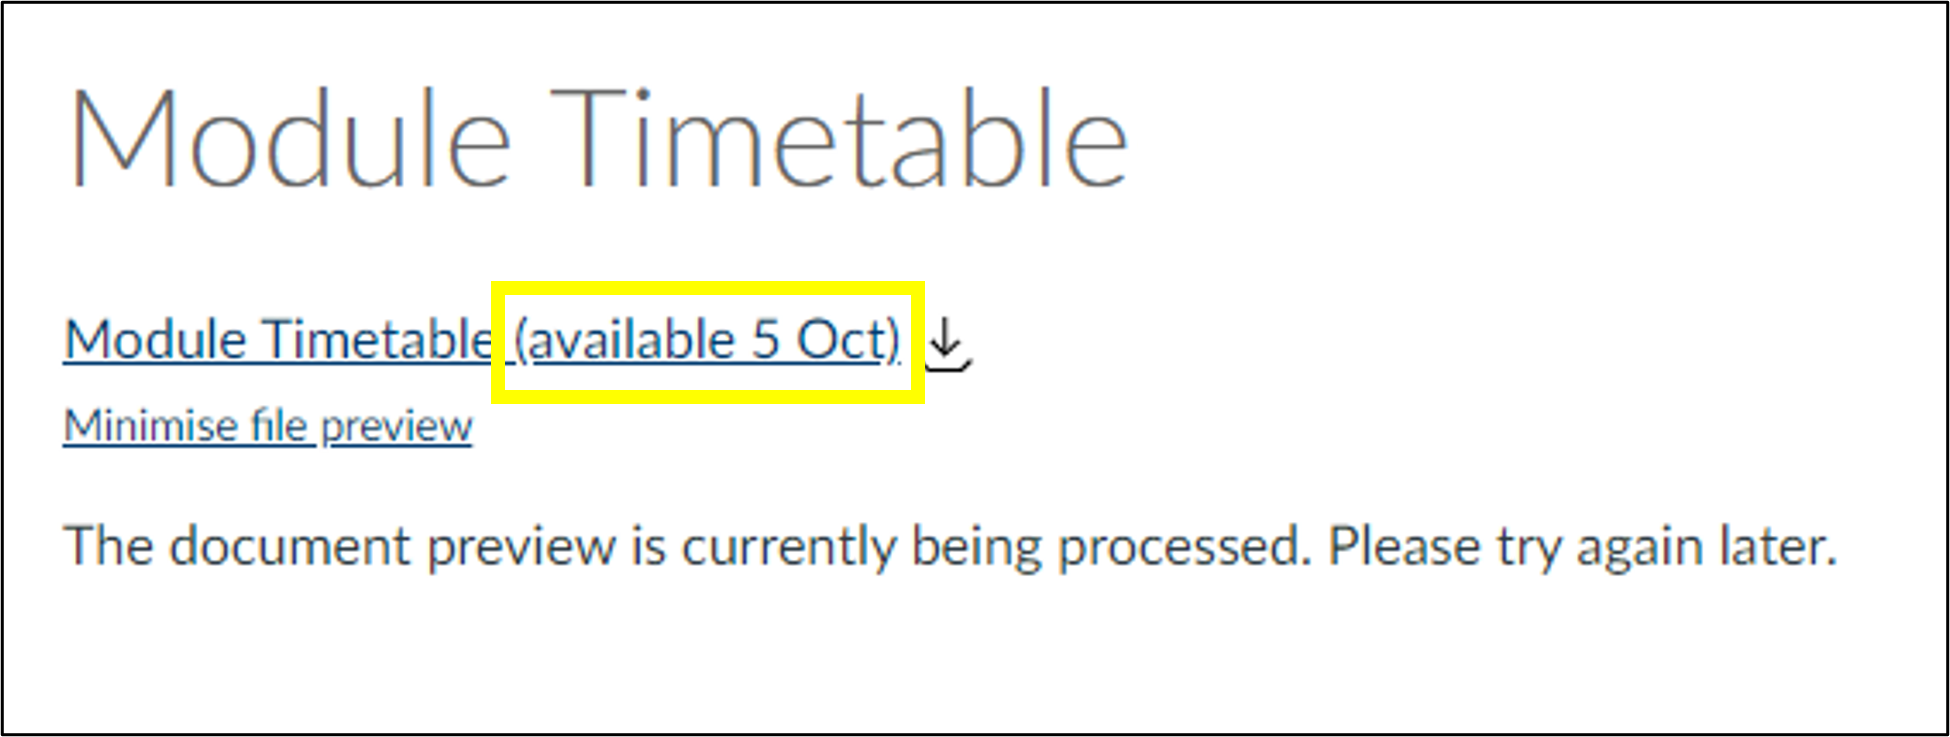
If you choose to use the file availability options mentioned in the previous method you may want to add a message on the page stating when the file will be available as the message canvas provides is not very informative:
Keeping track of your files and file names within your module helps you save time and avoid confusion later.


