Using overlays to make engaging videos

This post, kindly provided by Module Leader David Thewlis, discusses the use of OpenShot Video Editor to add overlays into videos for teaching.

Check out the resources section at the bottom of this post for step-by-step guides.

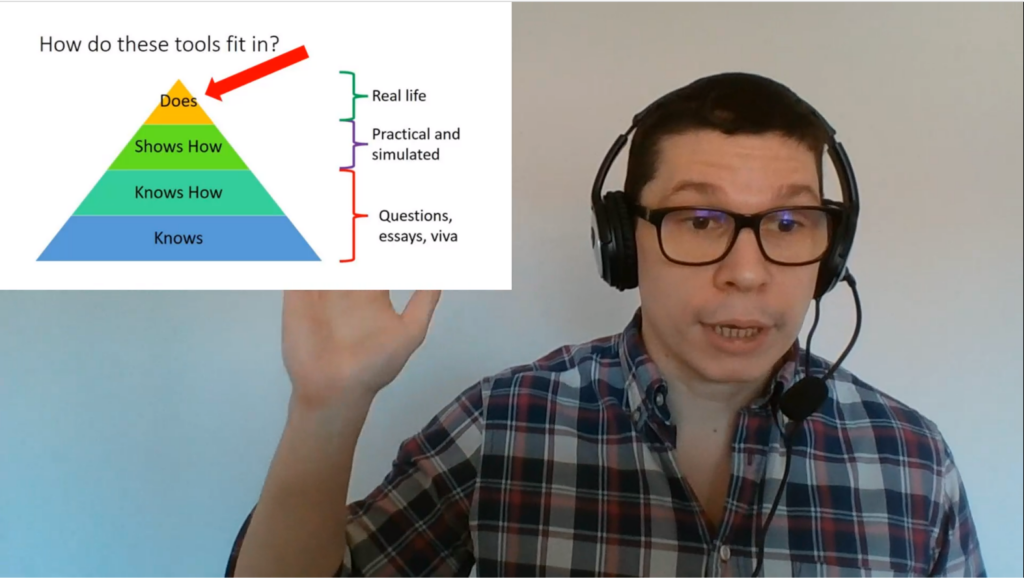
Example taken from MEE8079, Assessment in Medical Education, 2023

Why I use overlays?

I started my approach to online lecturing by recording in PowerPoint. Then I moved to recording in ReCap/Panopto. Neither were quite right for me, I felt limited in my delivery compared to in-person teaching. I found using props difficult when you only take up a small portion of a screen and emphasis on what really matters can be lost when you can’t feel the energy of the room.

I realised my biggest issue with my lectures was that I was relegated to a tiny corner and the slides had become central.

You want the slides to be condiments to what you’re saying, not be the main event.

Patrick Winston, How to Speak

Bell Hooks writes about academics hiding behind the pedestal lose engagement with the class. Unfortunately, online lectures can create a similar barrier between us and our students. Overlays is the approach I decided on to help reduce this barrier in my teaching.

I hope I am not the only person who spends hours watching videos on YouTube for inspiration. The videos I found most interesting (even if they were long) were simple speaker focused talks, which showed media when it was helpful. Replicating this type of content was my aim.

What can you use overlays for?

Overlays replace slides by allowing the speaker to have greater control over where and when to place media. You can incorporate pictures, videos, audio, and titles into a single talk with reasonably little skill (I have managed – you can too!). You can choose to direct focus in the frame. Wes Anderson has made a film director’s career out of this skill, perhaps we can learn from it.

Types of overlays:

  • Picture – these can act very much like slides. Placing them in a corner of the screen, or covering the whole screen can offer different experiences.
  • Titles – these are text which appears in picture. They can be used as a title, but I like to use them to correct a mistake I’ve made in wording I also use them to throw forward to an idea or call back something discussed earlier in the lecture or course.
  • Video – adding another video within your video can serve as a much better example than just simple explanation. I have done this a few times with examples of good teaching models recorded by my colleagues. I have also seen some effective uses of people having brief conversations with themselves using picture in picture overlays.
  • Audio– if you have a flair for the dramatic backing music might help at some point in your talk. Audio Commentaries can also create a richer resource, see our case study.
  • Emojis – They’re there. Why not?

How I set up overlays

You will require some basic video editing software – I like OpenShot Video Editor. It’s free and reasonably simple. Simplicity is the theme of my advice.

1.    Create/choose your media

Create a recording of your lecture using whatever recording device you have available. Errors or issues with the recording can be fixed in the editing process if needed. In this example on YouTube an instructor made a mistake with wording. Rather than re-record the entire video, which is otherwise good value, they corrected with an overlay title.

Making your images can be equally as easy. Saving pictures to an appropriate folder is one approach. I like to insert my pictures into a PowerPoint presentation to give myself the opportunity to get the structure clear in my head. I then save each slide as a picture. 

2.    Organise your content

Keep it simple and experiment with different formats. Layouts, text sizes, fonts, and colours all can have an impact on what you are communicating. Ensure that your titles are legible, and contrast appropriately with your background. I like the background to be the video of me generally, but I’ve seen solid examples of it being a slide or set of slides.

3.    Put the video together

I recommend you take your time editing your first few videos.

Regardless of the software you decide to use I recommend you save your project often! Losing an almost completed video is very frustrating.

You can clip your videos to remove errors. Insert other videos in the middle of your talk. Explore effects if you are delivering a narrative.

The export time can be quite long (mine usually run around 40 minutes for a 10-15 minute video). This is an opportunity to make a coffee, have a stretch, and look away from a screen.

Conclusion

Although it may need more initial time investment it is worth it. Using overlays can add a personal touch to any asynchronous video content.


Resources

References

  • Winston, Patrick (2018) How to Speak. MIT OpenCourseWare
  • Hooks, Bell (1994) Teaching to transgress : education as the practice of freedom. New York: Routledge.

Technology Showcase – UTME Study Day 2023

The FMS TEL team participate in an annual study day on the Utilising Technology in Medical Education (UTME) module offered by the School of Medical Education.

The module aims to raise students’ awareness of how technology enhanced learning is currently used in health care education and gives students the opportunity to explore technologies and investigate theoretical underpinnings. Based on these aims we put together a 3 part presentation.

Part 1 – Tools for Student Interaction

PowerPoint Slide: FMS TEL Interactive Content, Instant/Quick Wins

Emily introduced a number of TEL tools including; Menti, vevox and padlet. Each tool was discussed; outlining its uses, pros and cons. Current examples of content designs, interactive activities and animations used throughout the faculty were shared.

Part 2 – Collaborating and Facilitating Group Work

PowerPoint Slide: FMS TEL Collaborating with Microsoft

Simon demonstrated how to use Microsoft 365 to co-author and co-edit documents, presentations and spreadsheets. Students were shown various features including; reviewing mode, version history and how to use Sharepoint to monitor breakout room activities.

Part 3 – Teaching Tools

PowerPoint Slide: FMS TEL Teaching Tools

Eleanor shared her experience of teaching with Zoom/Teams and tips on how to humanise online sessions. She discussed common barriers, such as awkwardness or long silences and strategies or tools to use as solutions.

FMS TEL Stand – L&T Conference 2023

It was nice to see some familiar faces and meet new colleagues at last week’s Learning and Teaching Conference. Members of the FMS TEL team took turns answering queries during sessions breaks. We also had the opportunity to attend the talks ourselves, and pick up some helpful tips and tricks!

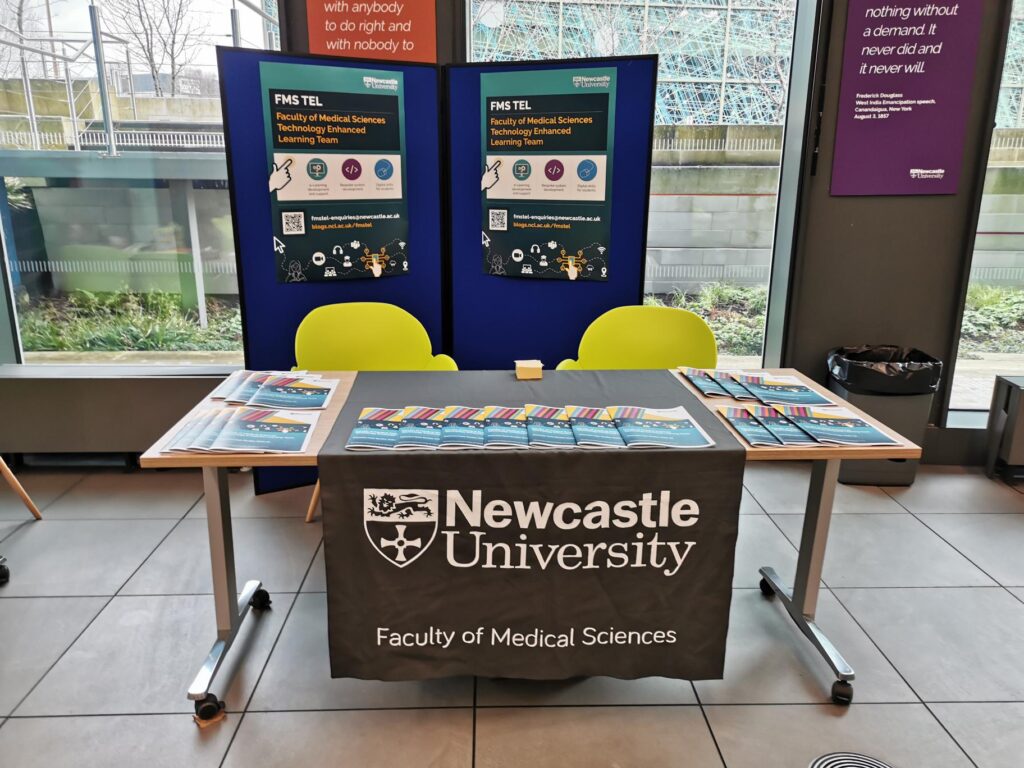
FMS TEL stand
The stand!

At the desk we were pleased to see a number of visitors take copies of our booklet, showcasing some of the best posts from the FMS TEL blog.

If you were unable to attend the conference and you really wanted a booklet, we’ve got you covered!

Case Study: Virtual Oral Presentations as a summative assessment

How do oral presentations work for 100% online modules?

Presentations helps students put across an idea while expressing their personalities, which is hard to do in an essay.

Introduction

Oral presentations are a popular choice of assessment in the Faculty of Medical Sciences, especially in our e-Learning modules. Students are asked to submit a pre-recorded presentation to Canvas and the markers watch the presentations at a time and place that suits them.

Diarmuid Coughlan, module leader for ONC8028 Practical Health Economics for Cancer, has kindly agreed to walk us through how the Virtual Oral Presentation element works on his module.

The Assessment

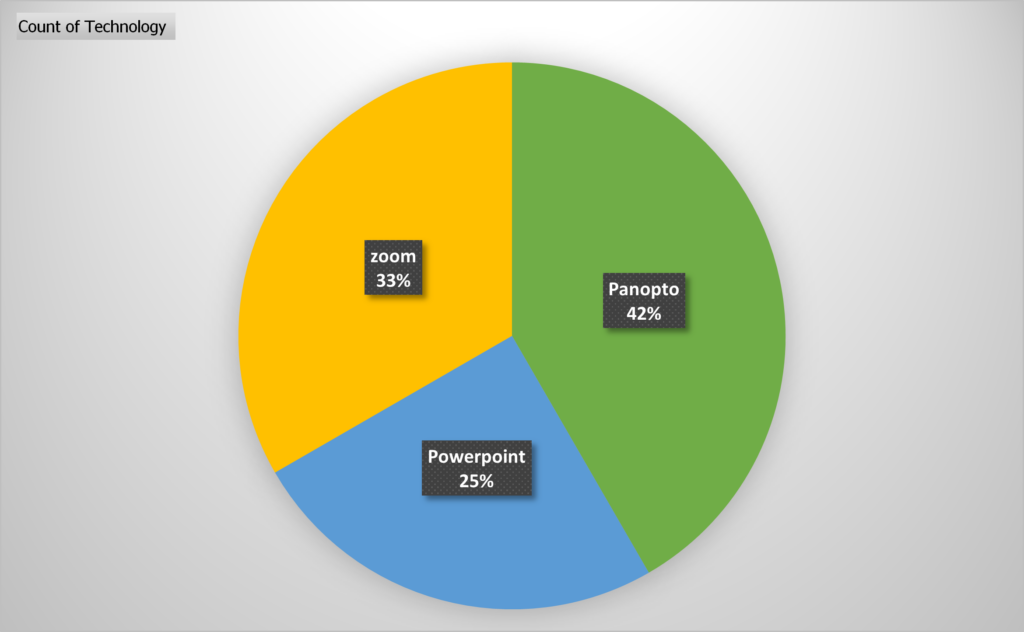
This year we had 14 students on the module. We asked the students to create a 15 minute presentation using either Zoom, Panopto (Recap) or PowerPoint.

We informed the students right at the start of the module that an oral presentation was part of the assessment and 4 weeks into the module we provided a formative assessment. The formative assessment allowed students to familiarise themselves with their chosen software, gain experience talking to a camera and also get some limited feedback on their presentation skills.

The submissions are double marked by 2 markers. Marking is completed separately by each marker outside of Canvas, then markers meet to discuss which marks/comments would be entered into Canvas and made visible to each student.

The Set Up

We provided 2 submission points in Canvas:

Recording Submission Point:

This area was used for the marking. It was set up as Media Recording for MP4 uploads (max of 500 mb) with a Text Entry option for Panopto users (no size limit).

We allowed students to choose which technology they were most comfortable with and provided video and written instructions for Panopto and Zoom. PowerPoint instructions were added later as an option with links to guidance provided by Microsoft.

View of instructions in Canvas

We also provided some instructions so students could crop their recordings to comply with the 15 minute time limit.

You are limited by time so remember to edit your recording so it is no longer than 15 minutes. Instructions: Windows | Mac | Panopto

Slide Submission Point:

This area had a 0 point value. It was set up as a File upload area for students to submit their slides as .ppt or .pdf, this allowed us to get a turnitin plagiarism score for each presentation as well as a reference copy of the slides, should anything be unclear in the video recordings.

How did it go?

There was a lot of fear from students initially. We encouraged students to give it a go, informing them that we were not trying to trick them. We provided clear guidance on what we expected and provided a rubric with a breakdown of points, clearly showing only a small percentage of the grade would be based on their presentation style and delivery. The content of the presentation was the most important part!

The use of technology was varied:

As markers we also had to overcome our fears of technology.

PowerPoint is easier once you know how to access recordings (you have to download the file, then click start slideshow).

Sometimes the Panopto recordings were hard to find, especially if students had experience of using the technology in Blackboard and did not follow the Canvas instructions correctly.

What are your next steps?

  • We only provided grades with a short feedback comment last year, we plan to provide more extensive feedback going forward
  • We will add more video content into the module as examples of how to create engaging slides and showcase our presentation styles – hopefully leading by example
  • We would also like to provide examples of a good presentation vs a bad presentation

Technology Showcase – UTME Study Day

This weeks post shares a session FMS TEL were asked to participate in a study day on the Utilising Technology in Medical Education (UTME) module offered by the School of Medical Education.

The FMS TEL team were asked to participate in a study day on the Utilising Technology in Medical Education (UTME) module offered by the School of Medical Education.

The module aims to raise students’ awareness of how technology enhanced learning is currently used in health care education and gives students the opportunity to explore technologies and investigate theoretical underpinnings. Based on these aims we put together a 3 part presentation.

Part 1 – Tools for Student Interaction

PowerPoint Slide: FMS TEL Interactive Content, Instant/Quick Wins

Emily introduced a number of TEL tools including; Menti, vevox and padlet. Each tool was discussed; outlining its uses, pros and cons. Current examples of content designs, interactive activities and animations used throughout the faculty were shared.

Part 2 – Collaborating and Facilitating Group Work

PowerPoint Slide: FMS TEL Collaborating with Microsoft

Michelle demonstrated how to use Microsoft 365 to co-author and co-edit documents, presentations and spreadsheets. Students were shown various features including; reviewing mode, version history and how to use Sharepoint to monitor breakout room activities.

Part 3 – Teaching Tools

PowerPoint Slide: FMS TEL Teaching Tools

Eleanor shared her experience of teaching with Zoom/Teams and tips on how to humanise online sessions. She discussed common barriers, such as awkwardness or long silences and strategies or tools to use as solutions.

Embrace the silence: the use of timers in synchronous teaching

Learn how to use timers in your PowerPoint presentations to aid questions and answers for students and yourself.

As teachers or trainers we can often feel the pressure to fill the silence when presenting. How long should you wait for an answer? Or a better question might be, how long do you think you wait?

Research suggests that at least 3 seconds can provide positive outcomes for both teachers/trainers and students (Rowe, 1972).

Each task may require different lengths of silence, you will want to think about the time the students will need to:

  • process the question
  • think of the answer
  • formulate a response
  • (if teaching virtually) unmute or type their response

The concern is to provide the period of time that will most effectively assist nearly every student to complete the cognitive tasks needed in the particular situation.

Stahl, 1994

You may find yourself counting the 10 or 15 seconds in your head, but still the silence can feel unbearable.

PowerPoint Animations to the rescue

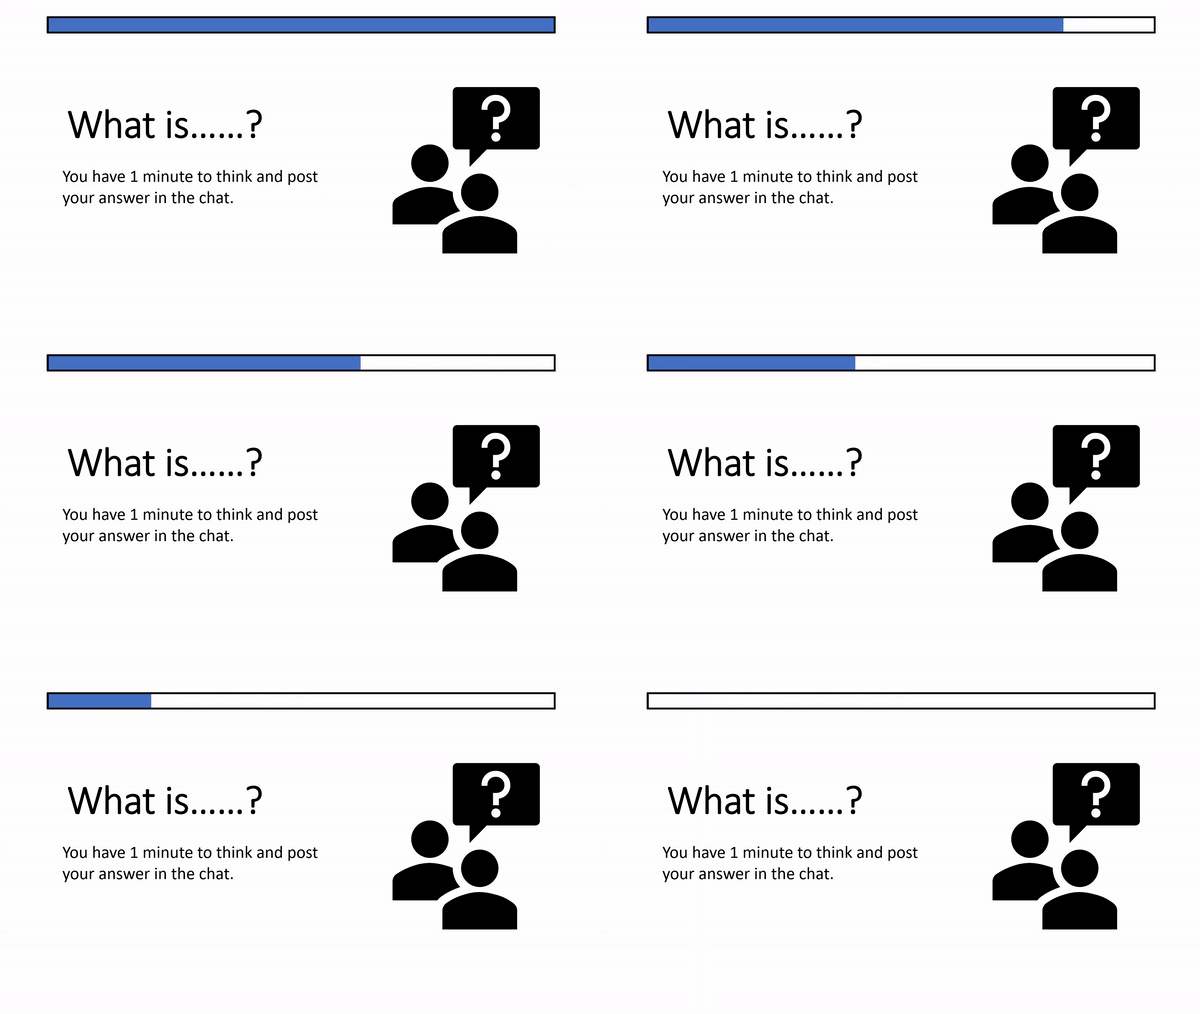
Using a consistent slide design with an animation will not only relieve the pressure on you to keep track of the time but also provide cues that students will become familiar with as your teaching progresses.

Below are examples and instructions for 4 different types of animations you can create in PowerPoint, ranging from super easy to slightly complex. At the bottom of this post you will find a template document of all the examples shown plus a few more complicated designs which you can download and use in your own presentations.

Example 1: Stopwatch

Example stopwatch PowerPoint animation
  1. Insert a circle and style as required (holding shift will help you draw a perfect circle)
  2. Add a “Wheel” animation to the circle and adjust to your chosen duration (max of 59 second)
  3. Add the stopwatch icon (Insert > Icons > search for “Stopwatch”)

Example 2: Progress Bar

Example progress bar PowerPoint animation
  1. Insert a rectangle, remove the outline and choose a fill colour
  2. Add a “Wipe” animation to the rectangle, using the effect options drop down change the direction to “From left” or “From right”. Adjust to your chosen duration (max of 59 seconds)
  3. Insert a second rectangle on top of the first, remove the fill colour and style the outline as desired.

Example 3: Count Down

Example count down PowerPoint animation
  1. Create a text box for each number required, style as required
  2. Add the “Disappear” animation to all text boxes
  3. Set the first number to start “on click” with a 1 second delay
  4. Set all other numbers to start “after previous” with a 1 second delay
  5. Stack each text box on top of each other in the correct order, you may want to use the arrange menu or the selection pane to assist with this
  6. (optional) Add a text box at the back stating times up

Example 4: Scrolling counter

Example scrolling counter PowerPoint animation
  1. Insert a rectangle, with no fill and an outline of your choice
  2. Insert a text box and type in the required numbers, with a new number on each line
  3. Add the “Lines” animation to the text box, move your text box so your first number aligns with the green arrow and your final number aligns with the red arrow (further guidance). Adjust to your chosen duration (max of 59 seconds)
  4. Insert more rectangles above and below the first rectangle you created to hide the numbers as they scroll in and out

Resources

References

Rowe, M., 1986. Wait Time: Slowing Down May Be A Way of Speeding Up!. Journal of Teacher Education, 37(1), pp.43-50

Stahl, Robert J. & ERIC Clearinghouse for Social Studies/Social Science Education.  1994,  Using “Think-Time” and “Wait-Time” Skillfully in the Classroom [microform] / Robert J. Stahl  Distributed by ERIC Clearinghouse [Washington, D.C.]  <https://eric.ed.gov/?id=ED370885>

Medicine Focused H5P Examples

As part of the FMS TEL Conference last week members of the FMS TEL Team created a few medicine focused examples of H5P content.

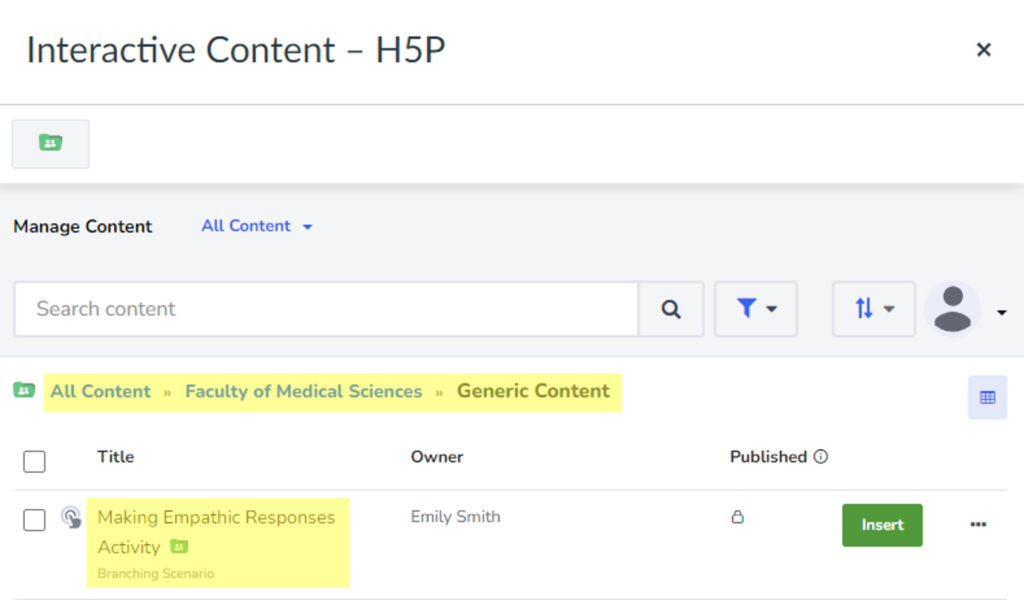
We have shared these examples with the University to use in course content or to clone and edit to fit specific needs. You can find all of our examples in:
All content > Faculty of Medical Sciences > Generic Content

H5P Folder structure

Example content includes:

  • Accordion: Vertically stacked expandable items
  • Agamotto: Sequence of images and explanations
  • Drag and Drop: Drag and drop task with images
  • Drag Text: Text-based drag and drop task
  • Flashcards: Stylish and modern flashcards
  • Image Hotspots: An image with info hotspots
  • Image Juxtaposition: Interactive images
  • Memory Game: Image pairing task
  • Timeline: Interactive timeline of event with multimedia

More Resources

The Hyflex Teaching Model

In response to the global pandemic, we have found ourselves faced with unprecedented challenges and a need to rapidly adapt our teaching delivery to accommodate students working remotely. Currently, we are aiming to return to a ‘business as usual’ model but in reality, there may be circumstances where some students are still unable to be present in person (PiP). Our international students are one particularly vulnerable group facing a continuous level of uncertainty regarding travel opportunities and restrictions. With this in mind, colleagues at INTO Newcastle University devised a delivery approach encompassing the Hyflex Model.

What is the Hyflex Model?

“The hybrid flexible, or HyFlex, course format is an instructional approach that combines face-to-face (F2F) and online learning. Each class session and learning activity is offered in-person, synchronously online, and asynchronously online” (EDUCAUSE, 2020). The main aim is that no student is disadvantaged, no matter which format they select. INTO Newcastle’s take on this approach was to connect PiP students with online peers through use of a camera, microphone, tripod and a hosting site such as Zoom or Teams. Asynchronous delivery is not a part of this approach. Session plans, pace of delivery and learning outcomes had to be adjusted because of the changed learning environment. A sample of FMS staff were able to experience this approach in real time at a training session delivered by INTO Newcastle’s Pre-Sessional Programme Manager, Darran Shaw. They gave the following reflections:

Overall

“While in no way perfect, this approach is something worth experimenting with”.

“The relatively cheap equipment was functional and would allow 3-way engagement”. 

Audio-related 

“I chose to join the ‘online’ part of the class via the Zoom meeting link on my phone. This was quick and easy to join, though we would possibly need to think about which accounts students have on their phones – whether they could join with their personal or university accounts. Once in the meeting I had minimal problems with sound or hearing the classroom participants. I can imagine this being difficult if the quality dropped though – even small cut-outs in the signal or sound pickup can make understanding difficult. This is even more of a concern for students joining who have poorer internet access, or who do not have English as a first language”. 

“To enhance the experience, I felt that the quality of the audio was the most important.  The levels of concentration required to filter out background noise and focus on the primary speaker is very tiring and difficult (this was already experienced with recorded lectures prior to COVID and even more diverse with academic recording or conducting zoom classes from their own PC over the last 18 months).  For those in the room, sound from all participants was equal and what we would expect, but it was not picked up equally by the microphone for those on-line.  Repositioning the single microphone was a trade-off to pick up more participants at the expense of reduced quality of the primary speaker. This could be enhanced by investment in a multiple microphone set up”.

“When the purpose of the teaching session is inter-participant communication, eg seminar, then we need to experiment more with all participants (PiP and remote) using zoom-like breakout rooms and headsets. In small classrooms/lecture theatres this is easier to control and can be achieved for lecture and seminar teaching”. 

Video

“Having a visual link to speakers and the PiP class gives an important feeling of participation and value.  I do not think the quality of the video is as important as the audio. Having said that, from the experience of this session a visual link to whoever is speaking makes it easier to focus on what is being said and allows non-verbal communication”.

“I feel it would also be good to have sight of the teacher and the class simultaneously. We spoke about this being important to pick up on cues when online participants can speak. We can see how easy it is to forget the online participants”.

Etiquette

“Appropriate etiquette is important and become vital for large class sizes. Emphasis should be placed on respect for other users, time management to attend equally (IT/bandwidth allowing) and professional level of engagement.  The latter should be specifically mentioned in Graduate Skills and academics should be allowed to comment on student engagement (recognising this is aspirational as it is almost impossible for one lecturer to monitor for large classes)”.

Top Tips for future Hyflex classes

  • There is a risk that an ‘us and them’ divide will form so it is recommended that staff look at mixing online participants and groupings in breakout rooms. PiP students could take turns signing in to Zoom/Teams calls.
  • A major requirement is sound. It would be worth investing in a few microphones to ensure the sound quality is equal between the participants in the room and the teaching lead. There would need to be potential wire issues and feedback issues sorted out. This is of fundamental importance due to the extra concentration and effort needed of online participants to hear what is said in the room. It is worth considering the use of a microphone that could be passed around easily.
  • Having multiple users logged on to zoom in the same physical space increases the chance for echo/feedback and therefore users need to experiment with the set up.
  • Whilst a hi-spec system, such as that available in the Boardroom is desirable, a low-cost camera recording the whole class will enhance feeling of participation, ‘time and place’ for learning.  The primary speaker can use a second camera (laptop or phone).  The two logged on as separate users.
  • Ground rules are needed: when to speak, recapping when unheard would be important, etiquette when joining a classroom remotely and being expected to participate fully as if present in person (but not in pyjamas or lying in bed).
  • Consider pre-planning task set up instructions. It may not always be obvious when students need to be looking at the shared screen, the speaker’s video input, or a gallery view of other online participants.
  • Be open-minded. Experiment with colleagues and test out the experience to determine what makes it easier for the teacher and the students. 

With thanks to the session leaders and participants: Darran Shaw, David Broadbent, Geoffrey Bosson, John Moss, Paul Hubbard, Luisa Wakeling, Eleanor Gordon

Resource: EDUCAUSE (2020) Available at: https://library.educause.edu/resources/2020/7/7-things-you-should-know-about-the-hyflex-course-model

Setting up different types of Discussions

The FMS TEL team recently delivered a webinar: Getting the most out of your discussion boards. If you can’t access the FMS TEL Canvas community, please enrol yourself before retrying the direct link.

As a follow up to that webinar we have created follow along video guides and step by step written instructions on how to make the ideas and suggestions a reality. Our guides cover:


Voting and Polls ✅

These can be set up in around 2 minutes and no external tools are required. Students can quickly share their opinions or provide feedback in a similar format to Social Media.

Discussion Folders ?

Is your modules area looking cluttered? Organise your discussions into folders so they are easy to navigate.

Sharing Group Discussions ?‍?‍?‍?

Group discussions in Canvas can be a great option however they have the disadvantage of only group members being able to see what was contributed. If your course would benefit from groups being able to share with other groups after the task then we have 2 solutions for you.

Multiple Posting Points ??

Some courses may require students to share personal experiences. In this guidance we offer a solution for student to choose if they post to the whole cohort or just to the Teachers on the course.

Anonymous Posts ft. Padlet ❔

Currently Canvas does not allow anonymous posts. To get around this limitation we can create boards using an External Tool Padlet and embed Anonymous Padlet Boards within Canvas and the MLE.


Podcasting Case Study

As part of the research for our Podcasting webinar, I recently spoke to Iain Wheeldon in the School of Arts and Cultures about his experience running his podcast Cultural Peeps.

The resulting case study can be seen on the LTDS Case studies site, and has also been highlighted as part of the Art of the Possible.

Our webinar recording and accompanying resources can be found on the FMS TEL Canvas community. These will be useful for anyone considering incorporating audio-only material in their teaching and assessment, as well as anyone interested in listening to or creating podcasts.

If you have any trouble joining the community, enrol here before retrying the materials link.