With a constant influx of notifications, emails, and alerts on our computers, staying focused on the task at hand can be a challenge. Distractions break our concentration, decrease productivity, and contribute to digital fatigue. How can you ensure a distraction-free environment when you need to concentrate on your work?
The Solution
Windows: Focus Assist
Quick Toggle: Windows key + A (to open the Action Center), then click on Focus Assist to toggle it between Off, Priority Only, or Alarms Only.
Customise: Go to Settings > System > Focus Assist to customize which notifications you want to see and when.
Mac: Do Not Disturb
Quick Toggle: Option + click the Notification Center icon at the top right of your screen.
Schedule: Go to System Preferences > Notifications > Do Not Disturb to set a schedule for when you want to silence notifications.
The Result
Activating Focus Assist on Windows or Do Not Disturb on Mac allows you to control when and how notifications appear. This can lead to better focus, improved productivity, and more significant periods of uninterrupted work. Plus, managing your digital wellbeing can reduce stress and enhance your overall experience while working on your computer.
In a world where the demands on medical professionals reach an all-time high, the need for effective communication has never been more crucial. Imagine a scenario where physicians must deliver devastating news to a patient—news that could alter the course of a life, news that might even imply the end of life. I have often wondered how people can deal with that as part of their job. I found out through my first project as a Learning Technologies Developer at the University with the redevelopment of an web service that helps facilitate roleplaynorth (RPN).
RPN provides a crucial role in preparing our MBBS students to deal with those types of scenarios. Through tailored and realistic scenarios they help in the theory of good communication, transitioning customers to be ready to apply these findings in practice.
In the first of a series of 3 posts about the redevelopment of RPN, we’ll look at the following aspects of the project; specifications, system features, and future plans. In this post I will walk you through the specification process.
Specifications: Building the Foundations
Firstly, we looked into what the existing system currently does. Amongst mainly other features it allowed RPN staff to add events and update role players using spreadsheets to manage who was on what event and the role they would play on the event. This information would then be added to the event on system. RPN also had available a separate AccessDB that provided queries required for payroll reports.
Action Function Requirement Document (AFR)
I used a document our team has worked with previously that lists the tasks/actions, function, data requirements to get RPN to think about the whole process and break it down into steps. This document was used to get feedback on how RPN expect the actions to work and gave the opportunity to add tasks if required.
Here’s an example on what that looks like:
ACTION/TASK
FUNCTION
DATA REQUIREMENTS
NOTES/ FEEDBACK
a) events
Create, Update, Delete Events
Start date, End date, description of event
b) event TAG
Assign Event Tag to event. This can be used to filter the events
Event Tag – Name/Title
c) Add/Remove Role Player – Event
On the events page add a role player to the event
Role Player, Event
Does this need to be automatic or do you want to add them as pending first until they have confirmed participation?
d) Scenario
Create, Update, Delete Scenario
Scenario – title, description
After feedback from RPN, we then converted this document into a more functional focused document. Breaking down actions into tasks allowed us to plan what needed to be developed first, including what actions could be worked on independently or by another members of the team. Here’s what we ended up with.
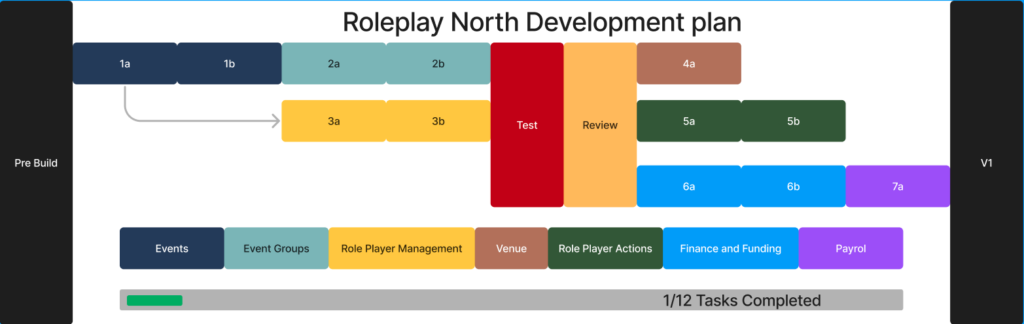
Role Play North Development Gannt Chart
From this gantt chart you can see that the Events block (1a, 1b) and the Events Group block (2a, 2b) need to be completed before the Venues block (4a) is worked on. You can also see that once 1a is completed someone else can start work on Role Player Management (3a,3b). We also gave time for testing and reviewing what the new system does, giving RPN staff the chance to influence the build and find bugs. We had multiple testing stages one after the Event Groups and Role Player Management blocks were completed, and another back in April after all listed tasks were completed.
The first iteration included all the fundamental features and actions of the website including, user authentication, role based access, basic management of events and customers and communication tools. Nothing too complicated, but essential to the functioning of the website and a good starting point for any future project.
The above image and the AFR document does not show how long each section took – as due to unknown variables like feedback, change in requirements and staff commitments effected the timeframes. However, with a continuous review process we added weight or complexity to these tasks.
You can also see that 1a, 1b is part of the events block by looking at the legend below the branches and you can see what tasks were completed. We also added a cross next to an item once complete to keep us updated on where we were in the build without digging through the code.
We then created wireframes showing how the new system could work. With the AFR, Gantt Chart and the Wireframes we were able to clearly outline what we intended to build for RPN. In my next post I will go through the features.
Inspired by an H5P talk at the NU Learning and Teaching conference, Kay McAlinden, module leader for ONC8030 Psychosocial Issues in Advanced Disease, approached the FMS TEL team about creating a branching activity.
We jumped at the opportunity to be involved and offered our services to film and edit the videos, and also build the activity in H5P and Canvas.
Bringing to idea to life
Kay took the lead in crafting the scripts and coordinating an actor. Pip Davies, roleplaynorth Co-Ordinator, kindly offered to play our patient and Kay would take the role as the Health Care Professional.
Emily Smith and Tracy Connell from the FMS TEL Team volunteered to be our videographers and canvased the campus to find a suitable room to be our ‘doctors office’. Once the scripts were finalised and the room was staged, filming commenced. Using two cameras and a team of two videographers we were able to film both the patient and the health care professional scenes at the same time. This aided in the flow of the conversation for the actors and filming was able to be completed within a couple of hours, with brief interruptions for the inevitable giggles and occasional bloopers.
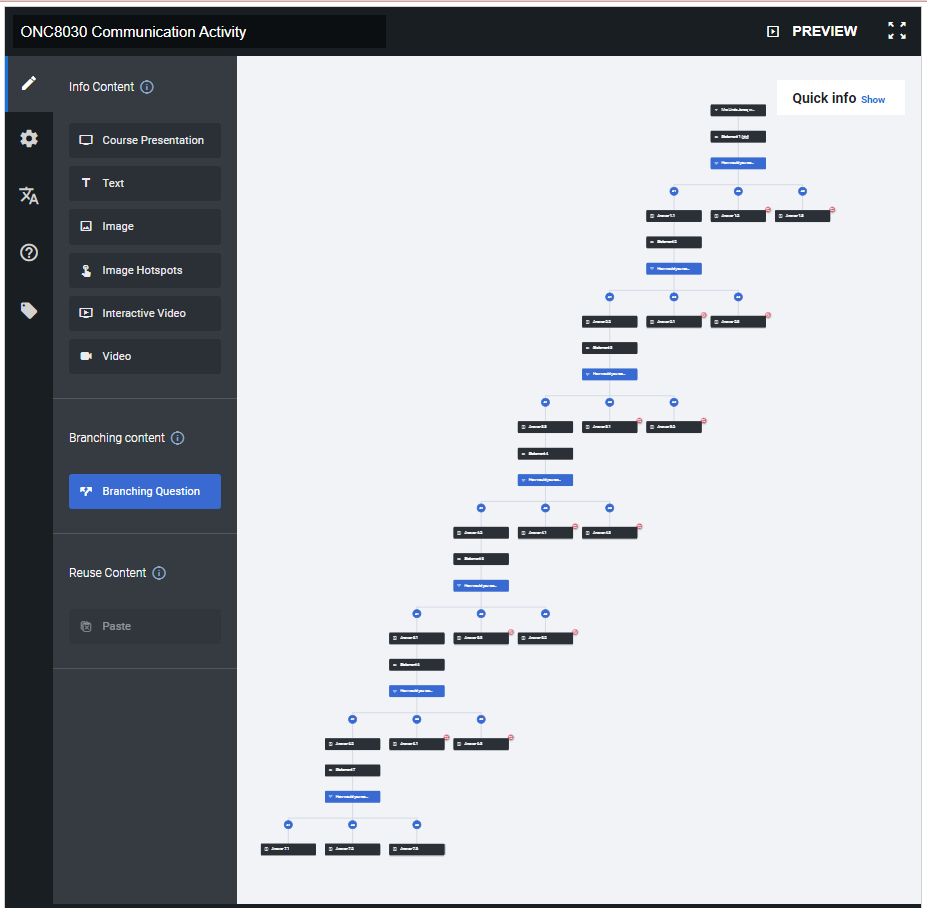
Editor View of H5P Activity
Next, we moved onto the task of editing the footage, which was completed in Adobe Premiere Pro, and building the task in H5P. We had filmed two options for the patients thoughts so a few different variations were created. After choosing a variation, making any further adjustments and proofreading of the captions, the activity was finalised.
All in all, the process took around a week of work.
The Final Layout
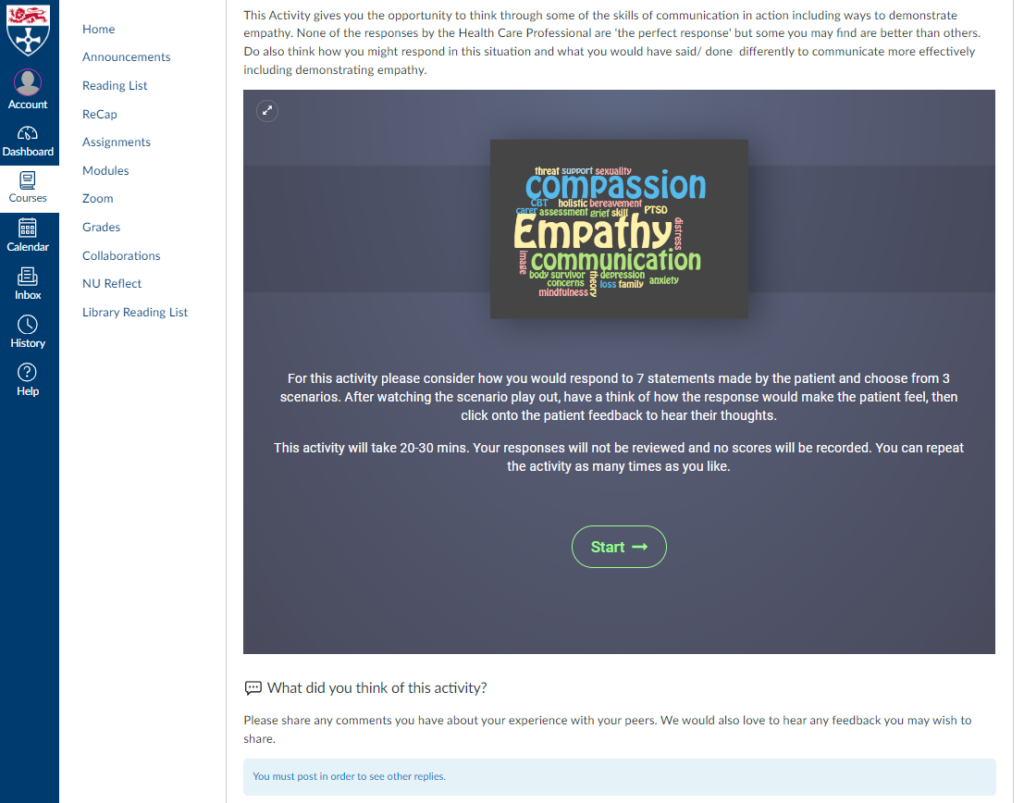
The activity is situated within a discussion board on Canvas, providing students with the opportunity to complete the task and subsequently engage in discussions with their peers. This setup also enables us to gather valuable feedback regarding the students’ perceptions of the task.
Canvas Discussion Board
After the introduction and instruction slides the first statement is introduced. Students are then prompted to pick from 3 responses. The corresponding response video is played, and students get a opportunity to reflect on the response and consider the patients perspective. Finally, we get to hear the patient’s thoughts. There are 7 statements for the students to work through, guiding students through a sequential conversation with the patient, fostering a sense of engagement and interaction.
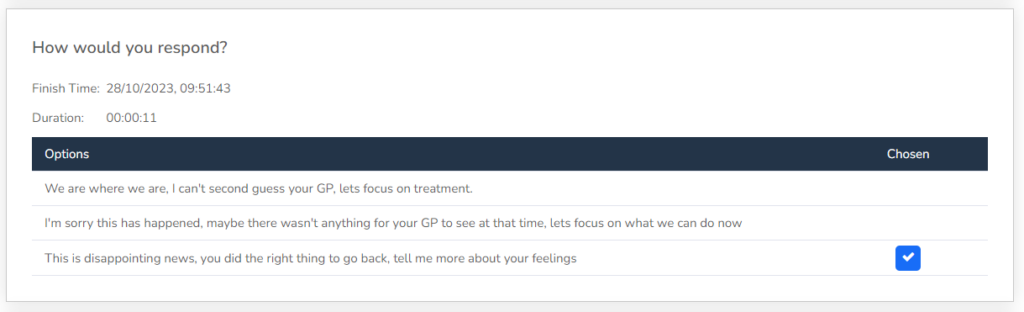
Student Responses
While the activity is not actively monitored we are able to track which students have completed the task, view their selected options, and read their written responses. These insights will prove valuable when we conduct future reviews of the activity.
Results page – Branching Route
Results page – Free text comments
Student feedback
We have been inundated with wonderful feedback from all the students. Below are some of our favourite quotes:
“This was a really valuable reflection for me. I could think back to how I had previously handled discussions like this. Had I perhaps been too quick to try and offer solutions and fix things. “
“This was quite an interesting exercise. It is quite easy to tip into problem solving and fixing, however what this highlights is that stepping back, allowing space for difficult emotions to be expressed”
“This was really interesting, I liked that there was not necessarily a wrong answer but makes you think about how you are wording answers to patients and the sequence to presenting the information to the patient.”
“I thought that was an interesting activity. It highlighted the importance of actively listening to what your patient is telling you and not just them with more information…. It was interesting sometimes the one i picked wasnt said in the way I would have said and therefore the response from the patient wasn’t what I would have expected.”
“I thought this was a really effective activity; it made me really think about how I would respond in these situations and how to put myself in Linda’s shoes to try and understand her feelings. I found that my responses developed through the activity and could see how by offering more space and time for Linda to talk it allowed her to open up and feel understood. At the start I definitely could see myself trying to find solutions to her problems but it became apparent that answers weren’t what Linda was seeking, she just wanted reassurance and to be understood. This will be useful to take into practice.”
“As a healthcare professional, this activity has opened my eyes to the fact that more often then not, we have been taught to focus on the physical issues and to prioritise first the physical health, and then the psychosocial aspects of the person’s life. During this activity, I realised how therapeutic empathy can be in itself.“
Final Thoughts
The creation of this branching activity, led by Kay McAlinden and supported by RolePlay North and the FMS TEL team, has been a successful collaboration. Scriptwriting, filming, and editing, came together to create an engaging and interactive learning experience for the students.
The use of technology, including Premiere Pro and H5P, was essential for executing the activity seamlessly and collecting valuable data for future improvements.
The overwhelmingly positive feedback from students underscores the effectiveness of this activity in enhancing their learning experience. It’s a fantastic example of how technology and teamwork can result in innovative and impactful activities that students truly enjoy and appreciate.
Your Next Step: Resource and Support
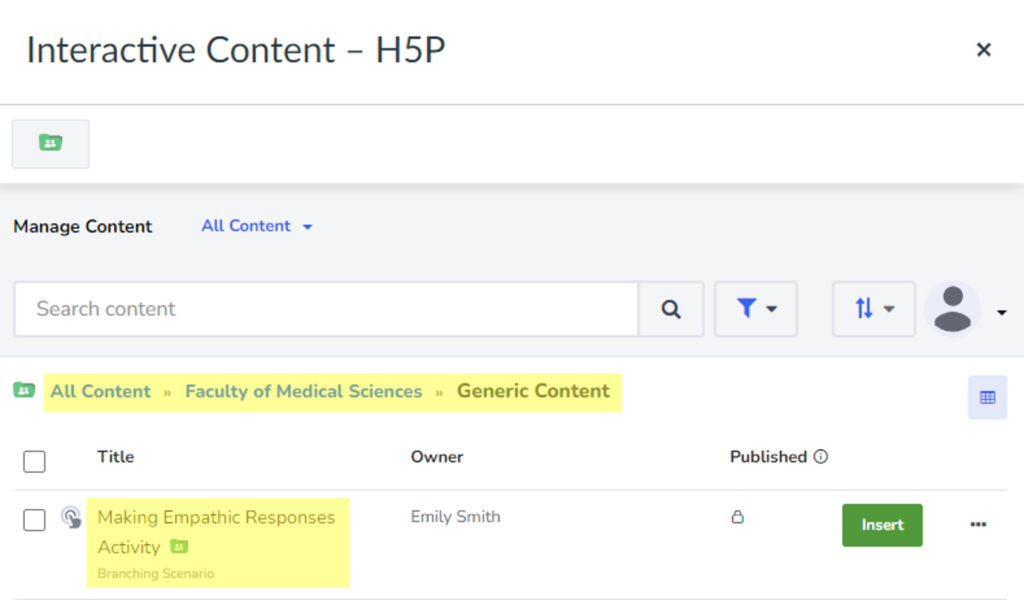
This activity has kindly been shared with all staff at Newcastle University and is available in the Faculty of Medical Sciences > Generic Content folder within H5P.
When you’re putting together course materials, it’s important to think about how it’ll look to your students. Laptops and monitors come in all shapes and sizes, so what looks good on your screen might not on someone else’s.
It is also becoming increasingly common for students to access content on their mobile phones and tablets. How can you efficiently ensure that everything appears visually pleasing and functional across these diverse devices?
The Solution
Windows: F12 Mac: Cmd + Opt + I
This opens the developer tools, which includes a ‘device mode’ where you can see how your content will look and function on different devices. The below example is using Chrome on a windows machine: