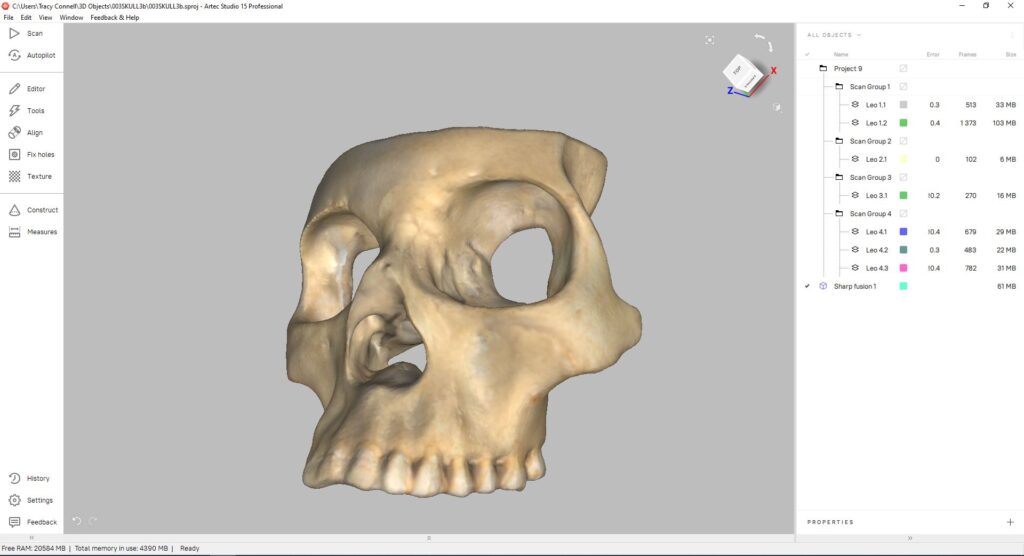
This year, 2021/22, FMS TEL took their first steps into 3D scanning to find a solution for a project in Dentistry.
Below you will find a summary of our progress to date, with further developments to come as we learn the craft of creating 3D digital images.
Equipment
Artec Leo scanner
Artec Studio 15 editing software
Sketchfab hosting
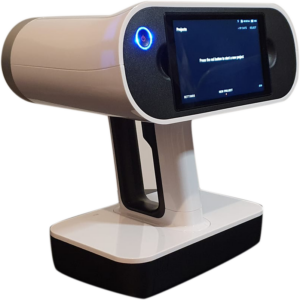
Artec Leo Scanner
This is the Artec Leo 3D image scanner. It is a structured light scanner, using light to create geometrical shapes from objects to produce digital 3D versions of real world objects.
The Artec Leo is wireless and has an inbuild screen which you can view the progress of your scan on, rather than having to view on a computer screen like the other Artec scanners. You can store scans onto a micro SD card up to 256gb.
Are you confident that you know when you should use a specific type of image format?
Within FMS teaching and research there is a great demand for clear and detailed images – this could be for purposes such as sharing diagnostic images or microscope views in high clarity, photographs of real cases and examples, or designing something eye-catching to promote your initiative. The detailed guide below explains the types of image formats you may find useful for different purposes.
There are several image formats that you are likely to come across, but what you may not know is that they can be separated into two ‘families’. This guide will help you understand the characteristics of each format, and which situation lends itself best to each.
Before we go into the details of each specific format, let’s talk about the two key families. These are VECTOR images and RASTER images, and while at certain sizes they could look almost exactly the same, their construction is fundamentally different.
Vector Images
Vector graphics are based on mathematical formulas that define geometric shapes such as polygons, lines, curves, circles and rectangles. Because vector graphics are composed of geometric constructions, they are best used to represent more structured images such as icons, line-art graphics and illustrations with flat uniform colours.
File extensions EPS, AI and SVG are examples of this type and are perfect for creating graphics that require frequent resizing such as logos and icons.
Vector-based images are much more versatile than raster-based images, with their most obvious advantage being that vector images are infinitely scalable. This means that the same image could be printed out the with the same clarity at both advertising billboard and postage stamp size. Another advantage is that as they are images that you create from scratch (as opposed to photographic images) they have a transparent background to them by default. If you need a white or coloured background in your file you can simply add a coloured box under your artwork.
Vectors do have a few limitations, such as not handling effects such as blurs, and poor handling of gradients.
Raster Images
Also known as Bitmap images, Raster images are composed of individually coloured square pixels which build up the complete image. As an example – all photographic images are captured as raster images, with TIF,JPG, PNG, and GIF all being examples of raster image file extensions.
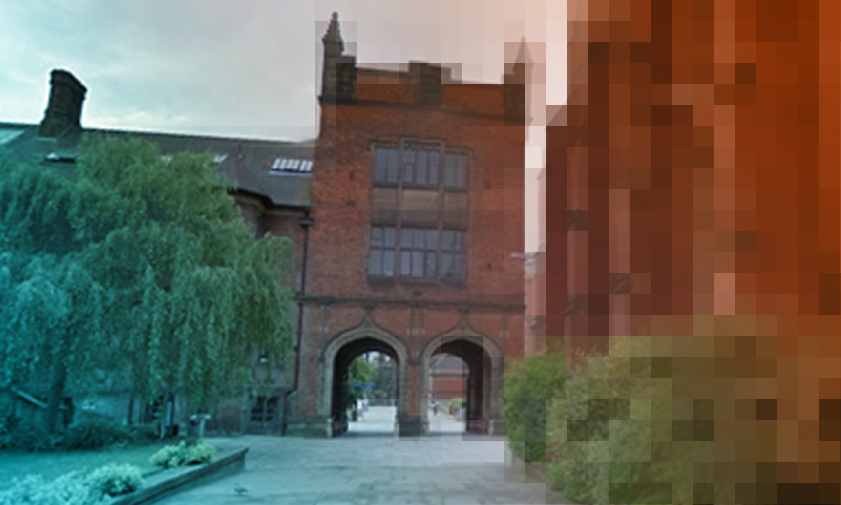
Pixels have a defined proportion based on their resolution (high or low), and when the pixels are stretched to fill space they were not originally intended to fit, they become distorted, resulting in blurry or unclear images. When you resize raster images by scaling up you will be compromising their resolution, as a result, it is important to remember to save raster files at your required dimensions. Once you make a source image smaller than its original size there is no going back – unlike vector images!
This example demonstrates the different affects that scaling has on both a vector and raster image (logo). Notice how they both look fine at first, but then pixelation occurs.
A note about ‘Resolution’ and ‘Effective Resolution’
Image resolution for raster images is measured in DPI (dots per inch) and this refers to the density of pixels in an image. Websites display images at 72dpi which is a relatively low resolution. By contrast, images that will be used for printing are required to be no less than 300dpi at the size they will be printed.
You can’t just take an image and scale it up dramatically, as it would stretch out and lose quality, as the dots per inch would effectively have been lowered, i.e. the ‘effective resolution’ would be lower.
What is compression and why does it matter?
When you save an image, some files need to be ‘compressed’ to keep file sizes down, as the files themselves would be far too large if this didn’t happen. Some formats are ‘lossy’ and some are ‘lossless’. If image compression is lossy, this means that every time you make an amendment and save, you may lose some quality, sharpness or colour data. The quality of the image decreases in proportion to file size.
Here are details of some of the most common file types you’re likely to encounter:
Raster File Formats
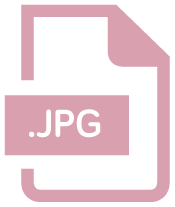
1. JPEG – Joint Photographic Experts Group
JPEGs are an extremely common image file type and as a result they can be used both on websites and in most desktop applications. It is a lossy file format.
Your file may have either the .JPG or the .JPEG extension, don’t worry it’s exactly the same type of file, and the .JPG extension is the most commonly used.
Note: This type of image does not support an alpha channel, therefore can’t have a transparent background.
2. TIF (or TIFF) – Tagged Image File
Mainly used in the print industry, these files tend to be very large high-quality photographic images that feature “lossless compression” meaning the original image data is maintained regardless of how often you might copy, re-save, or compress the original file.
If you have access to Adobe Photoshop, then you have the ability to retain a layering structure within the file. This means that if you put a text layer at the top, you could then move that text around without being destructive to the layer below. The same is true for a native Photoshop file.
Note: Due to the low compression and high file sizes, this type of image should not be used online as it will take forever to load!
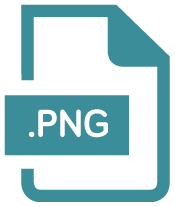
3. PNG – Portable Network Graphics
PNG’s are probably the second most common image type after JPGs. They offer lossless compression, so don’t lose quality when resaving or editing, resulting in a sharper image.
If you are preparing an image for a website then this format will probably be your best option as it allows for everything a JPG does but with a much sharper image. It can also handle transparency, enabling the use of a transparent background which is great for placing logos on to images, for example. These are not suitable for professional print purposes though, and are usually of a lower resolution for use online.
When saving these images in Photoshop you can choose between an 8 Bit, 16 Bit, or 32 Bit colour palette however this will be reflected in file size.
4. GIF – Graphics Interchange Format
There was a time when these and JPGs were pretty much the only image formats that you needed to know about however times have changed.
In their standard form GIFs are a pixelated image made up of a colour palette of up to 256 colours. Due to the limited number of colours, the file size is drastically reduced.
An example where these may be used could be some navigational icons on a site or app that require a quick load time.
The rise of social medial has contributed to the use of Animated GIFs, which are essentially a series of frames embedded within the GIF file. This can give an almost video like impression and typically only last a few seconds.
Vector File Formats
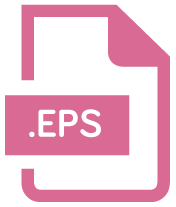
5. EPS – Encapsulated Postscript
An EPS file is a vector format that has been designed to produce high-resolution graphics for print. Almost any kind of design software can create/open an EPS.
The EPS extension is a universal file type that can be used to open vector-based artwork in almost any design editor, not just the more common Adobe products.
This safeguards file transfers to designers that may be using different software.
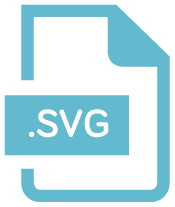
6. SVG – Scalable Vector Graphics
Although all vector graphics are scalable, the SVG file type is specifically named Scalable Vector Graphics because this format can be easily used online with newer technology and higher screen resolutions being introduced.
An SVG file would ensure that the quality of the image is not compromised no matter what device it is viewed on. This could be particularly appropriate for a logo or statistical chart. However, this image format is not intended for professional print purposes.
Note: SVGs can also be used in SVG animations.
7. AI – Adobe Illustrator Document
Adobe Illustrator is used for creating and editing images, rather than for sharing or uploading. Adobe Illustrator documents are the preferred vector graphics format used by designers for creating images for use in all types of projects from web to print.
Adobe Illustrator is the industry standard for creating vector artwork from scratch. It can also be used to export to pretty much any other file type.
Note: Think of these as being the “Source” file. Access to Adobe Creative Cloud is required to open this type of file.
It can be pretty complicated to fully understand the different image characteristics, much more so than it seems at first glance, but this brief guide has provided a better understanding of the standard file types and which are most appropriate for your project.
Conclusion
PNGs are very useful for most purposes – they are not lossy, and you can have a transparent background for easy integration to any document.
GIFs can be animated, and can also handle transparency.
Resolution is only relevant to raster images.
Vector images can be scaled up and down infinitely without loss of quality, which is great for logos, graphs and charts.
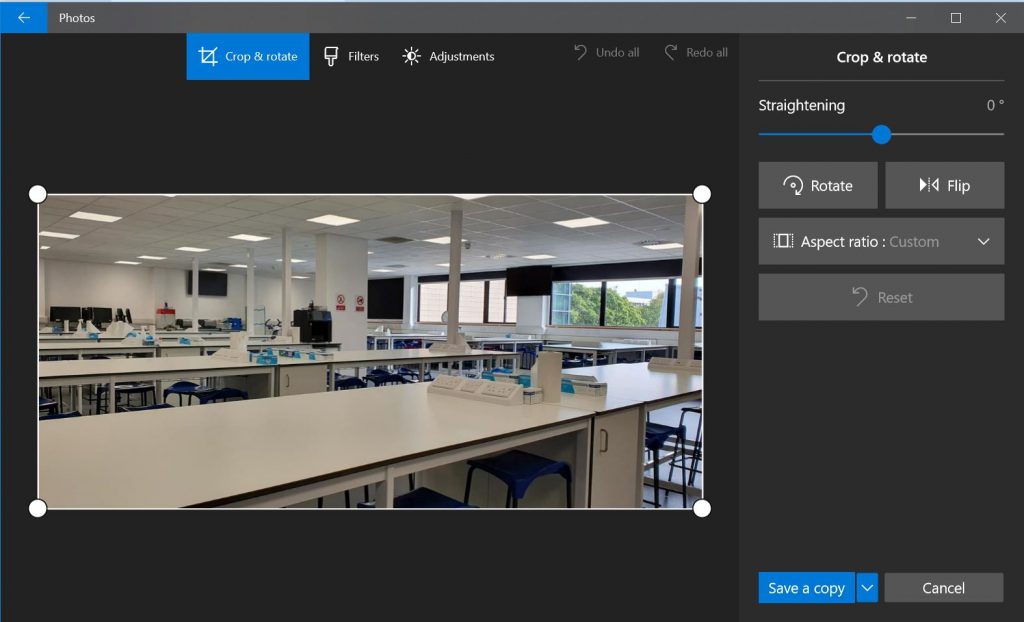
You may not have expensive software like Photoshop for image editing or you may just want to do a quick edit. There is a free option for basic editing in Windows 10. It’s called Photos.
If you’d like to find out how to do basic editing in Photos then check out this guide on the FMS TEL Community:
Animated GIFs are a great alternative to short videos or sets of screenshots. They can be used to display short moving images that can be looped to play repeatedly. The example GIF below takes the place of a series of screenshots demonstrating how to access a menu in Canvas.
Making your own GIFs
To make your own animated GIF, first record your screen as you perform the steps you want to illustrate. You can use Zoom for this, or any other screen-recording software you are comfortable with. Once you have your video, upload this to a video-to-GIF converter online. The best choice at the moment is ezgif – it has a wide range of features and good terms of use. They don’t store your file or claim any intellectual property rights over anything you upload, and your file is removed from the server in an hour. It’s always worth double-checking these online tools to make sure the terms are reasonable.
Using ezgif it is possible to crop the screen recording to show the specific part you are focusing on, and you can trim the clip to start and end where you need it to. Other settings include changing colours and setting how many times you want the animated GIF to loop.
Once you have created your animated GIF and have saved it, you can add it to a Canvas course in the same way as any other image.
The advantages of using GIFs
Compared with video, they minimise the storage space needed for the content, reducing data needed and loading times.
They can replace long sets of screenshots to show stages of a process. Often these screenshots take up a lot of space, and text can get lost amongst the large images.
They can be made quickly with no need for specialist skills or software.
Recently a change in Apple software made some other types of video and animation – those displayed in iframes – impossible to access using the Canvas app on iPhone. GIFs are a very accessible format and don’t require iframes to work, so using them where possible avoids this issue.
Some older formats of animations have become obsolete – animated GIFs have been around for over 25 years and show no signs of disappearing.
Uses for GIFs
To illustrate a couple of steps in using some software.
To show a series of improvements or changes to a document or file.
To show consequences of changing parameters in a simulation.
To illustrate the differences between a series of images, such as diagnostic scans.
We have had a few enquiries via FMS Enquiries about getting tasks done without specialist equipment we would normally have on hand in our offices.
We have recently added some information to the FMS Community on how to use mobile devices to produce learning materials. A kind of Do It Yourself guide for producing materials from home or on location.
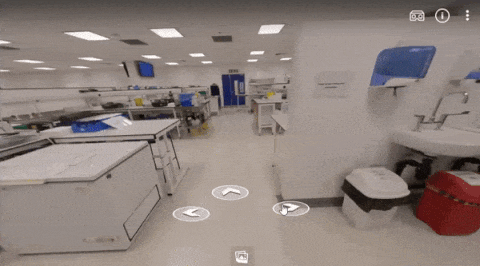
Prompted by the need to show students FMS teaching labs, we have added some information around 360° images to the FMS Community, including example images and how these images are captured, processed and made ready for viewing. This work results in images which can be viewed on screen or using a VR headset.
This is a low-quality preview of the real output.
These images have a variety of uses, including:
allowing students to view places they may otherwise never see in person
allowing students to see facilities such as labs before they arrive on campus
students can familiarise themselves with the layout of a room or building
taking activities in a safe controlled realistic environment, for example identifying hazards without putting themselves at risk
helping students learning at a distance to feel like they are part of the institution
As well as single images, it is possible to connect a series of images to create tours. Users can then click one place to the next in a series of linked 360 images – like in Google Map Street View. Video tours can also be created.
Recently we used these images to provide a virtual induction to FMS labs as part of a health and safety course. To see the full case study, visit the FMS Community.