As part of the conference, Susan Lennie and Eleanor Gordon presented this video detailing the student response to the introduction.
The written summary of the development of the intervention can be accessed below.
This post is about using audio recordings of patient consultations in teaching. Commentary was added to the recordings by the lecturer to create a richer resource.
This case study concerns Dietetics and Nutrition module NUT2006, Measurement and Assessment of Dietary Intake and Nutritional Status. As part of this module, dietary interview consultations are recorded so that the students can listen to these as examples. The FMS TEL Podcasting Webinar provided initial inspiration for what could be done with the recordings to enhance them. With a little more support, a new audio resource has been developed which adds audio commentary to the recorded consultations, highlighting various features.
The work of Dietitians and Nutritionists involves gathering information from individuals and populations on their recent or typical food intake. This enables them to analyse nutrient intake and understand dietary behaviours so that they can make suitable recommendations. Taking a diet history, or a 24-hour dietary recall, involves a structured interview with questions exploring habitual food intake, timing of meals, cooking methods and quantities. The effectiveness of the interviewers’ questioning technique impacts upon the quantity of information gathered and the quality of the nutritional analysis that can be undertaken. Students are working towards proficiency in these skills. Listening to recordings of these interviews exposes students to examples which will support in improving their skills when they perform these tasks for themselves. They can also practice analyzing the data provided from the audio recordings.
The recordings themselves are a very rich resource, which could be used in a variety of ways to help students improve their practice. The following task was developed, which required teaching staff to add audio commentary to the interviews.
Students first watched a short lecture on best practice for conducting interviews. They then listened to a recorded interview, by an anonymous peer, and made notes critiquing the effectiveness of the questioning techniques and determining if the quality of information obtained was sufficient to undertake nutritional analysis. Next, they listened to the same interview with professional commentary provided by staff, highlighting what could be improved and were asked:
This task was designed to allow students to develop their skills in conducting the interviews, and to reflect on practice and identify areas for development. The use of peer recordings meant that there would be a range of areas to comment on, making the task itself much more active than simply listening to a professional. Students were also offered more interview recordings to practice this task further.
A recording was chosen that demonstrated a range of teaching points. Having listened to the recording and made brief notes, cuts were then made in the original recording at natural stopping points, for example, after the participant and interviewer had discussed breakfast. It was important to allow the original recording room to breathe by not interjecting too often – this makes for fewer edits too.
You can record audio with a range of devices – Windows laptops can run Audacity, and Macs come with GarageBand. It is also possible to record audio clips on a smartphone and import them. When doing any recording, make sure to do a quick test first to ensure there is no unwanted background noise – just record a few seconds and listen back. GarageBand was used in this case, but the Audacity user interface is very similar.
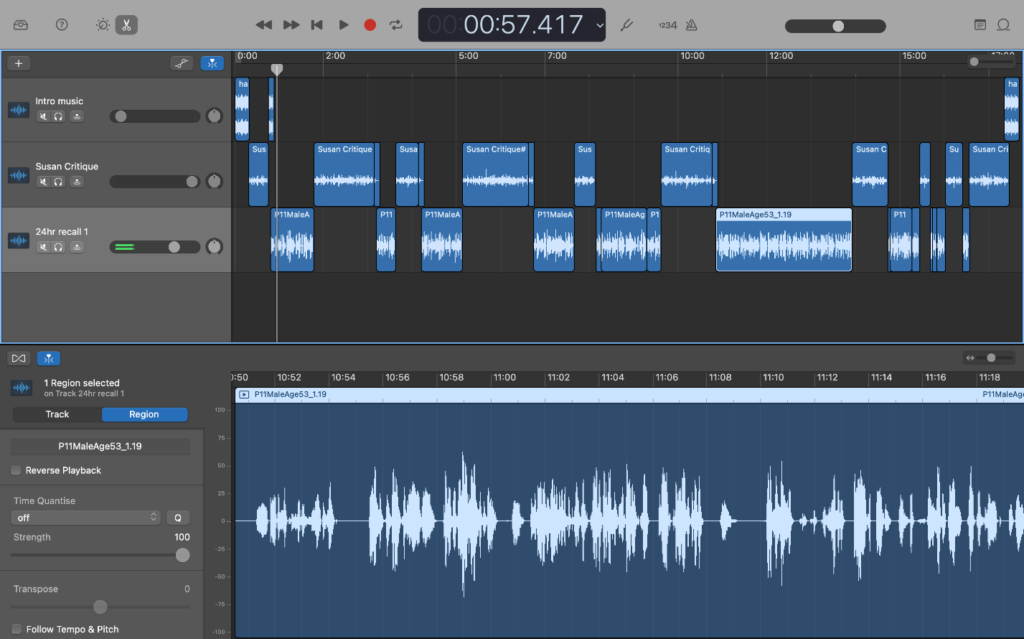
The first 20-minute recording took around two hours to produce, but this time included learning how to use the software. The screenshot below shows how the editing process looks in GarageBand. The top half shows the three tracks that were mixed to create the final output. By cutting and arranging the various sections, it is possible to quickly add commentary and even intro music to the basic original recording.

The project file, which contains all of the information in the top half of the screenshot such as individual tracks and cuts, can be saved for later use. This is helpful if you want the flexibility to change the content, or re-use elements. The single stream of audio can be exported separately as an audio file and embedded into Canvas or the MLE with accompanying text and other resources to build the desired task.
It is natural to worry about quality when producing an audio or audiovisual resource for the first time as the content should convey a level of professionalism matching its purpose. As long as content is clear and understandable, it will serve for teaching. Making a clean recording can be done relatively simply by avoiding background noise and speaking at a measured pace and volume. You can add a touch more professionalism to your recordings by adding a little music to the intro and using some basic transitions like fading between different tracks if needed, but there is no need to go out and buy specialist equipment. The content of the recordings was linked very closely to the students’ tasks and mirrored how they may receive feedback in future by showing what practitioners look for in their interviews. This clear purpose alongside the care taken in producing the audio ensures that this resource is valuable to listeners.
While at first it seemed like a big undertaking, a quick YouTube search for instructions on using the software, and then having a go with the audio recordings has opened up a new avenue of teaching methodology – it was a lot easier to do than it first appeared, and in total took around 2 hours. The software has a lot of capabilities, but only the basics are really needed to produce a high-quality, rich teaching resource. Commentated practitioner interactions allow teaching staff to draw students’ attention to key moments while remaining in the flow of the interaction, signposting how students can reflect on practice and develop their own interviewing skills.
Susan Lennie, Senior Lecturer, Biomedical, Nutritional and Sports Sciences
As part of the research for our Podcasting webinar, I recently spoke to Iain Wheeldon in the School of Arts and Cultures about his experience running his podcast Cultural Peeps.
The resulting case study can be seen on the LTDS Case studies site, and has also been highlighted as part of the Art of the Possible.
Our webinar recording and accompanying resources can be found on the FMS TEL Canvas community. These will be useful for anyone considering incorporating audio-only material in their teaching and assessment, as well as anyone interested in listening to or creating podcasts.
If you have any trouble joining the community, enrol here before retrying the materials link.
This webinar ran twice on 21st April 2021, and we were happy to see colleagues from across the faculty and NUMed in attendance.
The webinar covered:
Colleagues can find the resources from the webinar – including the recording and links to further reading – on the FMS TEL Community in Canvas. If you have trouble accessing the community, please get in touch via fmstel-enquiries@newcastle.ac.uk
One of the services I offer as part of the FMS TEL team is the creation of bespoke 2D animations. These are most commonly used as small parts of a bigger project, but they can also be stand-alone projects themselves.
Types of animation and choosing the right tool for the job
Depending on the nature of the animation required, and also the context in which it will be used, there are three different types of animation that we can produce.
These are:
When looking at the source material I will first plan the animation in my head, and will usually know right away which type of animation will be most appropriate for the job. For example, if there are any user interactions to be included then an HTML5 animation would allow for that, but if there is the need for some organic shapes then that would suit a video based animation better.
Planning and Storyboarding
When visualising an animation, I plan the animation as a whole from the start, rather than tackling it scene-by-scene as this gives a more natural and entertaining feel to the end result.
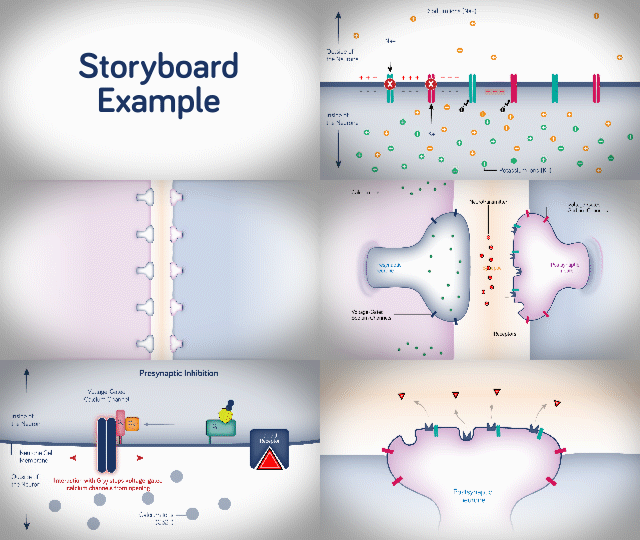
Once I’m happy that I have a good understanding of the content I will then create a series of illustrations as a storyboard and send this as a PDF for review.

I then discuss with the subject specialist which techniques will work best for the application, and raise any concerns. I can then start the animation process.
Creating the animation
Getting things right at the concept and storyboard stage is critical and can save a lot of time, compared to how much of a time investment it can be if you have to re-do a large part of the animation.
However, understanding that I may not get the content perfect in the first draft every time, I structure my files in a way that changes can be made with minimal disruption to the rest of the timeline. This is achieved by both layering up the source Illustrator files and also separating the key points of the main composition timeline into separate sub-compositions. That way I can work on a small section without knocking everything else out of sync.
Obviously, every project is different but by focusing on the movements involved, the flow between the scenes and the basic animation principles I begin the sequence (as you may have guessed) from the start and work on each stage in sequence. This is important because elements will often carry through from one scene to another so duplication can be avoided.
I use Adobe After Effects to create video-based animation and animated GIFs, and Adobe Illustrator to create any graphic and illustration assets needed for the animation. After Effects is an extremely powerful timeline-based tool that can make almost anything possible – think of it as being a kind of Photoshop for video!
If there is to be audio narration or a musical soundtrack on the video, then I arrange for that to be recorded early on in the development rather than being added at the end, as the content and movements should be timed to fit with events in the audio.
Most of the development time actually lies in creating the assets for the storyboard (which are later used in the animation), so when it actually comes to the animating stage things tend to move along pretty quickly.
I usually render out (export) the animation after every new section is complete and upload it our Vimeo account for approval and to check that I’m on the right track before moving on to the next one.
The review process

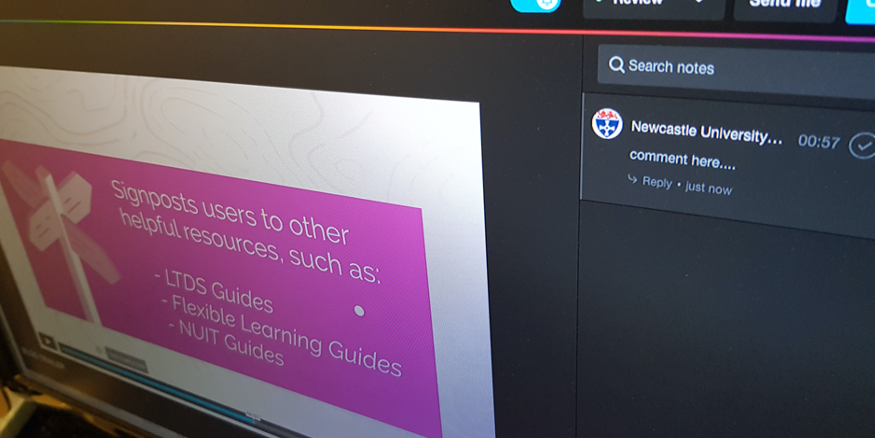
The Vimeo Review platform we use lets the users add time-stamped comments directly onto the video and sends me a notification email immediately thus providing a good communication channel for each specific issue.
When the first draft of an animation is complete, a shareable, password-protected link to the video can be sent out for a wider review to gather comments and feedback. From there we can address any comments and fine-tune the animation for further revisions, which will in turn be sent out for review.
While there is no standard for this, normally after a first (alpha) release and review, changes are made if required and a second (beta) release is then sent for review, with any further required changes reflected in a final (gold) release.
The finished product
The final render from After Effects will be a simple video file, usually in the .H264 codec (MP4) that can either be hosted on our Vimeo account and an embed code supplied, or, depending on file size restrictions, this could be uploaded directly to your target system. It can also be supplied as a file to be included in a PowerPoint presentation or other teaching material. The type of output required is discussed before we start the project to make sure we are taking the best approach.
Past examples
I’ve worked on a wide variety of projects during my time at the university, including multiple MOOCs, marketing materials, and work on modules across both FMS and Engineering courses. The showreel below includes just a small sample of the projects I have been involved in.
Can we help you with your project?
If you have a project that you would like to see come to life in an animation, or a smaller component of your teaching materials that could benefit from some animated content, then please get in touch via FMSTEL Enquiries. I would be very happy to discuss options with you to see what we can do to help.
As we have had a couple of enquiries via FMS Enquiries about audio and video, we have added some information to the FMS Community on how to edit using VLC Media Player. VLC media Player is a free application which allows you to play and convert videos. You can save in many different formats.
You may be looking to add new audio to an existing video, or remove audio before commencing adding a new narration. For example a demonstration of a practical session in a laboratory, or a tour around a building. You can also extract audio only from a video.
See the guide on how to do this here: https://ncl.instructure.com/courses/30988/pages/editing-with-vlc-media-player