FMS TEL have been checking out an exciting new PowerPoint feature from Microsoft. It allows you to put your live video feed on a PowerPoint slide. You can add transitions and other effects to it, just as you can to other objects.
Have you ever heard students complain about a particular topic? Module Leaders for our Chemotherapy Nurse Training module often come across such complaints for their Cell Cycle topic. As the issue was becoming a perennial problem, we decided to thoroughly review the topic that was causing frustration among our students. This blog post shares our project and the transformative impact it had on our students’ perception and understanding of the once-hated topic.
Revamping the Content
We started with the learning objectives for the topic. Using Blooms Verb Wheel as a guide we changed the wording so the objectives would be measurable, and therefore the students could better understand what was expected of them. We removed words such as “understand” and replaced them with “describe”.
Next we reviewed the flow of the topic. We started with a text heavy page with stock images covering; cell basics, cancer, chemotherapy, and ending with the phases of the cell cycle. This page was edited, removing over 100 words, and rearranged so we covered; normal cells and their cycles, then moved onto cancer and chemotherapy. The stock images were converted into animated infographics that were tailor made for the content being discussed.
The biggest change was with the asynchronous lecture. The audio was good quality and the messages were still relevant, however the lecture slides were text heavy and had an outdated look.
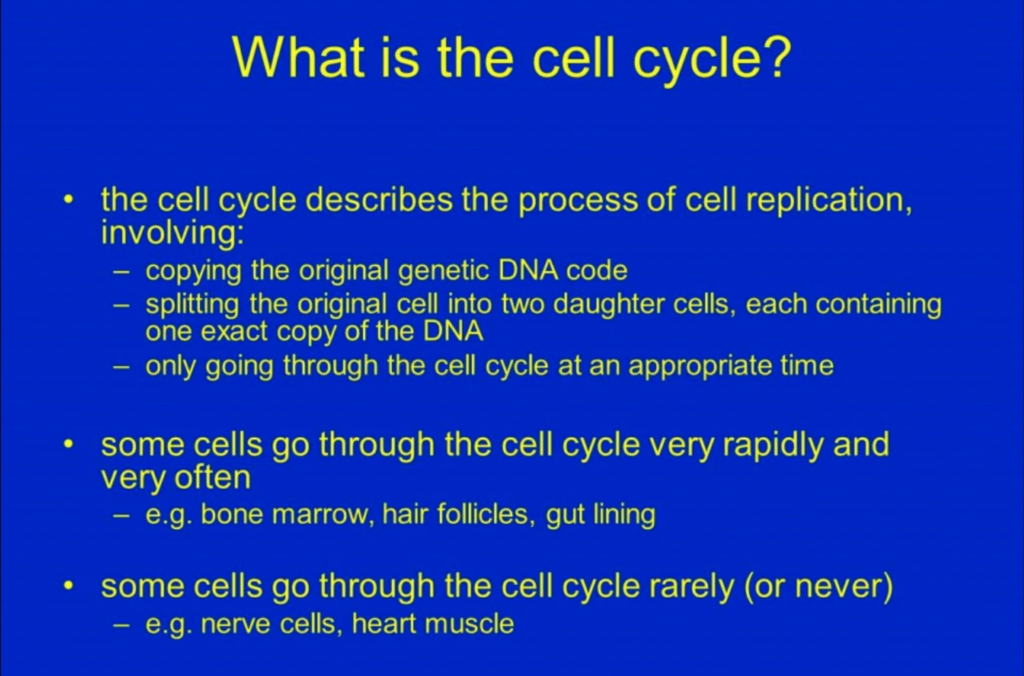
Original slide: What is the cell cycle
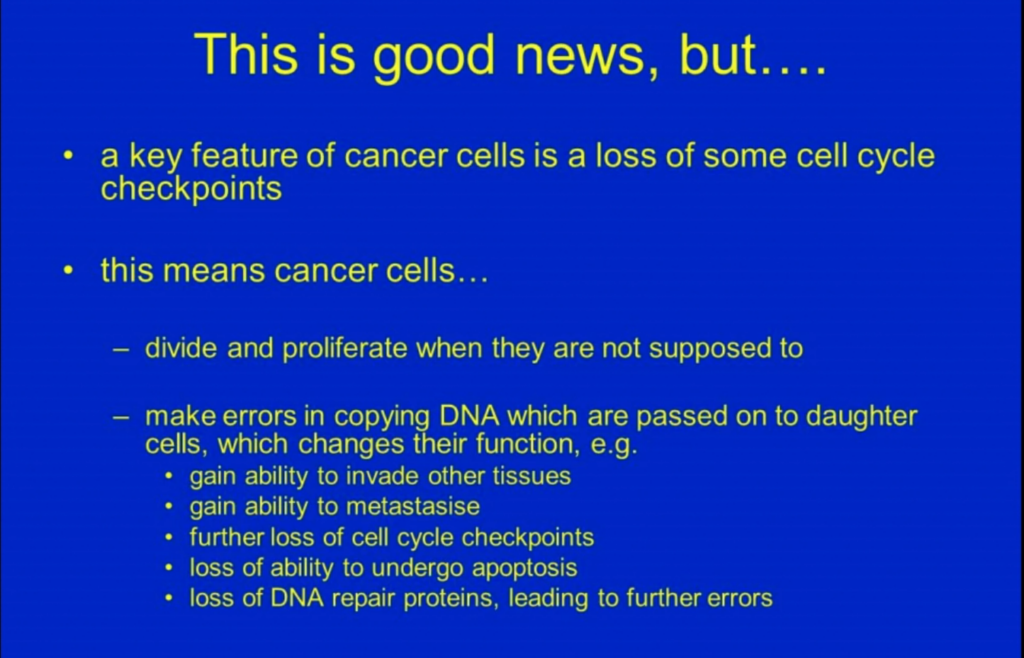
Original slide: This is good news, but…
The slides were given a facelift and where possible, animations were used to replace the text. We hoped the animations would assist the students in visualising the processes being described by the voiceover.
Updated slide: what is the cell cycle
Updated slide: This is good news, but…
Next the students had two tasks to complete. One was to answer some basic questions, and the other was to put their knowledge into action within a group activity. We spruced up the tasks visually, but didn’t make any other changes to them.
We chose to add a “check your knowledge” type quiz, using H5P, at the end of the topic. The questions directly linked to the learning outcomes and we hoped would help the students confidence with the topic.
Student feedback (before):
Found the cell cycle topic very difficult to understand.
I am dreading the cell cycle topic
Student feedback (after):
The topic I have enjoyed most was topic 3 (The cell cycle)
I have particularly enjoyed topics 3 – going further in depth into the cell cycle and pharmacology of the drugs we use has been really useful
I quite enjoyed the cell cycle section…I enjoy the lightbulb moments I’ve had understanding how everything links together.
Final Thoughts
The module team is thrilled with the amazing transformation we witnessed. Our goal was to address the complaints and make things better for the students. But we ended up surpassing our own expectations. The topic that used to be dreaded by the students has now become one of their favourites. The positive feedback from the students has made us proud and motivated us to continue on our journey for improvement. It’s really amazing to see such a big change in how they feel about the subject, with only a few tweaks in how the content was delivered.
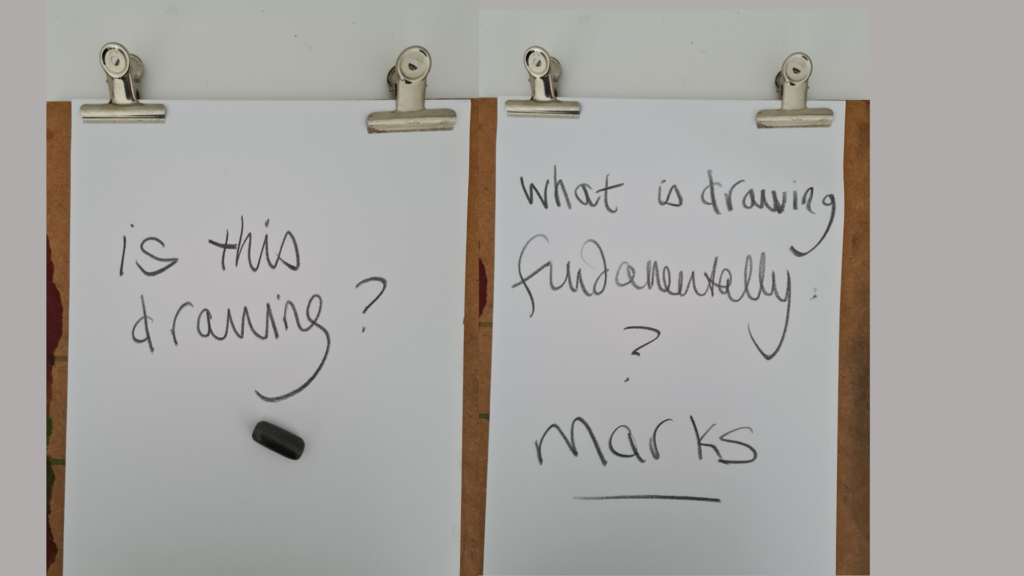
During the FMS TEL Conference, Leonard Shapiro of the University of Cape Town presented an overview of the many ways in which people draw, dispelled myths about the ‘quality’ of a drawing, and covered some of the many ways in which drawing can be useful in learning and in communication once we stop judging ourselves on our artistic skill.
The university has a range of tools that allow us to draw for learning and communication, and draw collaboratively when teaching in person and online, such as smart boards, interactive whiteboards, and collaborative whiteboards in Zoom and Teams, as well as note making apps on devices we have in our pockets.
Drawing as a method to understand 3D anatomical structures is central to Leonard’s work – how might drawing allow your students to take a different viewpoint in your subject?
You may also wish to consider the approaches and methods used in the other linked FMS TEL videos below:
I only have 1 screen, can I view my notes while sharing my screen?
Whether you are creating a pre-recorded presentation or delivering live on zoom/teams, having only one screen can be quite limiting.
Delivering my FMS TEL webinars in the office was easy with my two monitor set up but when working from home I struggled with only my laptop. I prefer to have notes to keep me on track and to make sure I cover everything I want to say. I knew there must be a way to access my notes while presenting.
Below are step by step instructions on how I shared my presentation with my audience while viewing my notes, all done using only a laptop!
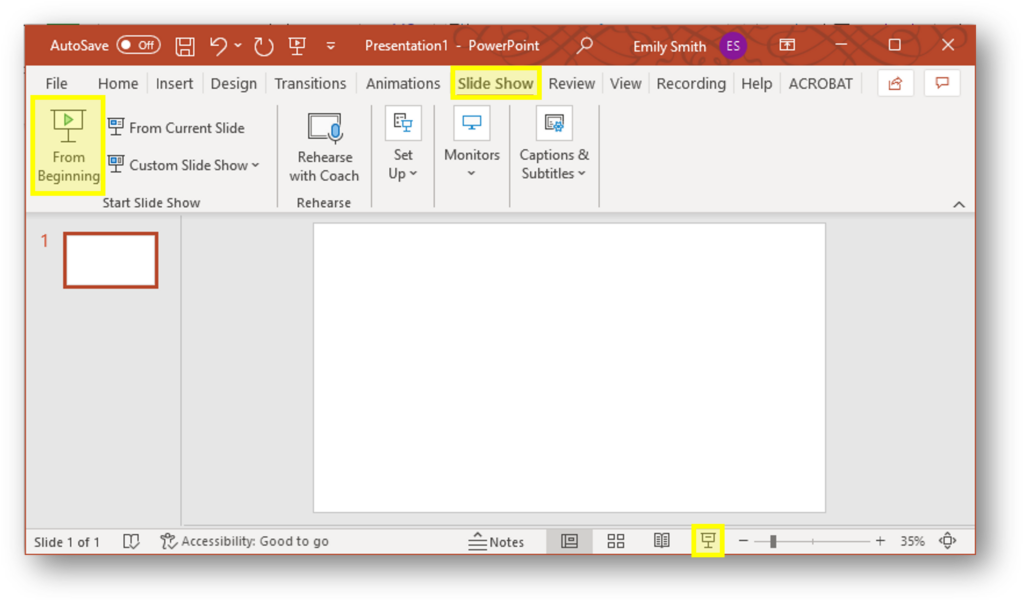
Open PowerPoint and start your slide show
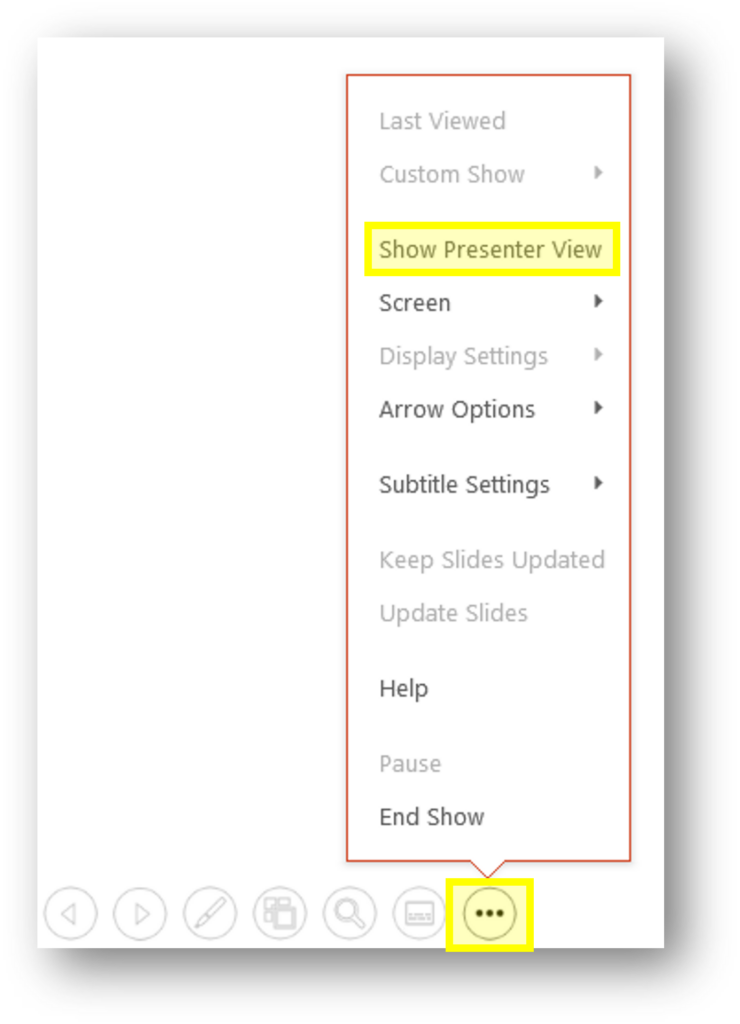
Click the Ellipsis menu, then “Show Presenter View”
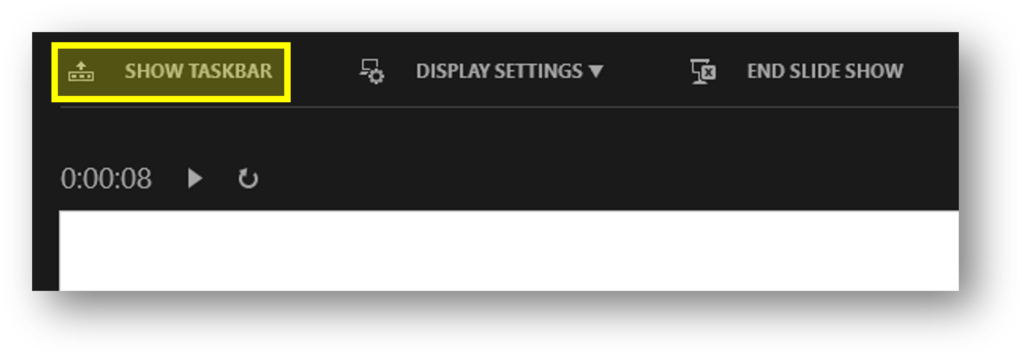
Click “Show Taskbar” or press the Windows key on your keyboard
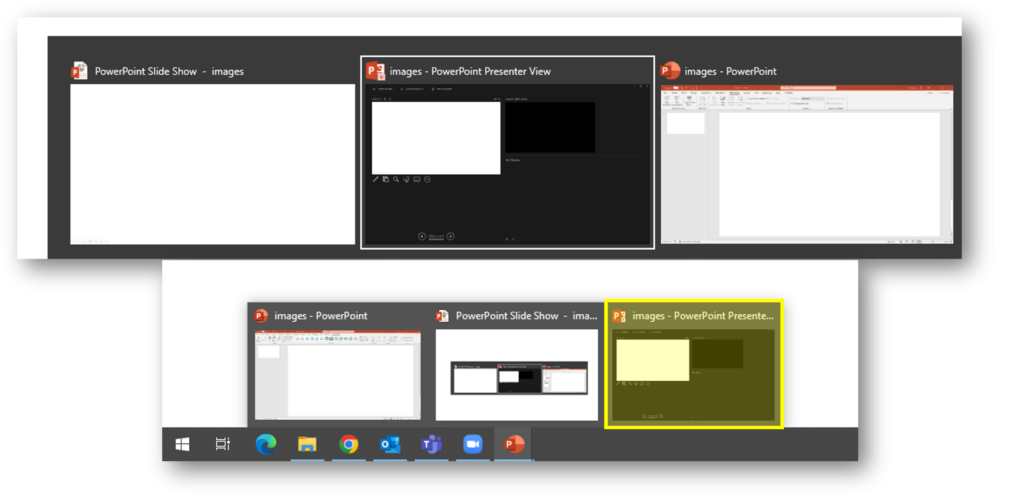
Open Zoom/Teams, Click “Share Screen”. You should see 3 options from PowerPoint, choose PowerPoint Slide Show
To open Presenter View, navigate using the Alt + Tab buttons on your keyboard, or press the windows key and select presenter view from the Task Bar
Tips
Practice the steps before your session (you may want to open this post on a second device so you can access the instructions while you practice)
Add a blank slide or holding slide at the start of your presentation, especially if your first slide contains animations or slide transitions
Add a finishing slide, when your presentation ends the screen will stop sharing automatically (Zoom will display a pop up message to confirm this has happened)
Learn how to use timers in your PowerPoint presentations to aid questions and answers for students and yourself.
As teachers or trainers we can often feel the pressure to fill the silence when presenting. How long should you wait for an answer? Or a better question might be, how long do you think you wait?
Research suggests that at least 3 seconds can provide positive outcomes for both teachers/trainers and students (Rowe, 1972).
Each task may require different lengths of silence, you will want to think about the time the students will need to:
process the question
think of the answer
formulate a response
(if teaching virtually) unmute or type their response
The concern is to provide the period of time that will most effectively assist nearly every student to complete the cognitive tasks needed in the particular situation.
Stahl, 1994
You may find yourself counting the 10 or 15 seconds in your head, but still the silence can feel unbearable.
PowerPoint Animations to the rescue
Using a consistent slide design with an animation will not only relieve the pressure on you to keep track of the time but also provide cues that students will become familiar with as your teaching progresses.
Below are examples and instructions for 4 different types of animations you can create in PowerPoint, ranging from super easy to slightly complex. At the bottom of this post you will find a template document of all the examples shown plus a few more complicated designs which you can download and use in your own presentations.
Example 1: Stopwatch
Example stopwatch PowerPoint animation
Insert a circle and style as required (holding shift will help you draw a perfect circle)
Add a “Wheel” animation to the circle and adjust to your chosen duration (max of 59 second)
Add the stopwatch icon (Insert > Icons > search for “Stopwatch”)
Example 2: Progress Bar
Example progress bar PowerPoint animation
Insert a rectangle, remove the outline and choose a fill colour
Add a “Wipe” animation to the rectangle, using the effect options drop down change the direction to “From left” or “From right”. Adjust to your chosen duration (max of 59 seconds)
Insert a second rectangle on top of the first, remove the fill colour and style the outline as desired.
Example 3: Count Down
Example count down PowerPoint animation
Create a text box for each number required, style as required
Add the “Disappear” animation to all text boxes
Set the first number to start “on click” with a 1 second delay
Set all other numbers to start “after previous” with a 1 second delay
Stack each text box on top of each other in the correct order, you may want to use the arrange menu or the selection pane to assist with this
(optional) Add a text box at the back stating times up
Example 4: Scrolling counter
Example scrolling counter PowerPoint animation
Insert a rectangle, with no fill and an outline of your choice
Insert a text box and type in the required numbers, with a new number on each line
Add the “Lines” animation to the text box, move your text box so your first number aligns with the green arrow and your final number aligns with the red arrow (further guidance). Adjust to your chosen duration (max of 59 seconds)
Insert more rectangles above and below the first rectangle you created to hide the numbers as they scroll in and out
Rowe, M., 1986. Wait Time: Slowing Down May Be A Way of Speeding Up!. Journal of Teacher Education, 37(1), pp.43-50
Stahl, Robert J. & ERIC Clearinghouse for Social Studies/Social Science Education. 1994, Using “Think-Time” and “Wait-Time” Skillfully in the Classroom [microform] / Robert J. Stahl Distributed by ERIC Clearinghouse [Washington, D.C.] <https://eric.ed.gov/?id=ED370885>
A video explanation and demonstration of how animations can be used to explain concepts, and when this is most effective.
Teaching and Learning Conference Presentation
Ashley Reynolds and Eleanor Gordon
This video demonstrates how animations can be used to enhance teaching. Some animations require specialist experience to create, but a great deal can be achieved by adding purposeful animations in PowerPoint, or utilising H5P.
Animated diagrams are a rich resource for explaining processes and relationships. Online teaching sometimes means that gestures such as pointing, highlighting and demonstrating motion are lost. Including these dynamic elements in presentations boosts understanding of concepts and processes when compared with static images. (Goff et al., 2017).