The FMS TEL Team work with schools across the faculty to maintain and improve our E-Learning offerings. At the moment, this is around 40 modules.
Join us in this blog post for a behind the scenes peek in our last minute checks before publishing the new courses for September 2023.
What have we already done?
During the summer we imported last years content, updated the timetables, and refreshed any padlets or wiki pages. We review the student feedback received from the previous year, and see if there are any quick wins we can do, or any larger problems which are being mentioned multiple times or have been mentioned over multiple years. Suggestions are made to our Module Leaders and agreed improvements are actioned. These will usually consist of activity revamps, updating outdated information, and excessive reading materials replaced with graphics or videos.
The final checks
Our last minute checks will always consist of:
- Run the Link Validator
- Check the courses accessibility
- Create groups and journals
- Prerequisites and Requirements
Run the Link Validator
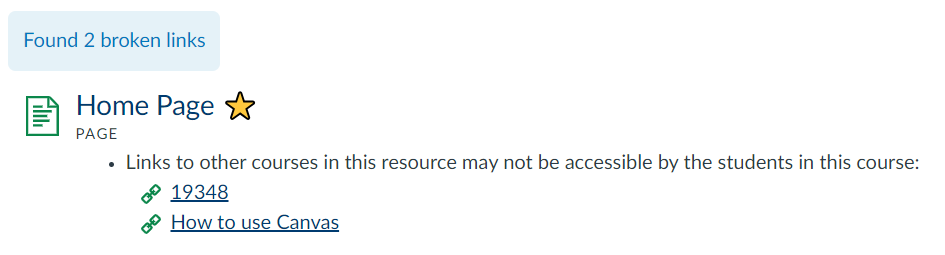
What: The Link Validator will find any broken links within your content. It will display a list of the page/discussion/assignment where the broken link is located and what the broken content is, as well as how it is broken.
Where: Settings > Validate links in content > Start link validation
How: We review every broken link. Sometimes an external website may have changed their website layout so a new path is required. Other times a resource might not longer be available and an alternative source will need to be found. We go through the list, fixing what we can and send a list of any unfixable links to our Module Leaders to review.
Learn more in this Canvas Guide: How do I validate links in a course?
Check course accessibility
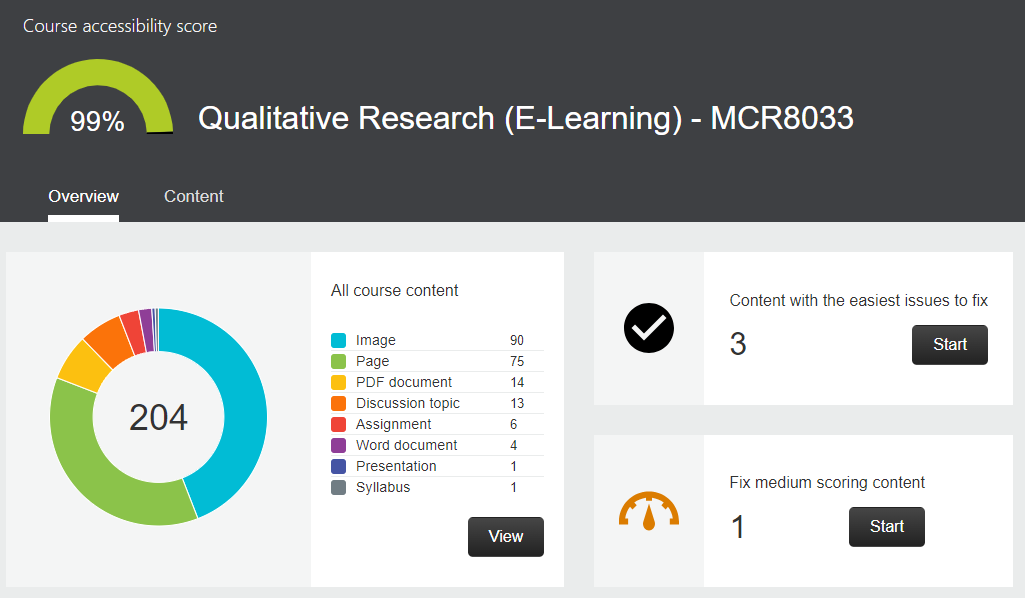
What: Canvas has an integrated Accessibility Report using Ally that will check all content; including documents, images and HTML content. The University has no baseline score, however it is highly recommended that your course is as accessible as possible. For E-learning courses in FMS we aim for a score of at least 95%.
Where: Canvas course > Accessibility Report (side menu)
How: The majority of improvements are easy to make and Ally takes you through the process step by step. Most of the time it will be tagging PDF documents, adding alt text to images or editing images that are over exposed (usually screenshots). We start with the red items and move onto the amber items. It is usually a case of following the on screen instructions. We have a walkthrough document available on the FMS Community as well as a few other posts on Accessibility.
Learn more on the LTDS Digital Technologies website: Ally for Canvas
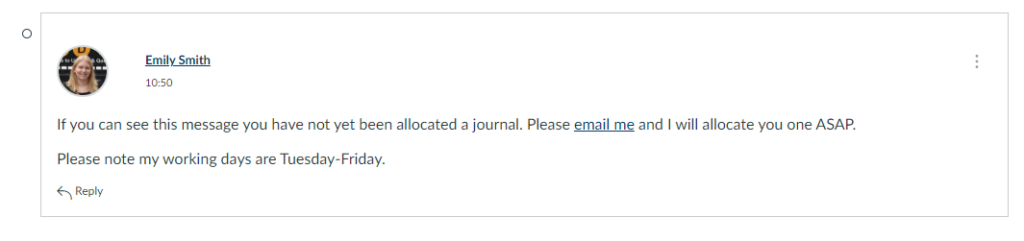
Create Groups and Journals
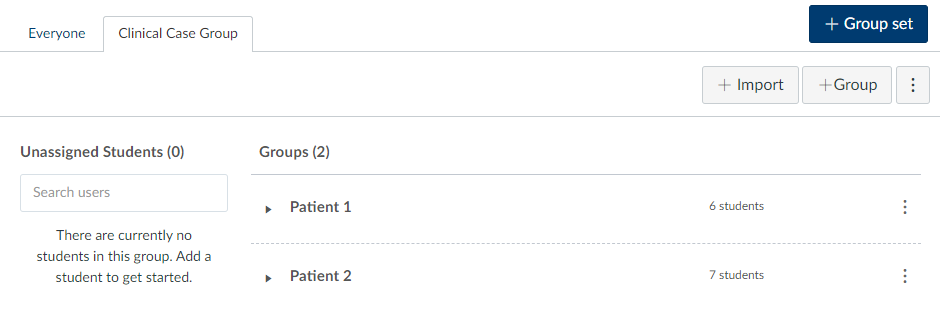
What: On larger modules we tend to put students into groups for certain tasks. We find this helps with engagement, there is nothing worse than joining a task late and finding it already completed. Group tasks are also a great way to distribute workload and encourage teamwork. Some tasks also require privacy or independent thinking, for those tasks journals are a great addition.
Where: Canvas > People > +Group Set
How: Using the groups function in Canvas you can create custom groups, automatically assign groups or create journals by creating a group set with a size of 1. We will start assigning groups once students are added to canvas in the first week in September and then do daily checks for new arrivals every couple of days for the first few weeks of term. I also add a little message to the main board on my group activities asking students to get in touch if they haven’t been assigned to a group/journal yet.
Learn more in this Discussion Board video series we created or in these canvas guides: Instructor Guides for Groups
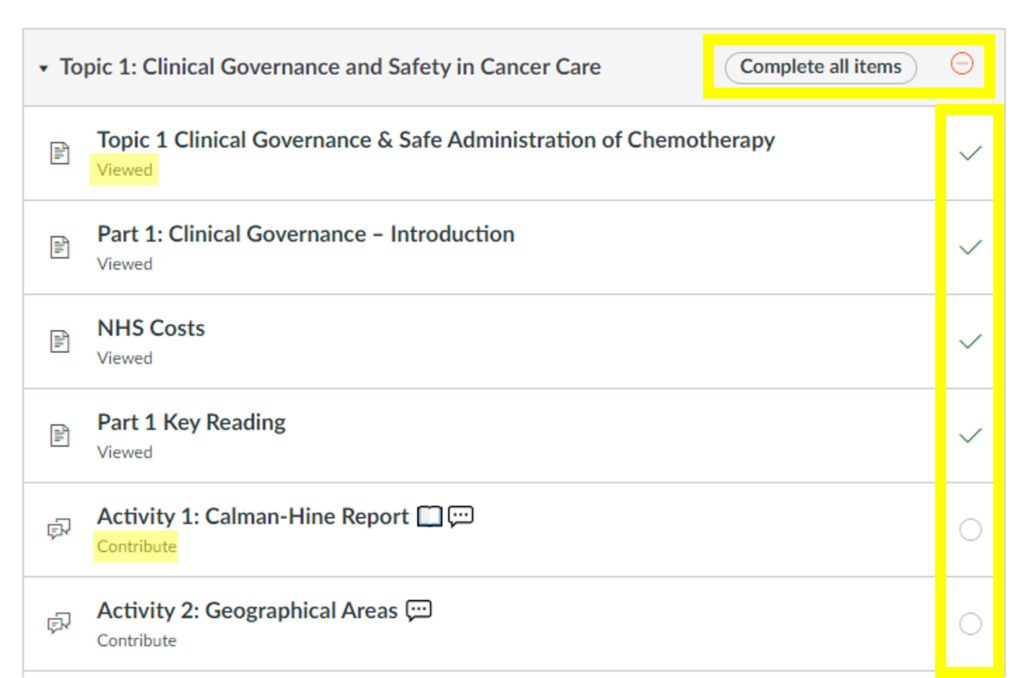
Prerequisites and Requirements
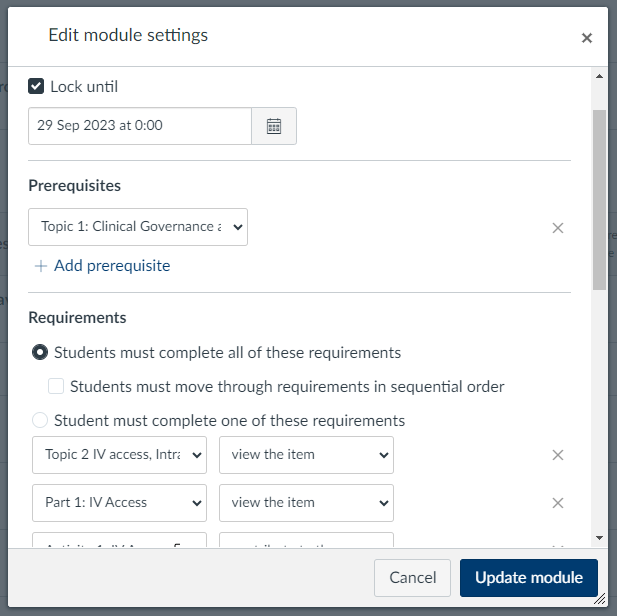
What: There are various ways to organise the flow of your courses. Adding requirements to your content creates a little tick box next to each item, so students can easily pick up where they left off. Using requirements also allows us to add prerequisites, which control when students can move on. They may have to contribute to a discussion board, or pass a test before moving on. We can also control the date and time certain content is made available.
Where: Modules > 3 dot menu > Edit
How: Most modules will have a lock until date, so content is released gradually. All modules include requirements on every page but they will vary from module to module. Some will just be “view” for everything so students can see where they are up to, other modules require students to complete certain tasks to get their tick. A few modules will use the prerequisite option to stop student continuing until they have completed certain tasks.
Learn more in these canvas guides: Prerequisites and Requirements
We hope this little insight into our practice was interesting. Good luck for 2023!