This post assumes users are using Panopto (ReCap), therefore Panopto guidance is linked for uploading and downloading caption files. Guidance for other products such as Streams, Vimeo and YouTube can be found on their own sites.
In FMS TEL many team members regularly work with captioning videos – whether these are our own instructional videos or webinars, or student learning materials. Recently a few of us in the team have been talking about how we caption videos – specifically, what processes we use. There are some of us in the team who use the inline caption editor in Panopto, and use speed controls to manage the flow of speech so they can correct as they go. Others prefer to download the caption files and work with them in a separate program.
Both methods have their pros and cons. Working within the online editor is often best for short videos, or those with very few corrections to be made. Sometimes, though, it is easier to manage longer or more error-prone caption files in their own window. This gives more space to see what you’re doing – as long as you can avoid messing up the file structure. You can also use proofing tools in Word to speed things along or cut out repeated mistakes.
The rest of this post details some tips you can try to speed up your own process if not using the online editor.
You may find that for the bulk of the editing you don’t even need to be listening to the video – the errors can sometimes be evident just from text.
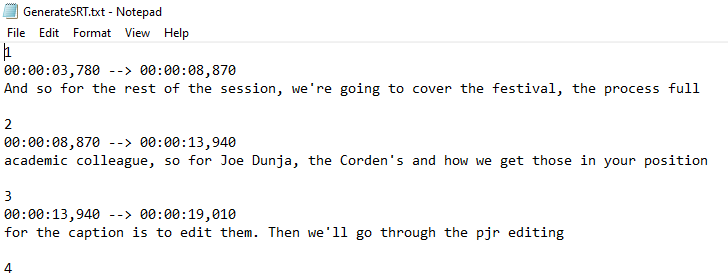
To work with captions outside of Panopto, you’ll first need to download the caption file. If there is no file to download, you’ll need to request automatic captions first. The caption file can be opened in Notepad. From there, you can edit each line of text separately. You must not change the file structure – so do not edit any of the other lines in the file, even the empty ones.

Then, save the Notepad file. In its folder, right-click the file, select ‘rename’ and edit the file extension to .vtt instead of .txt (you may need to change your folder settings to view file extensions first). Then, upload your caption file.
Deciding WHAT to edit is a whole separate issue, but once you’ve made those decisions, Word’s proofing tools can help you target certain things more efficiently.
If you want to take advantage of some more proofing tools, try copy and pasting your entire file into Word. This will allow you to use tools such as Spelling and Grammar check to remove duplicate words or transcribed stuttering sounds, and can also draw your attention to other oddities. The Spelling and Grammar tool automatically moves you through your document, saving time scrolling and searching. As well as checking spelling, this can also help trim unnecessary words from the text, making it faster to read.
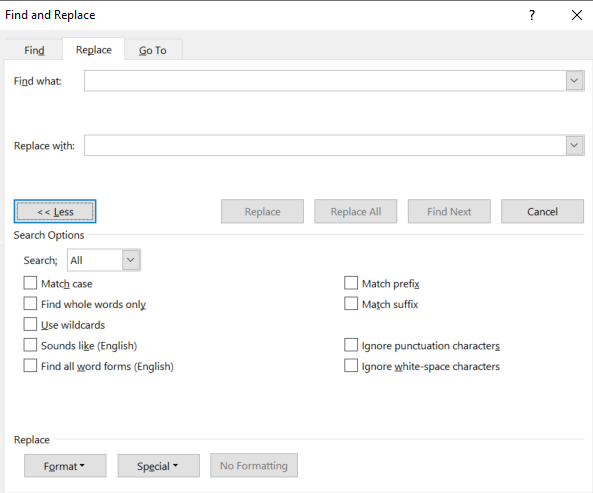
Find and Replace is useful, and can help…
- If a name has been consistently misspelled – for example Jo/Joe.
- If the speaker has a filler word that can be removed (I say “kind of” as filler so always search for and remove it from the captions!).
- To replace key numbers or years that have been spelled out with their numerical representations (e.g. ninety-nine percent -> 99%).
- Filtering out inappropriate language if it has been misheard by the auto software – if you see it once you can search the whole document quickly.
- Filtering out colloquial spellings (gonna -> going to).
A good tip to ensure you only find whole words is to search them with spaces before and after the word itself. You can also use the ‘more’ option dialog and check the ‘whole words only’ box.

If you have been deleting a lot of items and adding spaces in their place, you might also want to do a find and replace for two spaces together and replace with one space. Run this a few times until there are no results. Similarly, you could look for comma-space-comma if you have removed a lot of filler.
These steps won’t fix everything, but can cut out some of the bulk and help speed up your process. After using these tools, read through the captions carefully again to fix any leftover errors.

