FMS TEL Conference 2022 – behind the scenes

This post is a review of the conference experience by FMS TEL members John Keogan and Andy Stokes.

This years conference was going to be a bit different to any conference we had ran in the past, the decision was made for the 2022 conference to be hybrid! We would run in-person presentations, online only sessions, and some sessions would be a hybrid of both. We were excited to take advantage of the video-conferencing technologies on offer within the University.

Using lessons learnt from last years online version, we set out tasks to complete and deadlines to meet.

The Tasks

clipboard with list

We divided the main tasks between us and ran through the list of jobs involved in preparing for the conference. We quickly realised that there was lot more involved than we initially thought!

The main tasks included:

  • timetabling
  • booking rooms
  • communications (including mail merges)
  • creating online conference materials

One aspect of the preparation was getting word out about the conference. We approached schools within the faculty and asked them to put up posters in areas with heavy footfall, as well as staffrooms. We put up posters in cafes, corridors and even lifts – please let us know if you saw them! We also requested that the campus messaging screens carried information about the conference in FMS areas. 

Tips

Room Bookings

  • Consider your criteria before booking, for example:
    • ‘Is the room big enough?’
    • ‘Do the speakers work?’
    • ‘Can we connect a laptop to the projectors?’
  • The room bookings website is not always accurate when you nominate the relative criteria; i.e. ‘Hybrid’, ‘videoconference’ etc.
  • Give yourself enough time to visit the rooms in person (It’s also worthwhile booking the rooms for when you plan to test them, as they can be snapped up pretty quickly in term time).
  • Reserved your rooms well in advance! 

Technology

  • Contact the Audio Visual team for a demonstration of the hybrid technology. They showed us how to set up and use the cameras and mics, and also how to troubleshoot common problems.
  • Consider your booking platform and its limitations, we used workshops.ncl which required us to use an iCal maker so delegates could add the events to their diaries.
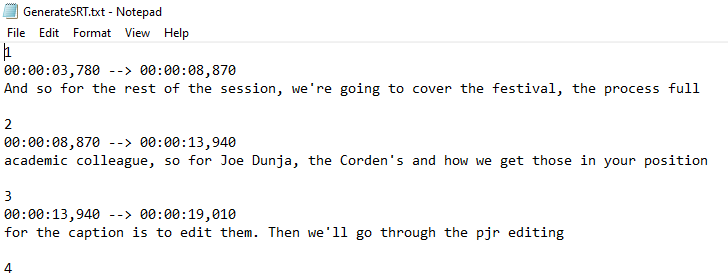
  • Familiarise yourself with video editing software. As a team we edited the recordings using a mix of ReCap, Premiere Pro and Adobe Rush.
  • Schedule a block of time to review captions. We have some excellent posts on how to edit your captions.

Conclusion

Overall, the conference was a great success and we all enjoyed our time being part of the 2022 FMS TEL Conference team.

Being new to running a conference we developed skills and knowledge during the journey. The encouragement and support from our team helped ensure that we fulfilled our tasks and that looming deadlines were met.

We learned things that we will do different, or better, next year and we hope the tips shared in this post will be a good starting point for anyone wanting to run their own conference.

Faster Transcription

This post gives tips and tricks to speed up the production of transcripts, including neat formatting and quickly tidying up timestamps.

This post is the last in the series on Captioning and Transcription. The first two posts cover how to decide what to edit, and tips and tricks for faster captioning. This post builds upon the latter, and covers how to create transcripts more quickly.

If you need to produce captions and a transcript, complete the caption editing first and then use the corrected caption file as your starting point for your transcript. Creating a transcript with the method below will not give you a file that can be used for captions.

When creating a transcript, you will need to decide a few things before you start.

  • Are timings important, and if so, what level of accuracy do you need? Does every utterance need a time, or would it suffice to signal timing points at the start of each slide, for example?
  • Is it important to know who is speaking? Training videos may not need this.

The first step is to download your caption file and copy and paste the text into Word. Then, transform your lines of text into a table using ‘convert text to table‘ and setting the number of columns to 4.

Copy your table from Word and paste it into Excel. Once this is done, you can use Excel to trim down your times and make them more human-friendly, using the MID function in a new column. Copy the formula down the whole row to quickly tidy all of the timestamps. This example trims the hours from the start time, and gets rid of the milliseconds and the end time completely.

The formula above (typed into B1) will look in A1 for the source text, and starting with the 4th character, output 5 consecutive characters into the cell, and then stop. You can change the numbers if you need a different segment or more characters, for example, if you want the hours included.

Pasting the resultant data back into Word means you can then use Word’s formatting tools to shape your transcript, adding columns as needed to denote speakers or other important information, and removing columns that contain redundant data.

Cutting and pasting the individual cells containing speakers’ words into a single cell will help improve the look of the document. Paste without formatting to combine the cells into one. Spare rows can then be deleted. Using Find and Replace to get rid of line breaks (search for ^p) and replacing them with spaces further tidies this up. You can then delete the redundant rows.

If you like, you can then remove the borders from your table. You could also set a bottom cell margin to automatically space out each row.

It is important to check your resulting transcript’s accessibility. As this method uses a table, make sure that a screen reader can read it in the correct order. You can do this by clicking into the first cell of your table and then pressing the tab key to move between cells – this is the order most screen readers will relay the text, so check it makes sense.

You can also choose to add a header row to your table to give each column a title. After adding this, highlight the row, click ‘table properties‘ and in ‘row‘ select ‘repeat as header row’. Ally in Canvas will not give a 100% score without this.

Once your transcript is formatted correctly, you can correct your text and fix mistakes in the usual way if you have not already done so for captions. The previous post on Faster Captioning has some tips and tricks to speed this up.

Faster Captioning

This post details some easy tips and tricks to speed up your caption editing process using Notepad and Word.

This post assumes users are using Panopto (ReCap), therefore Panopto guidance is linked for uploading and downloading caption files. Guidance for other products such as Streams, Vimeo and YouTube can be found on their own sites.

In FMS TEL many team members regularly work with captioning videos – whether these are our own instructional videos or webinars, or student learning materials. Recently a few of us in the team have been talking about how we caption videos – specifically, what processes we use. There are some of us in the team who use the inline caption editor in Panopto, and use speed controls to manage the flow of speech so they can correct as they go. Others prefer to download the caption files and work with them in a separate program.

Both methods have their pros and cons. Working within the online editor is often best for short videos, or those with very few corrections to be made. Sometimes, though, it is easier to manage longer or more error-prone caption files in their own window. This gives more space to see what you’re doing – as long as you can avoid messing up the file structure. You can also use proofing tools in Word to speed things along or cut out repeated mistakes.

The rest of this post details some tips you can try to speed up your own process if not using the online editor.

You may find that for the bulk of the editing you don’t even need to be listening to the video – the errors can sometimes be evident just from text.

To work with captions outside of Panopto, you’ll first need to download the caption file. If there is no file to download, you’ll need to request automatic captions first. The caption file can be opened in Notepad. From there, you can edit each line of text separately. You must not change the file structure – so do not edit any of the other lines in the file, even the empty ones.

The file repeats in structure every 4 lines. The first is the sequence number of the caption, the second is the timestamp displayed in hours, minutes, seconds and milliseconds, the third is the spoken text and the fourth is an empty line.

Then, save the Notepad file. In its folder, right-click the file, select ‘rename’ and edit the file extension to .vtt instead of .txt (you may need to change your folder settings to view file extensions first). Then, upload your caption file.

Deciding WHAT to edit is a whole separate issue, but once you’ve made those decisions, Word’s proofing tools can help you target certain things more efficiently.

If you want to take advantage of some more proofing tools, try copy and pasting your entire file into Word. This will allow you to use tools such as Spelling and Grammar check to remove duplicate words or transcribed stuttering sounds, and can also draw your attention to other oddities. The Spelling and Grammar tool automatically moves you through your document, saving time scrolling and searching. As well as checking spelling, this can also help trim unnecessary words from the text, making it faster to read.

Find and Replace is useful, and can help…

  • If a name has been consistently misspelled – for example Jo/Joe.
  • If the speaker has a filler word that can be removed (I say “kind of” as filler so always search for and remove it from the captions!).
  • To replace key numbers or years that have been spelled out with their numerical representations (e.g. ninety-nine percent -> 99%).
  • Filtering out inappropriate language if it has been misheard by the auto software – if you see it once you can search the whole document quickly.
  • Filtering out colloquial spellings (gonna -> going to).

A good tip to ensure you only find whole words is to search them with spaces before and after the word itself. You can also use the ‘more’ option dialog and check the ‘whole words only’ box.

These extra options can help speed things up.

If you have been deleting a lot of items and adding spaces in their place, you might also want to do a find and replace for two spaces together and replace with one space. Run this a few times until there are no results. Similarly, you could look for comma-space-comma if you have removed a lot of filler.

These steps won’t fix everything, but can cut out some of the bulk and help speed up your process. After using these tools, read through the captions carefully again to fix any leftover errors.

Captioning and Transcribing – What Standard Should I Aim for?

When captioning and transcribing, what is meant by ‘accuracy’? When are captions good enough?

In FMS TEL and LTDS many team members regularly work with captioning videos, in particular for our own instructional videos or webinars. Recently a few of us have been talking about how we caption videos and how we decide what to correct. After discovering we all had differences of opinion about what to keep and what to edit, it seemed like a good idea to think through the issues.

This webinar from the University of Kent features Nigel Megitt from the BBC talking about priorities when captioning and audio describing TV programme. It includes research on how people with different levels of hearing feel about captions.

Note: These discussions refer to materials created for staff training and other internal uses. For student materials, please see the university policies on captioning materials for students and the captioning disclaimer to help with your decision-making.

Different Types of Captioning and Transcription

Commercial captioning companies offer a range of levels of detail. We do not outsource these tasks, but the predefined service levels can help clarify what decisions are made when captioning. Is verbatim captioning better than a lightly edited video? An accurate set of captions or transcript should include hesitations and false starts, but a more readable one might remove these for fast comprehensibility and more closely resemble the script of a speech.

Key Considerations

  • Destination – who is the audience? What do they need?
  • Speaker(s) – how can they be best represented? How do they feel about you editing their speech for clarity (e.g. removing filler words) vs correcting captions to verbatim?
  • Timescale – how fast do you need to turn this around? Longer videos and heavier editing takes longer.
  • Longevity – will this resource be around for a long time and reach a wider audience? If so it may merit extra polish.

Once you have broadly decided on the above, you can deal with the nitty-gritty of deciding what to fix, edit or remove. Deciding on your approach to these common issues means you won’t have to make a decision each time you find an error in your transcript. If working with a few other colleagues on a larger project you might want to agree with each other what standard you are aiming for to create uniformity.

Editing Decisions

The ASR occasionally misunderstands speech and adds incorrect captions that may be distracting, embarrassing or inappropriate, for example adding swearing or discriminatory language that the speaker has not in fact used. Checking the captions for these is a great start, and is likely to be appreciated by all speakers!

We don’t usually speak in the same way we write. Normal speech is full of little quirks that don’t appear in text. Some of these include…

  • False starts (If we take… no actually let’s start with… yes, OK, if we take question 4 next…)
  • Hesitations (um….ah…)
  • Filler Words (you know, like, so…)
  • Repeated words (You can do this by… by reading the text)

Other Considerations for Captioning

Remember that captions will be read on screen at the pace of the video. This means that anything that you can do to increase readability may be useful for the viewer. This includes simple things like…

  • Fixing initialisms and acronyms (PGR not p g r, SAgE not sage)
  • Fixing web and email addresses (abc1@ncl.ac.uk, not A B C One At Newcastle Dot A See Dot UK)
  • Adding quotation marks around quotes.

You may also consider…

  • Presenting numbers using figures rather than words (99% not ninety-nine percent)
  • Removing awkward breaks (When Panopto separates a final word from its sentence.)
  • Fixing inaccurate punctuation like full stops in the wrong places, or commas and apostrophes (this is quite time consuming).

Considerations for Transcription

As well as the editing and tidying jobs above, before beginning to work with your file, consider whether or not the timing points are going to be important, and how you are going to denote different speakers, or break up the text. For example, for an interview you may need to denote various speakers very clearly. By contrast, for a training webinar, even if there are two presenters it might not be crucial to distinguish them. Instead it might be better to add headings for each slide so that the two resources can be used side by side.

Once you have decided on what to edit and what to ignore, your process will move along much faster as you won’t need to decide on the fly.

Keep an eye on the blog over the next few weeks for tips on how to quickly manage and edit your caption and transcription files.