The Unessay – NULTConf

Dr Stephanie Holton presented her Unessay assessment task – what could you assess with an Unessay?

At the Learning and Teaching Conference Dr Stephanie Holton, along with two of her students, presented their experiences trialling a new approach to assessment – giving students freedom in how to present their learning, rather than setting a traditional essay task. This work was done in a module examining Ancient Greek texts.

What is an ‘unessay’ – and how exactly does it work? This talk explores the increasingly popular unessay as alternative assessment type, taking as a case study its implementation across several compulsory language modules in the School of History, Classics & Archaeology during 2020-21. Delivered by both the staff and students involved, it highlights the wide range of benefits – as well as the challenges – of diversifying assessment in some of our most traditional modules.

Dr Stephanie Holton

The full talk can be viewed here.

It was fantastic to see how the students were able to approach this new assessment methodology, and the outputs themselves were diverse, including models and digitally-created choose-your-own adventure books. The support provided included workshops and one-to-one sessions so that students knew what to expect, and were confident they were on the right track. While somewhat time-intensive in terms of support, the level of engagement and ownership the students felt around their creations was a clear benefit of this methodology.

Students were able to share their extra curricular creative skills, and the diversity of their approaches meant that they were prompted to explore their texts in new ways – for example researching clothing colours for their model characters that would be appropriate for the time. The need for these extra details prompted students to do more research around their text that they may not have otherwise done, broadening their subject knowledge.

These kinds of assessments open the door to students using and expanding their digital skills, even though this isn’t the focus of the assessment. The element of choice allows them to choose their own level of comfort with how they’d like to present their project – whether this is in a digital format or physical.

What could you assess with an Unessay?

Augmented reality in physics laboratories – NULTConf

NULTConference – Augmented reality in physics laboratories how might this help in FMS?

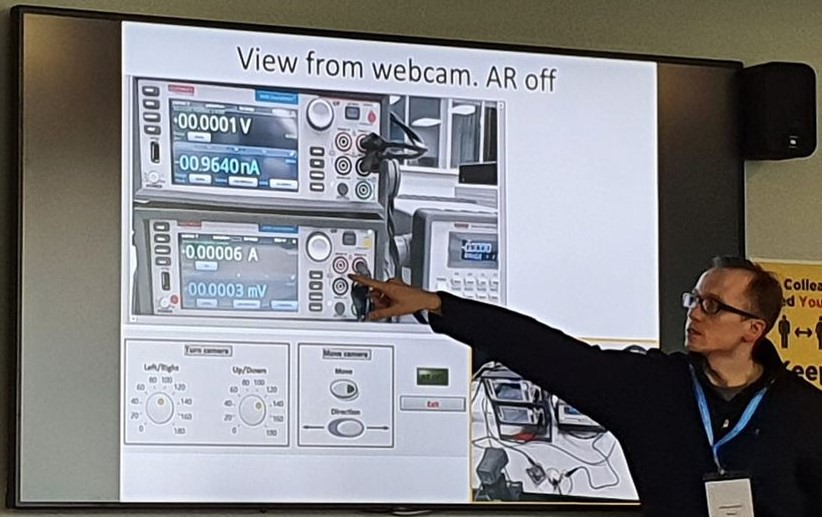
An extremely interesting talk from Dr Aleksey Kozikov on using AR to allow students to operate equipment in a lab remotely.

We introduce augmented reality (AR) in online physics laboratories and demonstrate their operation. It allows students to see the real and virtual world overlaid with each other. Webcams stream videos of real hands-on experiments live into students’ computers. Virtual objects (buttons, switches, cables, etc.) overlay with the real scenes. As users handle virtual tools, they perform required tasks of experiments. We will also discuss advantages of having AR labs.

The full talk can be viewed here

Equipment was set out with a webcam in front of it. . The webcam was linked to a micro controller which allowed students to control it remotely. Students logged into an onscreen control panel. Virtual buttons were placed over the top of real buttons on the machines to allow students to have the effect of pressing them. The camera worked by using markers which were placed on the machines to help the camera with tracking and keep the virtual buttons in place.

There were also 360⁰ virtual tours of labs. Students could enter and walk around the labs, click on icons to learn more about equipment and click a weblink to a browser to do the experiment. There was no need for software, just a browser. Only necessary functionality was available. No need to log into university computers, and students could work remotely in groups.

Red circles were used as markers for the camera. Next steps were to use Fiducial markers (small QR codes) which can provide much more information. They are also looking for students to be able to use handheld controllers with VR glasses in future development. These would also be used in person in the labs and they would be able to comment to someone through the glasses on Zoom.

This concept may be transferable to some experiments done in FMS labs.

Technology Showcase – UTME Study Day

This weeks post shares a session FMS TEL were asked to participate in a study day on the Utilising Technology in Medical Education (UTME) module offered by the School of Medical Education.

The FMS TEL team were asked to participate in a study day on the Utilising Technology in Medical Education (UTME) module offered by the School of Medical Education.

The module aims to raise students’ awareness of how technology enhanced learning is currently used in health care education and gives students the opportunity to explore technologies and investigate theoretical underpinnings. Based on these aims we put together a 3 part presentation.

Part 1 – Tools for Student Interaction

PowerPoint Slide: FMS TEL Interactive Content, Instant/Quick Wins

Emily introduced a number of TEL tools including; Menti, vevox and padlet. Each tool was discussed; outlining its uses, pros and cons. Current examples of content designs, interactive activities and animations used throughout the faculty were shared.

Part 2 – Collaborating and Facilitating Group Work

PowerPoint Slide: FMS TEL Collaborating with Microsoft

Michelle demonstrated how to use Microsoft 365 to co-author and co-edit documents, presentations and spreadsheets. Students were shown various features including; reviewing mode, version history and how to use Sharepoint to monitor breakout room activities.

Part 3 – Teaching Tools

PowerPoint Slide: FMS TEL Teaching Tools

Eleanor shared her experience of teaching with Zoom/Teams and tips on how to humanise online sessions. She discussed common barriers, such as awkwardness or long silences and strategies or tools to use as solutions.

Embrace the silence: the use of timers in synchronous teaching

Learn how to use timers in your PowerPoint presentations to aid questions and answers for students and yourself.

As teachers or trainers we can often feel the pressure to fill the silence when presenting. How long should you wait for an answer? Or a better question might be, how long do you think you wait?

Research suggests that at least 3 seconds can provide positive outcomes for both teachers/trainers and students (Rowe, 1972).

Each task may require different lengths of silence, you will want to think about the time the students will need to:

  • process the question
  • think of the answer
  • formulate a response
  • (if teaching virtually) unmute or type their response

The concern is to provide the period of time that will most effectively assist nearly every student to complete the cognitive tasks needed in the particular situation.

Stahl, 1994

You may find yourself counting the 10 or 15 seconds in your head, but still the silence can feel unbearable.

PowerPoint Animations to the rescue

Using a consistent slide design with an animation will not only relieve the pressure on you to keep track of the time but also provide cues that students will become familiar with as your teaching progresses.

Below are examples and instructions for 4 different types of animations you can create in PowerPoint, ranging from super easy to slightly complex. At the bottom of this post you will find a template document of all the examples shown plus a few more complicated designs which you can download and use in your own presentations.

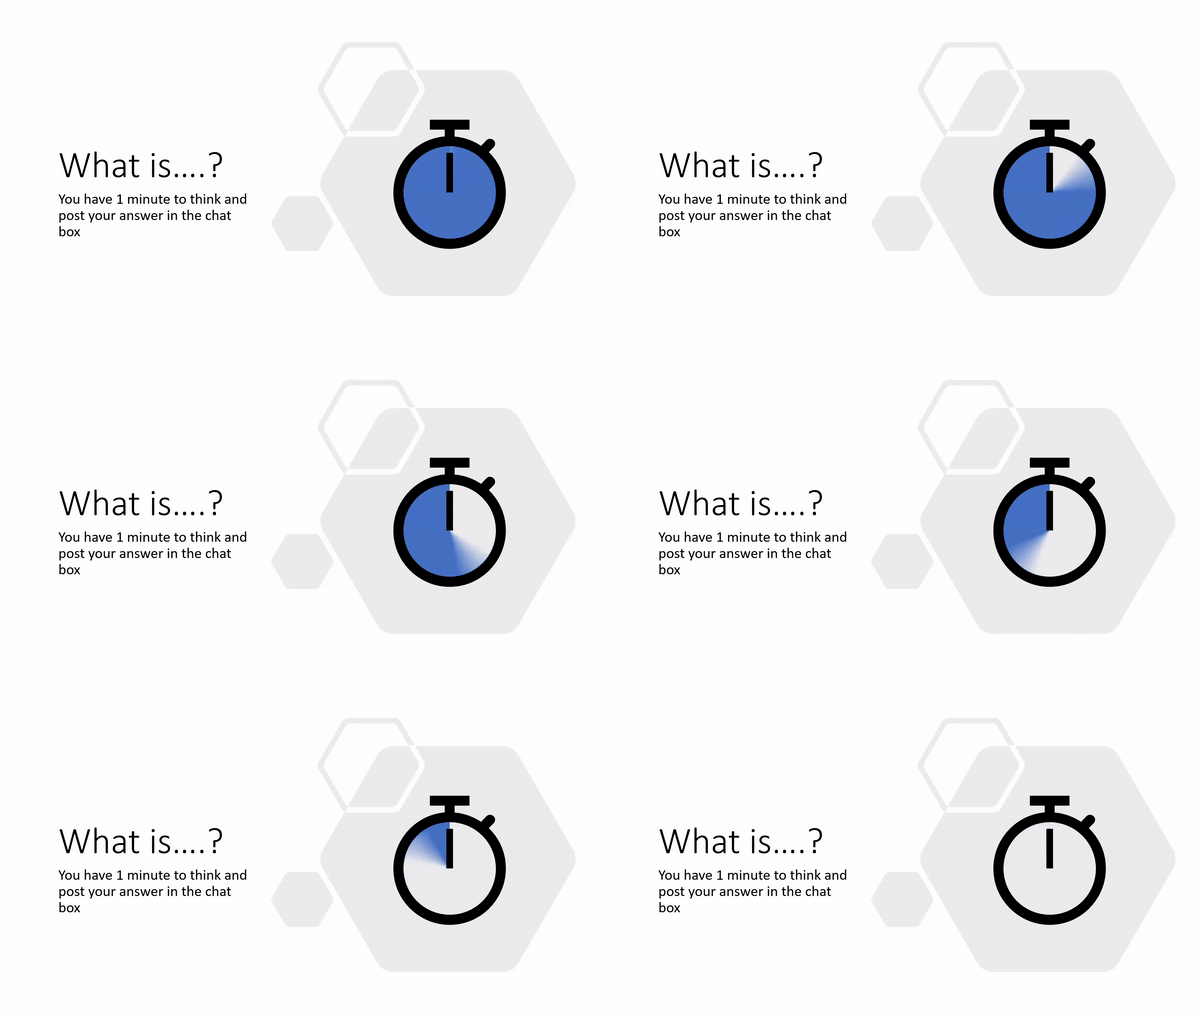
Example 1: Stopwatch

Example stopwatch PowerPoint animation
  1. Insert a circle and style as required (holding shift will help you draw a perfect circle)
  2. Add a “Wheel” animation to the circle and adjust to your chosen duration (max of 59 second)
  3. Add the stopwatch icon (Insert > Icons > search for “Stopwatch”)

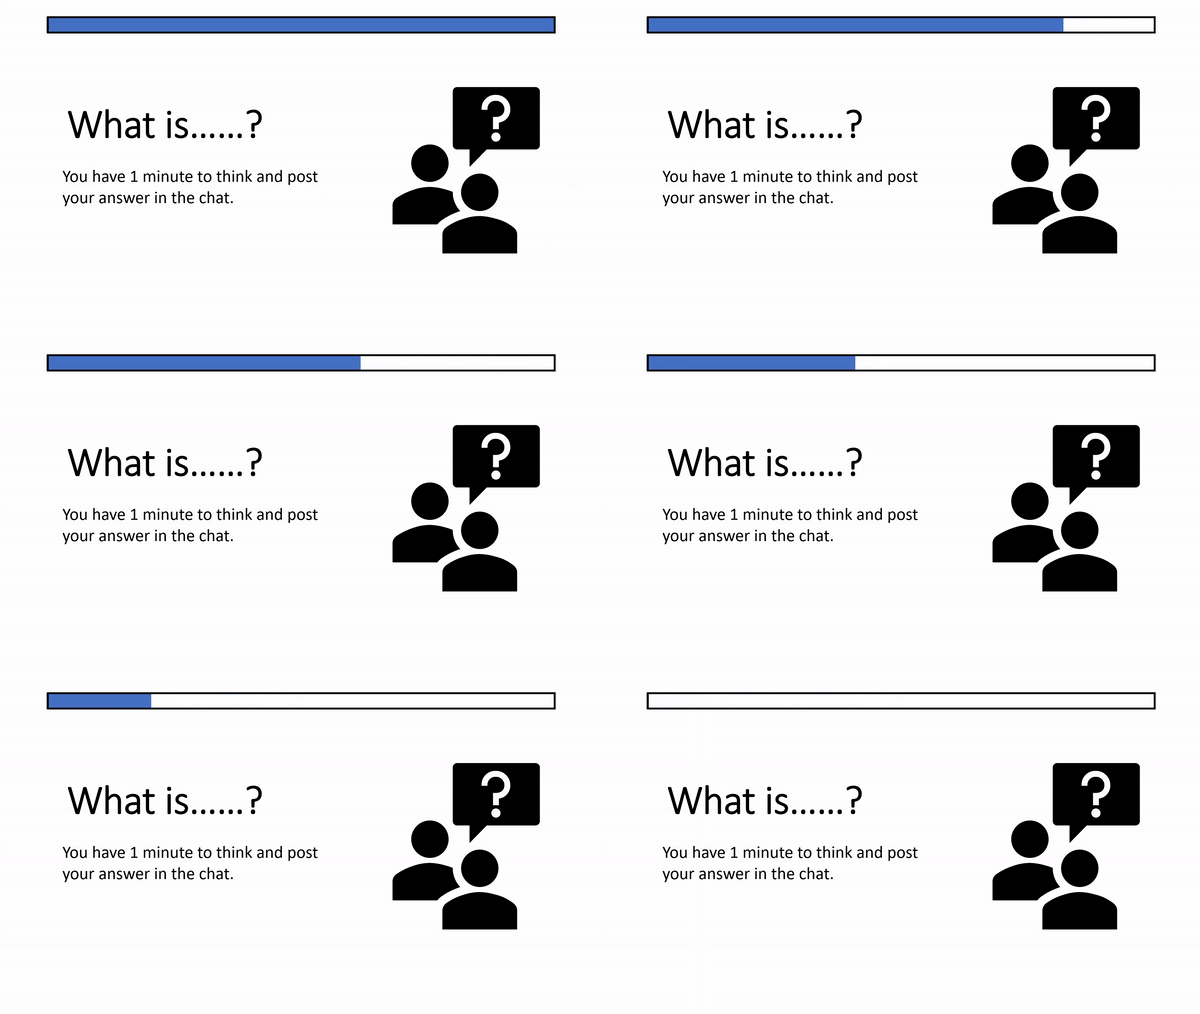
Example 2: Progress Bar

Example progress bar PowerPoint animation
  1. Insert a rectangle, remove the outline and choose a fill colour
  2. Add a “Wipe” animation to the rectangle, using the effect options drop down change the direction to “From left” or “From right”. Adjust to your chosen duration (max of 59 seconds)
  3. Insert a second rectangle on top of the first, remove the fill colour and style the outline as desired.

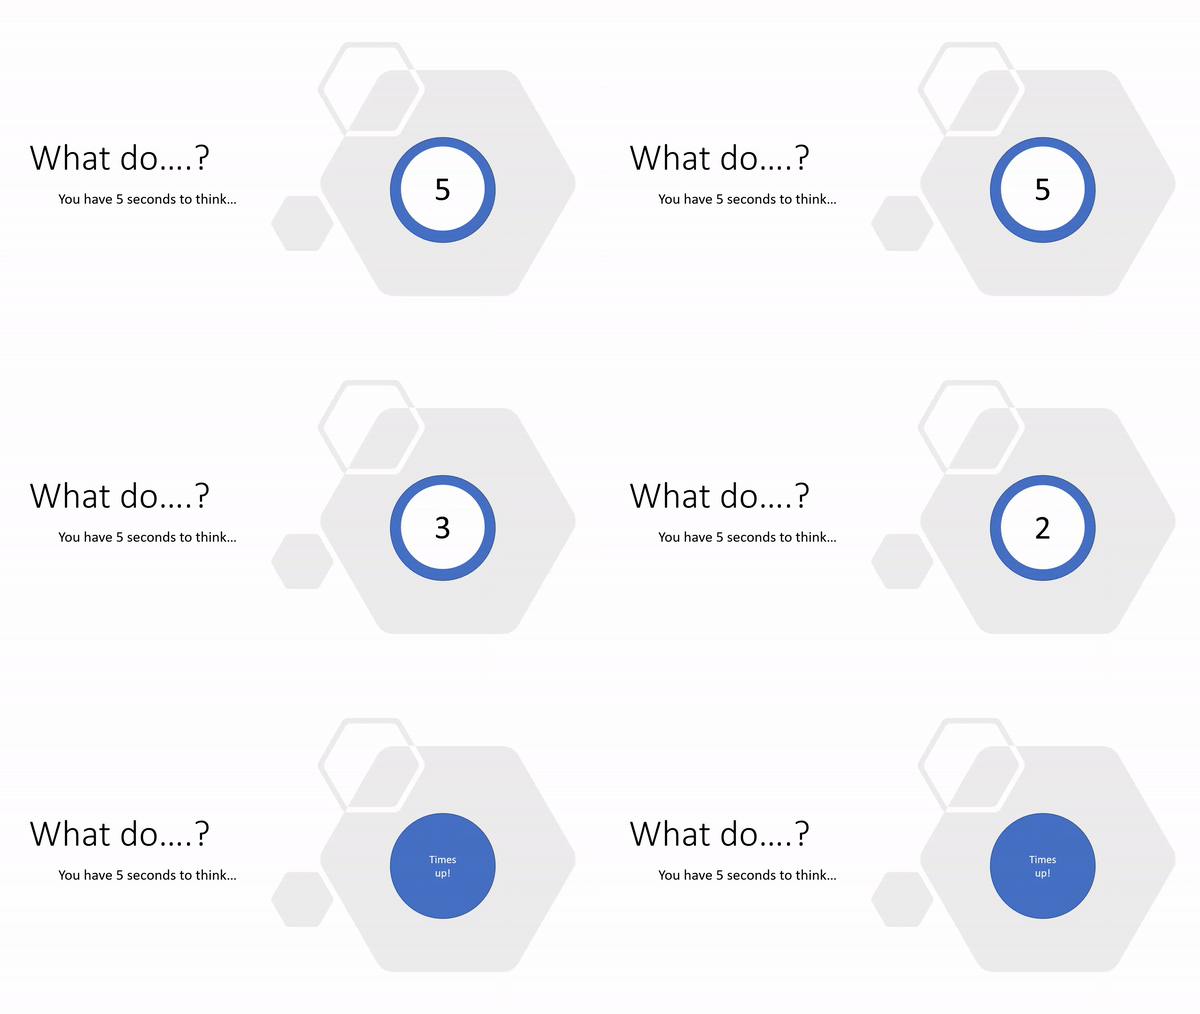
Example 3: Count Down

Example count down PowerPoint animation
  1. Create a text box for each number required, style as required
  2. Add the “Disappear” animation to all text boxes
  3. Set the first number to start “on click” with a 1 second delay
  4. Set all other numbers to start “after previous” with a 1 second delay
  5. Stack each text box on top of each other in the correct order, you may want to use the arrange menu or the selection pane to assist with this
  6. (optional) Add a text box at the back stating times up

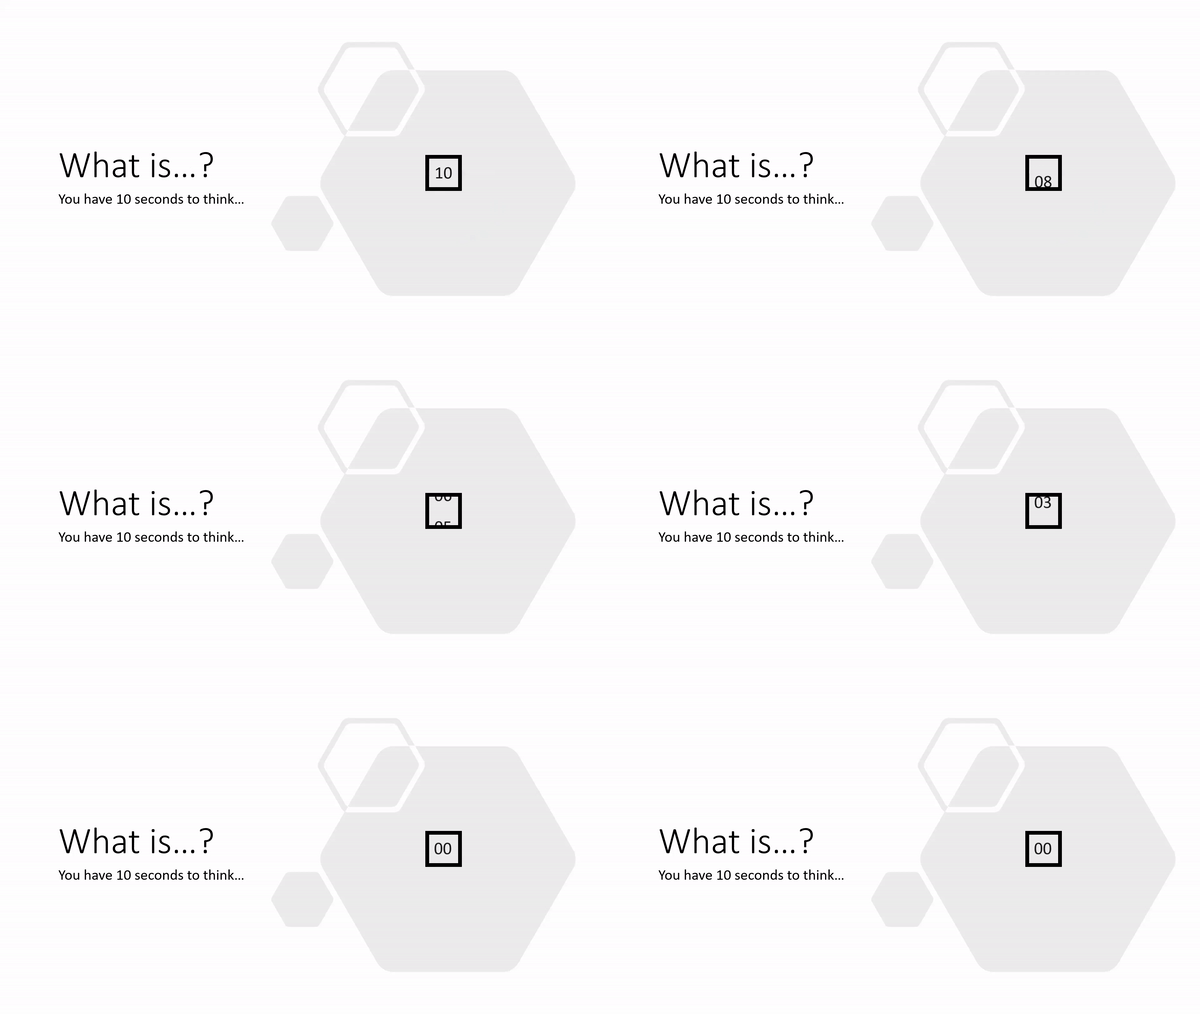
Example 4: Scrolling counter

Example scrolling counter PowerPoint animation
  1. Insert a rectangle, with no fill and an outline of your choice
  2. Insert a text box and type in the required numbers, with a new number on each line
  3. Add the “Lines” animation to the text box, move your text box so your first number aligns with the green arrow and your final number aligns with the red arrow (further guidance). Adjust to your chosen duration (max of 59 seconds)
  4. Insert more rectangles above and below the first rectangle you created to hide the numbers as they scroll in and out

Resources

References

Rowe, M., 1986. Wait Time: Slowing Down May Be A Way of Speeding Up!. Journal of Teacher Education, 37(1), pp.43-50

Stahl, Robert J. & ERIC Clearinghouse for Social Studies/Social Science Education.  1994,  Using “Think-Time” and “Wait-Time” Skillfully in the Classroom [microform] / Robert J. Stahl  Distributed by ERIC Clearinghouse [Washington, D.C.]  <https://eric.ed.gov/?id=ED370885>