Giving new life to an old presentation: A Module Revamp Case Study

The Situation

Have you ever heard students complain about a particular topic? Module Leaders for our Chemotherapy Nurse Training module often come across such complaints for their Cell Cycle topic. As the issue was becoming a perennial problem, we decided to thoroughly review the topic that was causing frustration among our students. This blog post shares our project and the transformative impact it had on our students’ perception and understanding of the once-hated topic.

Revamping the Content

We started with the learning objectives for the topic. Using Blooms Verb Wheel as a guide we changed the wording so the objectives would be measurable, and therefore the students could better understand what was expected of them. We removed words such as “understand” and replaced them with “describe”.

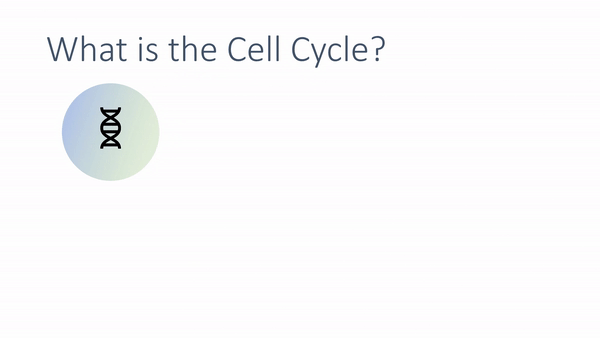
Next we reviewed the flow of the topic. We started with a text heavy page with stock images covering; cell basics, cancer, chemotherapy, and ending with the phases of the cell cycle. This page was edited, removing over 100 words, and rearranged so we covered; normal cells and their cycles, then moved onto cancer and chemotherapy. The stock images were converted into animated infographics that were tailor made for the content being discussed.

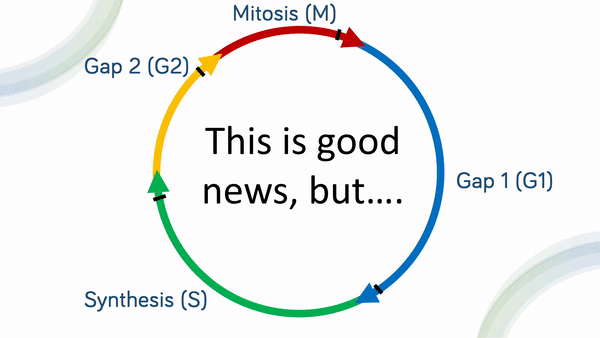
The biggest change was with the asynchronous lecture. The audio was good quality and the messages were still relevant, however the lecture slides were text heavy and had an outdated look.

blue slide with lots of yellow text
Original slide: What is the cell cycle
another blue slide with yellow text in bullet points
Original slide: This is good news, but…

The slides were given a facelift and where possible, animations were used to replace the text. We hoped the animations would assist the students in visualising the processes being described by the voiceover.

slide showing cells splitting
Updated slide: what is the cell cycle
slide showing checkpoints disappearing and slides duplicating with errors
Updated slide: This is good news, but…

Next the students had two tasks to complete. One was to answer some basic questions, and the other was to put their knowledge into action within a group activity. We spruced up the tasks visually, but didn’t make any other changes to them.

We chose to add a “check your knowledge” type quiz, using H5P, at the end of the topic. The questions directly linked to the learning outcomes and we hoped would help the students confidence with the topic.

view of quiz starting page

Student feedback (before):

Found the cell cycle topic very difficult to understand.

I am dreading the cell cycle topic

Student feedback (after):

The topic I have enjoyed most was topic 3 (The cell cycle) 

I have particularly enjoyed topics 3 – going further in depth into the cell cycle and pharmacology of the drugs we use has been really useful  

I quite enjoyed the cell cycle section…I enjoy the lightbulb moments I’ve had understanding how everything links together. 

Final Thoughts

The module team is thrilled with the amazing transformation we witnessed. Our goal was to address the complaints and make things better for the students. But we ended up surpassing our own expectations. The topic that used to be dreaded by the students has now become one of their favourites. The positive feedback from the students has made us proud and motivated us to continue on our journey for improvement. It’s really amazing to see such a big change in how they feel about the subject, with only a few tweaks in how the content was delivered.

Video Award Success for FMS TEL Team

The team shares success at the Learning and Teaching Conference – find out more about how DIY and bespoke animations can help boost learning in your course.

Several members of the FMS TEL team attended the NU Teaching & Learning Conference on Thursday 31st March giving strong representation of the team.

It was a great day with some very insightful presentations on a broad range of topics and a very interesting keynote from Professor Paul Ashwin. It was also the first time in years that the conference has been able to be run ‘in person’ and with around 300 attendees it felt like a slight return to normality.

Members of the FMS TEL team had both ‘posters’ and ‘video presentations’ entered into the competitions. Attendees were sent a link to view them and were able to vote for their favourites both in the week leading up to the conference and also on the day itself.

Eleanor Gordon (left) and Ashley Reynolds (right)

Ashley Reynolds and Eleanor Gordon from the FMS TEL team were delighted to be announced winners of the ‘Best Video Award’ for their video presentation titled ‘Creating and using animations to explain concepts’ which highlighted how animations could be used to enhance teaching, and techniques that will both improve memory retention and also increase learner engagement. The video presentation entry can be seen below.

Video submission

If you would like to know more about animations and the services that the team can offer, please get in touch.

We would like to say ‘Thank you very much’ to the LTDS team for organising a great conference. Can’t wait for next year!

Animation: What I can offer, the journey, and previous examples

One of the services I offer as part of the FMS TEL team is the creation of bespoke 2D animations. These are most commonly used as small parts of a bigger project, but they can also be stand-alone projects themselves.

Types of animation and choosing the right tool for the job
Depending on the nature of the animation required, and also the context in which it will be used, there are three different types of animation that we can produce.

These are:

  • Video based animation
  • HTML5 (web based) animation
  • Animated GIFs

When looking at the source material I will first plan the animation in my head, and will usually know right away which type of animation will be most appropriate for the job. For example, if there are any user interactions to be included then an HTML5 animation would allow for that, but if there is the need for some organic shapes then that would suit a video based animation better.

Planning and Storyboarding
When visualising an animation, I plan the animation as a whole from the start, rather than tackling it scene-by-scene as this gives a more natural and entertaining feel to the end result.

Once I’m happy that I have a good understanding of the content I will then create a series of illustrations as a storyboard and send this as a PDF for review.

Storyboarding example

I then discuss with the subject specialist which techniques will work best for the application, and raise any concerns. I can then start the animation process.

Creating the animation
Getting things right at the concept and storyboard stage is critical and can save a lot of time, compared to how much of a time investment it can be if you have to re-do a large part of the animation.

However, understanding that I may not get the content perfect in the first draft every time, I structure my files in a way that changes can be made with minimal disruption to the rest of the timeline. This is achieved by both layering up the source Illustrator files and also separating the key points of the main composition timeline into separate sub-compositions. That way I can work on a small section without knocking everything else out of sync.

Obviously, every project is different but by focusing on the movements involved, the flow between the scenes and the basic animation principles I begin the sequence (as you may have guessed) from the start and work on each stage in sequence. This is important because elements will often carry through from one scene to another so duplication can be avoided.

I use Adobe After Effects to create video-based animation and animated GIFs, and Adobe Illustrator to create any graphic and illustration assets needed for the animation.  After Effects is an extremely powerful timeline-based tool that can make almost anything possible – think of it as being a kind of Photoshop for video!

If there is to be audio narration or a musical soundtrack on the video, then I arrange for that to be recorded early on in the development rather than being added at the end, as the content and movements should be timed to fit with events in the audio.

Most of the development time actually lies in creating the assets for the storyboard (which are later used in the animation), so when it actually comes to the animating stage things tend to move along pretty quickly.

I usually render out (export) the animation after every new section is complete and upload it our Vimeo account for approval and to check that I’m on the right track before moving on to the next one.

The review process

Vimeo Review platform

The Vimeo Review platform we use lets the users add time-stamped comments directly onto the video and sends me a notification email immediately thus providing a good communication channel for each specific issue.

When the first draft of an animation is complete, a shareable, password-protected link to the video can be sent out for a wider review to gather comments and feedback. From there we can address any comments and fine-tune the animation for further revisions, which will in turn be sent out for review.

While there is no standard for this, normally after a first (alpha) release and review, changes are made if required and a second (beta) release is then sent for review, with any further required changes reflected in a final (gold) release.

The finished product
The final render from After Effects will be a simple video file, usually in the .H264 codec (MP4) that can either be hosted on our Vimeo account and an embed code supplied, or, depending on file size restrictions, this could be uploaded directly to your target system. It can also be supplied as a file to be included in a PowerPoint presentation or other teaching material. The type of output required is discussed before we start the project to make sure we are taking the best approach.

Past examples
I’ve worked on a wide variety of projects during my time at the university, including multiple MOOCs, marketing materials, and work on modules across both FMS and Engineering courses. The showreel below includes just a small sample of the projects I have been involved in.

FMS TEL Animation Showreel

Can we help you with your project?

If you have a project that you would like to see come to life in an animation, or a smaller component of your teaching materials that could benefit from some animated content, then please get in touch via FMSTEL Enquiries. I would be very happy to discuss options with you to see what we can do to help.

Animated GIFs for Instruction and Demonstration

Animated GIFs are a great alternative to short videos or sets of screenshots. They can be used to display short moving images that can be looped to play repeatedly. The example GIF below takes the place of a series of screenshots demonstrating how to access a menu in Canvas.

Making your own GIFs

To make your own animated GIF, first record your screen as you perform the steps you want to illustrate. You can use Zoom for this, or any other screen-recording software you are comfortable with. Once you have your video, upload this to a video-to-GIF converter online. The best choice at the moment is ezgif – it has a wide range of features and good terms of use. They don’t store your file or claim any intellectual property rights over anything you upload, and your file is removed from the server in an hour. It’s always worth double-checking these online tools to make sure the terms are reasonable.

Using ezgif it is possible to crop the screen recording to show the specific part you are focusing on, and you can trim the clip to start and end where you need it to. Other settings include changing colours and setting how many times you want the animated GIF to loop.

Once you have created your animated GIF and have saved it, you can add it to a Canvas course in the same way as any other image.

The advantages of using GIFs

  • Compared with video, they minimise the storage space needed for the content, reducing data needed and loading times.
  • They can replace long sets of screenshots to show stages of a process. Often these screenshots take up a lot of space, and text can get lost amongst the large images.
  • They can be made quickly with no need for specialist skills or software.
  • Recently a change in Apple software made some other types of video and animation – those displayed in iframes – impossible to access using the Canvas app on iPhone. GIFs are a very accessible format and don’t require iframes to work, so using them where possible avoids this issue.
  • Some older formats of animations have become obsolete – animated GIFs have been around for over 25 years and show no signs of disappearing.

Uses for GIFs

  • To illustrate a couple of steps in using some software.
  • To show a series of improvements or changes to a document or file.
  • To show consequences of changing parameters in a simulation.
  • To illustrate the differences between a series of images, such as diagnostic scans.