Interactive Animated Venn Diagrams

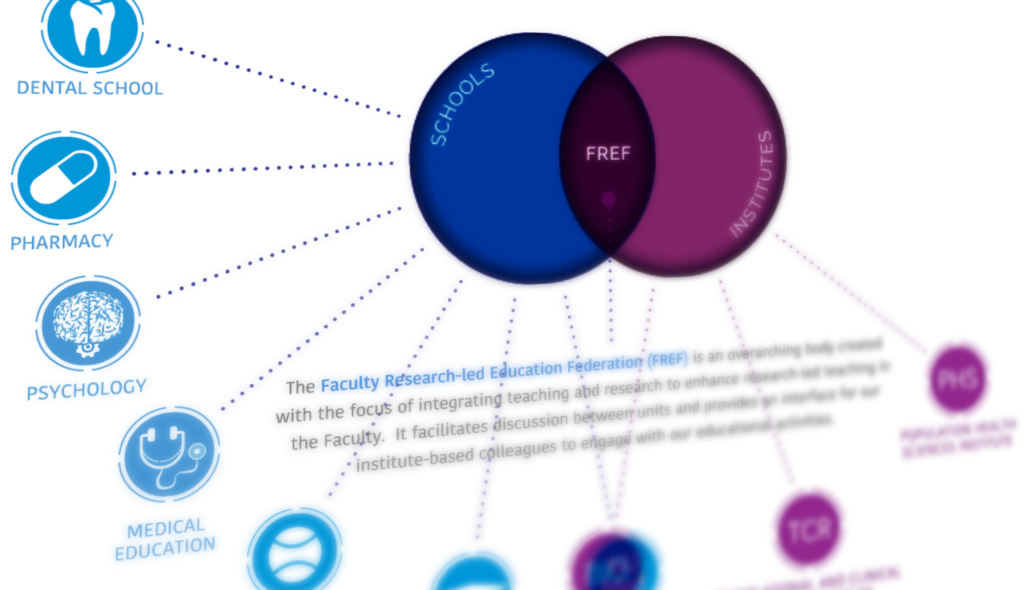
The Learning and Teaching Team contacted us to request an animated diagram showing the relationship between various areas of work, including faculty schools, institutes, and the Faculty Research-led Education Federation (FREF). The resulting page is visible to Newcastle staff here – take a look before reading the rest of the post.

The initial brief included a PowerPoint with the required information, as well as a mock-up of how the final animation could look. As this content was being built within SharePoint, there were certain technical restrictions on what could be done. For example, the site template has a fixed width, and animations cannot be created natively within it. The interactive diagram also needed buttons and links added that would both display additional item information, and also take users to different areas of the site when clicked, such as school and institute homepages.

These requirements meant that the animation needed to be created separately and then shared, and an HTML 5 canvas based animation was the best choice (not to be confused with our VLE Canvas!).

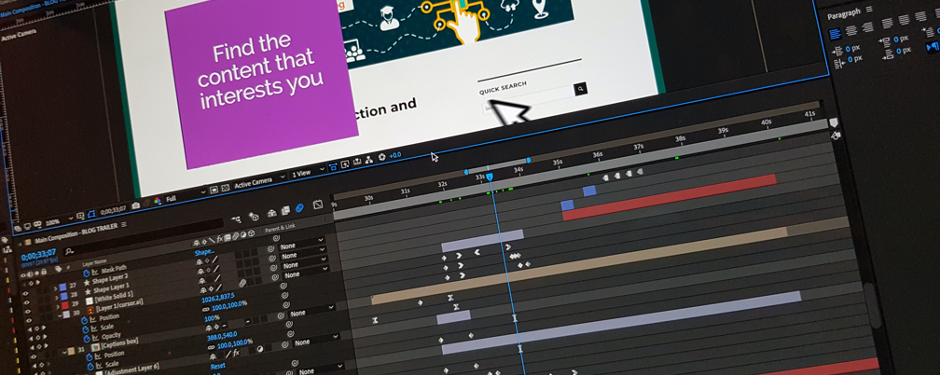
Working from the requirements for the layout, icons were designed/created to match each school and institute. These icons were designed in Adobe Illustrator. Once these had been approved, they were then imported into Adobe Animate where the animation and programming processes began.

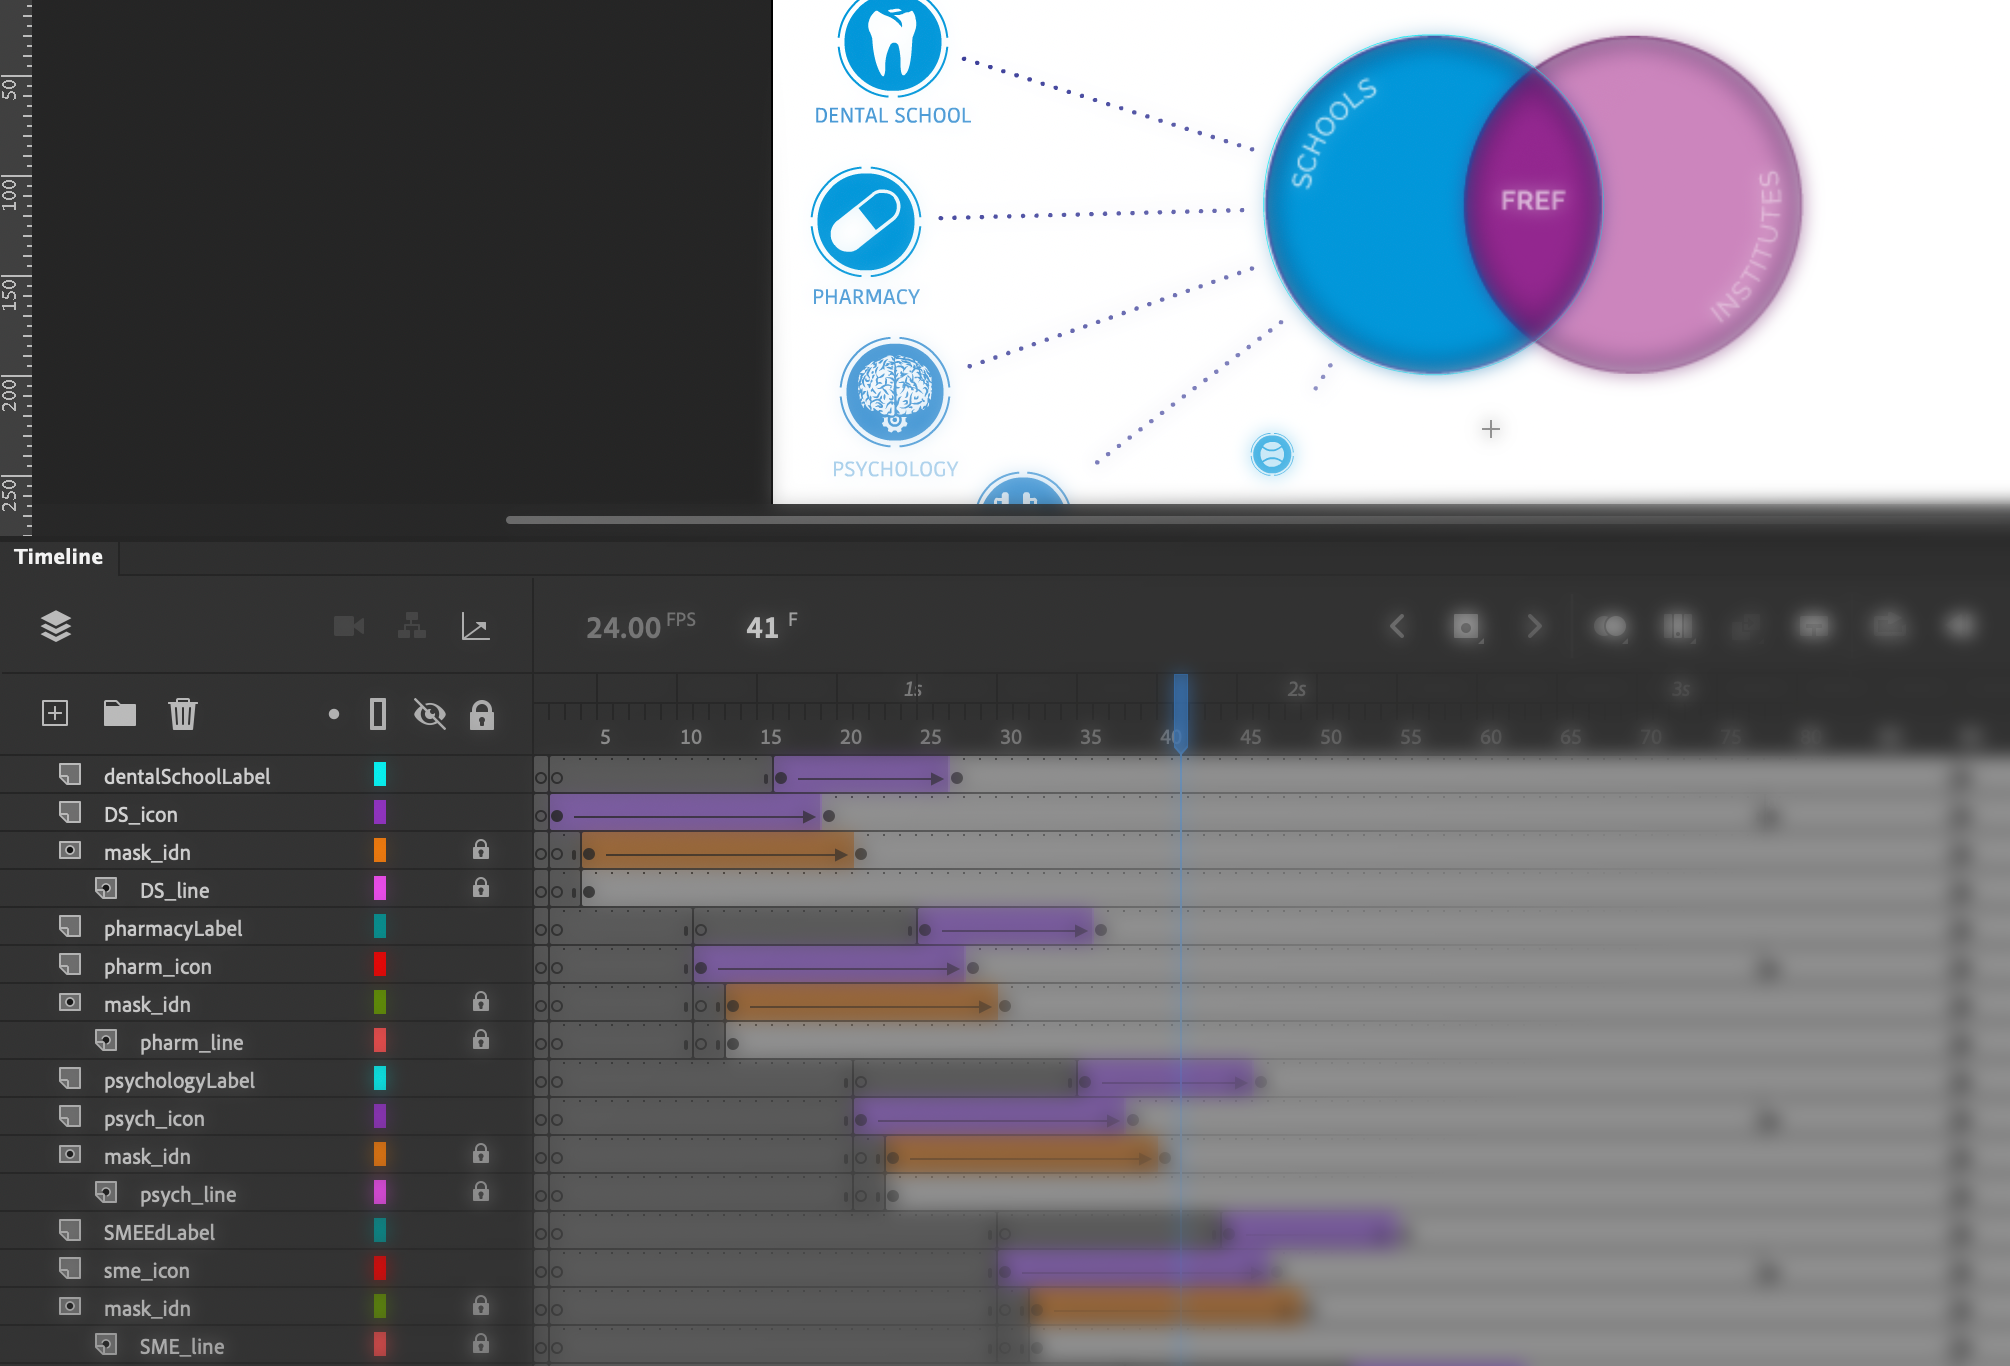
Some elements of the animation, such as moving an object or changing its size can be done very simply in Animate with its inbuilt tools and timeline-based animation, however extra coding is needed in some cases, for example when checking variables or adding links and hotspot areas.

After a second round of consultation and changes, the final animation could be uploaded to our teams e-learning repository and then an embed code provided to enable it to be placed on the SharePoint site. The resulting diagram shows how the many organisations inter-relate and allows for a large amount of information to be shared in a relatively small space. Showing everything at once would not be practical. The animation itself cannot be easily understood by accessibility software, however the information is easily accessible via alternative menus on the page.

sample animation of interactive diagram

In this animation, the first stage shows the building of the initial stages of the diagram, and an animated cursor encourages viewers to interact with each section. Next, the three key areas of the Venn diagram become interactive (changing colour as users’ mouse over with a pointer cursor) and users can click around the diagram to explore the further information and link out to the various school/faculty pages. The use of the cursor pointer and the colour change clearly highlights the interactivity to the user.

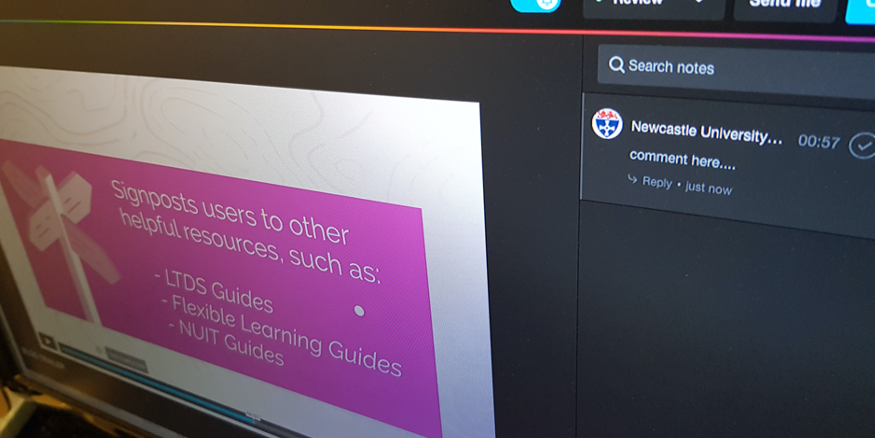
There are a wide range of alternative uses for this type of diagram, which is commonly used for categorising. Adding the interactive hotspot elements opens up further possibilities, where each individual item can be further explored.

Resources

Introduction to HTML 5 Canvas

Adobe illustrator: https://www.adobe.com/uk/products/illustrator.html

Adobe Animate: https://www.adobe.com/uk/products/animate.html

Link to animation: https://elearning-repo.ncl.ac.uk/uploads/assets/59/Assets/FREF.html

Writing Complex Documents with LaTeX

In FMS and SAgE, students can produce heavily mathematical theses. These can be difficult to manage in Microsoft Word as it is not designed for documents that include a lot of equations and other mathematical notations. Furthermore, theses are often very large documents with each chapter in a separate file. Compiling those chapters into a single document is something that LaTeX is ideal for. It was designed with professional typesetting so that users can focus on their content and not the style of the document.

Here at FMS TEL, we added a session in LaTeX to our catalogue of digital skills sessions a few years ago, and since the pandemic we have transitioned this to a webinar with some interactivity.

LaTeX is an open-source mark-up language so the training sessions are on primarily on learning the LaTeX code. This enables postgraduates to set up their documents from scratch or, more likely, to modify pre-existing templates such as the template that we provide them on the Digital Skills Hub or working a boilerplate paper. The slides used in the session are also provided on the Digital Skills Hub as well as some additional materials used during the session such as the graph files used.

Sessions are in two parts and cover how to set up your document in LaTeX, incorporating comments, mathematics, images, bibliography and references, tables and matrices, and more. There are many different LaTeX editors but the training session is built around the Overleaf.com editor as that is completely in the cloud and therefore nothing needs to be installed to be able to use it. It is free to use unless collaboration is needed with a document or other advanced needs. Skills learned with this editor should be easily transferable to other editors.

We have had a great response to the LaTeX training session. It is always very popular and we get a lot of positive feedback from participants.

Resources

FMS TEL Community in MLE

For some time we have had an FMS TEL Community within Canvas, where members of the FMS TEL team share guides and resources. However not all members in our faculty use Canvas so we decided to launch a second Community in our sister Virtual Learning Environment (VLE), the Medical Learning Environment (MLE).

We have added guides on:

As well as the recordings and resources from our most recent webinars:

Faculty Research-Led Education Federation (FREF)

It is crucial that all academic staff including researchers, are involved in teaching at the university.  To this end, we hope to make information about what educational opportunities are out there available, as well as signposting where to find information on best practices and educational research.  FREF, or the Faculty Research-Led Education Federation, part of the Good to Great Project, has been formed to address those needs. 

In particular, we have at FMS-TEL been developing the FREF website which should provide a one-stop shop of sorts for institute-based researchers and others interested in finding information about teaching and research project opportunities.  Those who are maybe just starting out and would like an overview of the structure of the schools and institutes in the Faculty of Medical Sciences can find this information on the website.  We hope to help them identify which programmes are available that they might teach on or otherwise contribute to, for example by supervising undergraduate research projects.  We are currently working to locate the website for FREF under the Learning and Teaching section of the FMS Sharepoint site and will also encourage colleagues to take advantage of professional development opportunities to build on the quality of their teaching. 

Teaching Document Accessibility

The Faculty of Medical Sciences Digital Skills provides lifelong learning to students throughout the faculty on a bespoke basis. Our tutorials cover the use of Microsoft Office programmes such as Word, Excel, and PowerPoint, as well as tutorials on how to work with specific media such as images and posters.

Recently, we have increased focus on the value of our tutorials by highlighting lifelong learning skills for accessibility. As part of our Word tutelage, we teach students to use Styles to format their documents. Styles are packets of information that control how text looks and behaves. Namely, we teach students to work with heading and caption styles. In addition to being effective and efficient methods of formatting text, styles have an important role to play in accessibility. Screen readers can analyse a Word document using styles and accurately interpret headings. This allows users to easily navigate through documents. And, when converted to a PDF, styles automatically create tags in the document affording the same benefit for screen reader navigation.

Additionally, we teach students how to add alternative text (alt text) to images they insert into Word or PowerPoint. Alt text allows users with impaired visibility to understand what an image depicts. By using alt text, student increase accessibility of their digital documents. And, like styles, when converted to PDF, images retain tags of their alt text.

These skills are truly lifelong learning skills as they provide students with the knowledge and ability to create accessible documents. These skills will serve them in their future careers where digital documents will be required to meet specific accessibility regulations.

Dealing with extra sensitive data in the Medical Learning Environment (MLE)

Most FMS sites run by the unit contain and maintain personal data that needs to be kept private. Techniques such as securely certified websites and authentication/authorisation portals are usually sufficient in keeping this data safe.

The Challenge

With the introduction of the new year 4 in the MBBS curriculum and the move to more blended learning, a higher degree of sensitive data was required to be stored on the Medical Learning Environment (VLE for MBBS). Year 4 students are now asked to keep electronic records of patients and interactions as part of the Advanced Clinical Experience module. This data contained personal contact details such as address, telephone and email of patients the students would follow on the clinical journey, and let them reflect upon this experience throughout year 4.

So before the start of Year 4, in the summer of 2020, we investigated and implemented an enhanced way of storing this patient information in the MLE.

The Solutions

First we investigated how the data was stored in the backend database. Most information is stored in databases as unencrypted data due to the lack of sensitive nature of the data.

This new data required something else. It was decided that parts of the data that could contain personal patient information should be encrypted, both in transit and at rest.

For parts of the ACE model (the data structure we use for the ACE section of MLE) we replaced the open text fields with this new encrypted field. This now meant that when data was entered and saved, before it was added to the database, the system would replace the open text with a encrypted data set using a secure key. To read the data again it would need the use of the decrypt method, that only the MLE could do by using the secure key.

The second part we investigated was to detach any personal patient information from the student’s reflections. Once the student had completed the recording of the patient’s details, the direct link in the website was removed and generic patient information used from that point onwards to identify the individual records. This kept the sensitive information separate from the day to day recording of patient interactions.

The students also uploaded consent forms signed by patients who agreed to take part in the ACE module. Final versions of consent forms highlighted that these would also contained sensitive information.

After further investigation the development team included these static files in the encryption methods used to support ACE. In order to allow students to verify the uploaded consent forms, the MLE allows a short window before encryption and archiving of consent forms takes place. Once this process completes the consent forms are no longer accessible via the website (MLE) and recovery if required is performed by a limited number of staff in FMS TEL.

These methods used may be a little extreme for the day to day data stored on most FMS sites, but the investigations and lessons learned from the ACE data has provided us with options for other sites in the future.

If you are interested in this topic and wish to learn more, please contact:

Dan Plummer, Learning Technologies Developer, dan.plummer@newcastle.ac.uk

John Moss, Technology Enhanced Learning Manager, john.moss@newcastle.ac.uk

Animation: What I can offer, the journey, and previous examples

One of the services I offer as part of the FMS TEL team is the creation of bespoke 2D animations. These are most commonly used as small parts of a bigger project, but they can also be stand-alone projects themselves.

Types of animation and choosing the right tool for the job
Depending on the nature of the animation required, and also the context in which it will be used, there are three different types of animation that we can produce.

These are:

  • Video based animation
  • HTML5 (web based) animation
  • Animated GIFs

When looking at the source material I will first plan the animation in my head, and will usually know right away which type of animation will be most appropriate for the job. For example, if there are any user interactions to be included then an HTML5 animation would allow for that, but if there is the need for some organic shapes then that would suit a video based animation better.

Planning and Storyboarding
When visualising an animation, I plan the animation as a whole from the start, rather than tackling it scene-by-scene as this gives a more natural and entertaining feel to the end result.

Once I’m happy that I have a good understanding of the content I will then create a series of illustrations as a storyboard and send this as a PDF for review.

Storyboarding example

I then discuss with the subject specialist which techniques will work best for the application, and raise any concerns. I can then start the animation process.

Creating the animation
Getting things right at the concept and storyboard stage is critical and can save a lot of time, compared to how much of a time investment it can be if you have to re-do a large part of the animation.

However, understanding that I may not get the content perfect in the first draft every time, I structure my files in a way that changes can be made with minimal disruption to the rest of the timeline. This is achieved by both layering up the source Illustrator files and also separating the key points of the main composition timeline into separate sub-compositions. That way I can work on a small section without knocking everything else out of sync.

Obviously, every project is different but by focusing on the movements involved, the flow between the scenes and the basic animation principles I begin the sequence (as you may have guessed) from the start and work on each stage in sequence. This is important because elements will often carry through from one scene to another so duplication can be avoided.

I use Adobe After Effects to create video-based animation and animated GIFs, and Adobe Illustrator to create any graphic and illustration assets needed for the animation.  After Effects is an extremely powerful timeline-based tool that can make almost anything possible – think of it as being a kind of Photoshop for video!

If there is to be audio narration or a musical soundtrack on the video, then I arrange for that to be recorded early on in the development rather than being added at the end, as the content and movements should be timed to fit with events in the audio.

Most of the development time actually lies in creating the assets for the storyboard (which are later used in the animation), so when it actually comes to the animating stage things tend to move along pretty quickly.

I usually render out (export) the animation after every new section is complete and upload it our Vimeo account for approval and to check that I’m on the right track before moving on to the next one.

The review process

Vimeo Review platform

The Vimeo Review platform we use lets the users add time-stamped comments directly onto the video and sends me a notification email immediately thus providing a good communication channel for each specific issue.

When the first draft of an animation is complete, a shareable, password-protected link to the video can be sent out for a wider review to gather comments and feedback. From there we can address any comments and fine-tune the animation for further revisions, which will in turn be sent out for review.

While there is no standard for this, normally after a first (alpha) release and review, changes are made if required and a second (beta) release is then sent for review, with any further required changes reflected in a final (gold) release.

The finished product
The final render from After Effects will be a simple video file, usually in the .H264 codec (MP4) that can either be hosted on our Vimeo account and an embed code supplied, or, depending on file size restrictions, this could be uploaded directly to your target system. It can also be supplied as a file to be included in a PowerPoint presentation or other teaching material. The type of output required is discussed before we start the project to make sure we are taking the best approach.

Past examples
I’ve worked on a wide variety of projects during my time at the university, including multiple MOOCs, marketing materials, and work on modules across both FMS and Engineering courses. The showreel below includes just a small sample of the projects I have been involved in.

FMS TEL Animation Showreel

Can we help you with your project?

If you have a project that you would like to see come to life in an animation, or a smaller component of your teaching materials that could benefit from some animated content, then please get in touch via FMSTEL Enquiries. I would be very happy to discuss options with you to see what we can do to help.