Resulting from a few queries from FMS staff, we have added some information to the FMS TEL Community detailing how to add audio to a video using ReCap.
Staff had recorded footage of processes or experiments in laboratories which they wished to add a narration over afterwards. There was existing audio or noise on the video which they did not want to include. Rather than go through the process of removing the unwanted audio, ReCap/Panopto ignores the audio if the video is uploaded as a Secondary file. Audio can only be uploaded as a Primary file.
You may want to record your audio narration first using your mobile phone or software such as Audacity on a computer with a microphone. A common format would be mp3. Then upload your audio narration as your primary file and your video as a secondary file. Any audio in your video file is ignored and the new audio you recorded will be played instead.
One of the services I offer as part of the FMS TEL team is the creation of bespoke 2D animations. These are most commonly used as small parts of a bigger project, but they can also be stand-alone projects themselves.
Types of animation and choosing the right tool for the job Depending on the nature of the animation required, and also the context in which it will be used, there are three different types of animation that we can produce.
These are:
Video based animation
HTML5 (web based) animation
Animated GIFs
When looking at the source material I will first plan the animation in my head, and will usually know right away which type of animation will be most appropriate for the job. For example, if there are any user interactions to be included then an HTML5 animation would allow for that, but if there is the need for some organic shapes then that would suit a video based animation better.
Planning and Storyboarding When visualising an animation, I plan the animation as a whole from the start, rather than tackling it scene-by-scene as this gives a more natural and entertaining feel to the end result.
Once I’m happy that I have a good understanding of the content I will then create a series of illustrations as a storyboard and send this as a PDF for review.
Storyboarding example
I then discuss with the subject specialist which techniques will work best for the application, and raise any concerns. I can then start the animation process.
Creating the animation Getting things right at the concept and storyboard stage is critical and can save a lot of time, compared to how much of a time investment it can be if you have to re-do a large part of the animation.
However, understanding that I may not get the content perfect in the first draft every time, I structure my files in a way that changes can be made with minimal disruption to the rest of the timeline. This is achieved by both layering up the source Illustrator files and also separating the key points of the main composition timeline into separate sub-compositions. That way I can work on a small section without knocking everything else out of sync.
Obviously, every project is different but by focusing on the movements involved, the flow between the scenes and the basic animation principles I begin the sequence (as you may have guessed) from the start and work on each stage in sequence. This is important because elements will often carry through from one scene to another so duplication can be avoided.
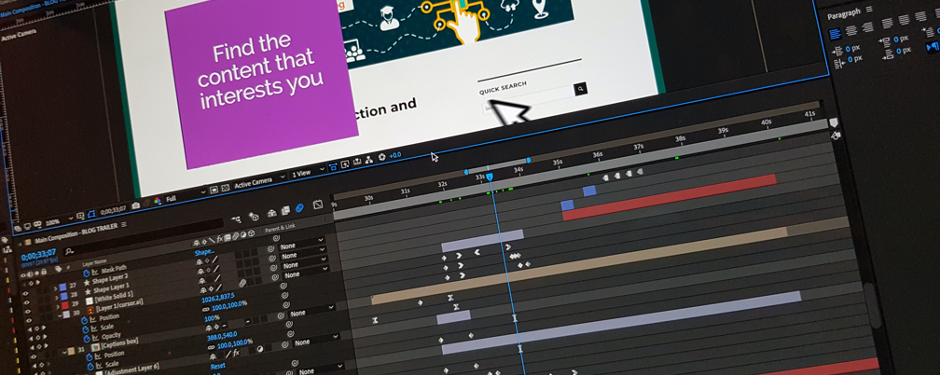
I use Adobe After Effects to create video-based animation and animated GIFs, and Adobe Illustrator to create any graphic and illustration assets needed for the animation. After Effects is an extremely powerful timeline-based tool that can make almost anything possible – think of it as being a kind of Photoshop for video!
If there is to be audio narration or a musical soundtrack on the video, then I arrange for that to be recorded early on in the development rather than being added at the end, as the content and movements should be timed to fit with events in the audio.
Most of the development time actually lies in creating the assets for the storyboard (which are later used in the animation), so when it actually comes to the animating stage things tend to move along pretty quickly.
I usually render out (export) the animation after every new section is complete and upload it our Vimeo account for approval and to check that I’m on the right track before moving on to the next one.
The review process
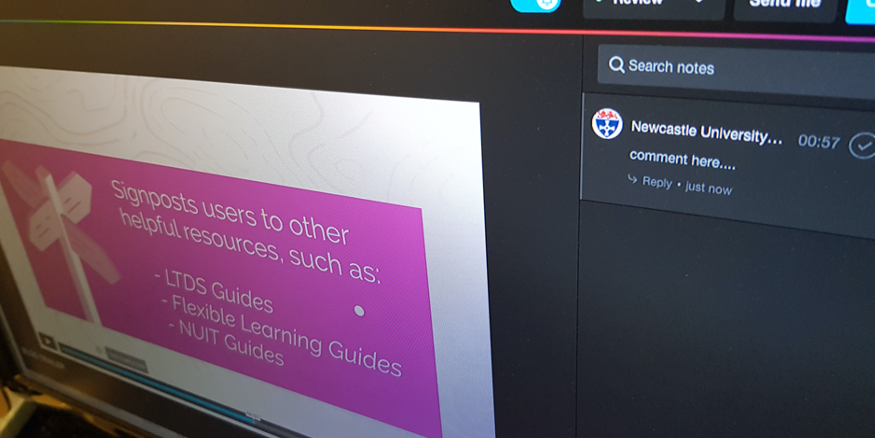
The Vimeo Review platform we use lets the users add time-stamped comments directly onto the video and sends me a notification email immediately thus providing a good communication channel for each specific issue.
When the first draft of an animation is complete, a shareable, password-protected link to the video can be sent out for a wider review to gather comments and feedback. From there we can address any comments and fine-tune the animation for further revisions, which will in turn be sent out for review.
While there is no standard for this, normally after a first (alpha) release and review, changes are made if required and a second (beta) release is then sent for review, with any further required changes reflected in a final (gold) release.
The finished product The final render from After Effects will be a simple video file, usually in the .H264 codec (MP4) that can either be hosted on our Vimeo account and an embed code supplied, or, depending on file size restrictions, this could be uploaded directly to your target system. It can also be supplied as a file to be included in a PowerPoint presentation or other teaching material. The type of output required is discussed before we start the project to make sure we are taking the best approach.
Past examples I’ve worked on a wide variety of projects during my time at the university, including multiple MOOCs, marketing materials, and work on modules across both FMS and Engineering courses. The showreel below includes just a small sample of the projects I have been involved in.
FMS TEL Animation Showreel
Can we help you with your project?
If you have a project that you would like to see come to life in an animation, or a smaller component of your teaching materials that could benefit from some animated content, then please get in touch via FMSTEL Enquiries. I would be very happy to discuss options with you to see what we can do to help.
As we have had a couple of enquiries via FMS Enquiries about audio and video, we have added some information to the FMS Community on how to edit using VLC Media Player. VLC media Player is a free application which allows you to play and convert videos. You can save in many different formats.
You may be looking to add new audio to an existing video, or remove audio before commencing adding a new narration. For example a demonstration of a practical session in a laboratory, or a tour around a building. You can also extract audio only from a video.
We have had a few enquiries via FMS Enquiries about getting tasks done without specialist equipment we would normally have on hand in our offices.
We have recently added some information to the FMS Community on how to use mobile devices to produce learning materials. A kind of Do It Yourself guide for producing materials from home or on location.