What does that mean again? Glossary Building

Why use a glossary?

“A glossary is a great reference tool for a student, especially when they’re studying material which is quite technical and contains a vocabulary which is specific to the subject.”

David McGeeney, MCR8019 Module Leader

“Well, our students come from a diverse range of professional backgrounds, are based in different countries and have different experiences.  And when you’re dealing with clinical scenarios you really can’t afford to allow confusion and misinterpretation to happen, especially where the subject material is quite technical.  Adding a glossary to ONC8004: Developments in Diagnostic Imaging in Oncology allows us to focus the webpage content on teaching and learning whilst linking to explanatory terms for those who need it.”

Victoria Hewitt, ONC8004 Module Leader

Benefits of using a Glossary

  • Ensures all students are familiar with discipline specific vocabulary
  • Provides a reliable reference tool students can use throughout their studies
  • Content can be more concise
  • Easy to create
  • Can be rolled over year after year

Making your own Glossary

It could be as simple as having a dedicated page located near the start of the content which students can reference throughout the course.
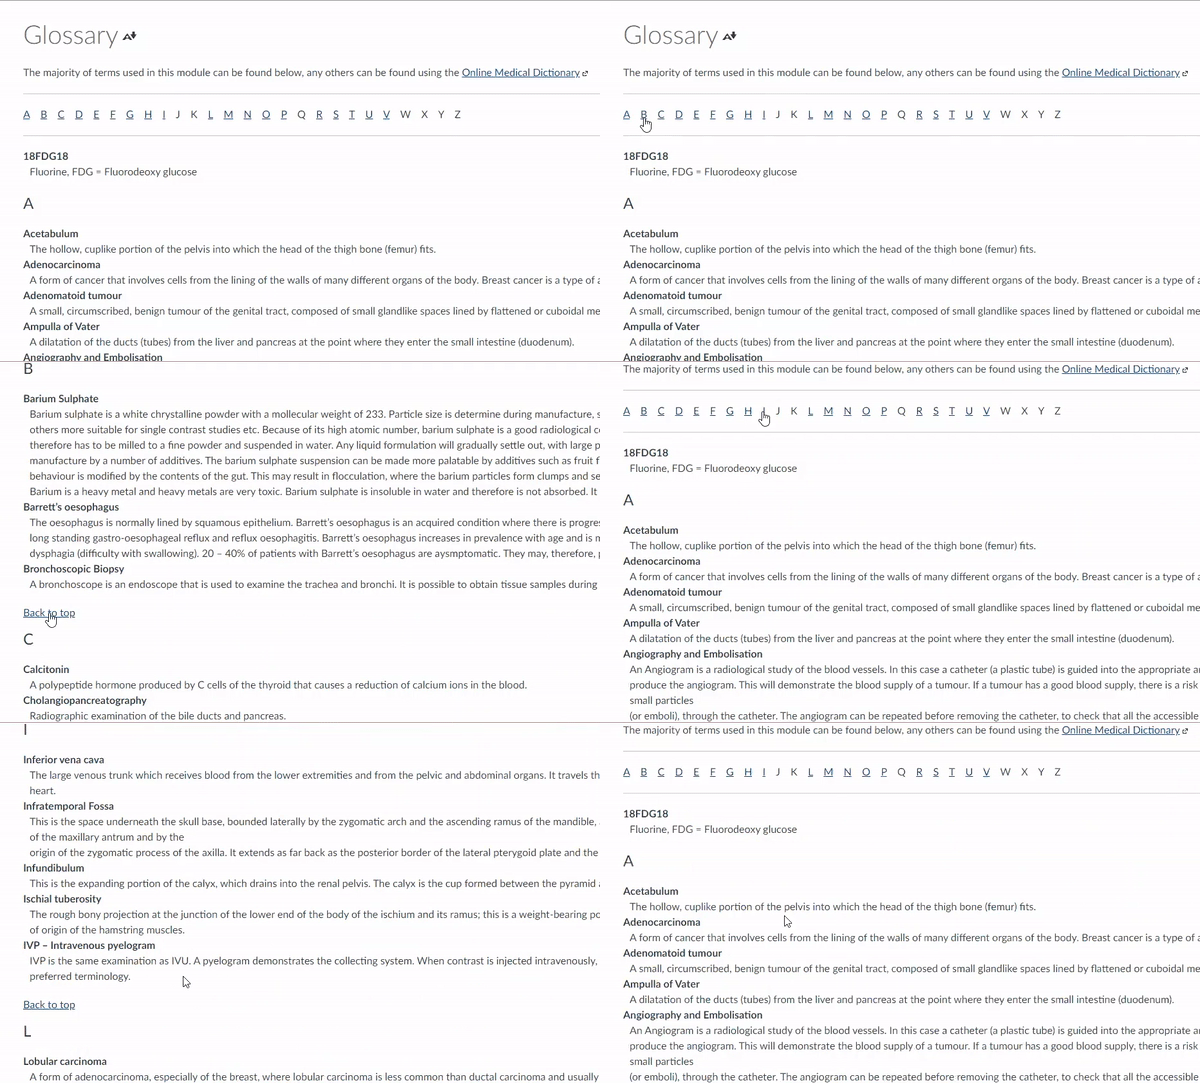
screenshot of a glossary in canvas

You can view example glossaries in the FMS Community, along with instructions on how to add navigation options such as an A-Z menu at the top and ‘Back to top’ links.

Animated GIFs for Instruction and Demonstration

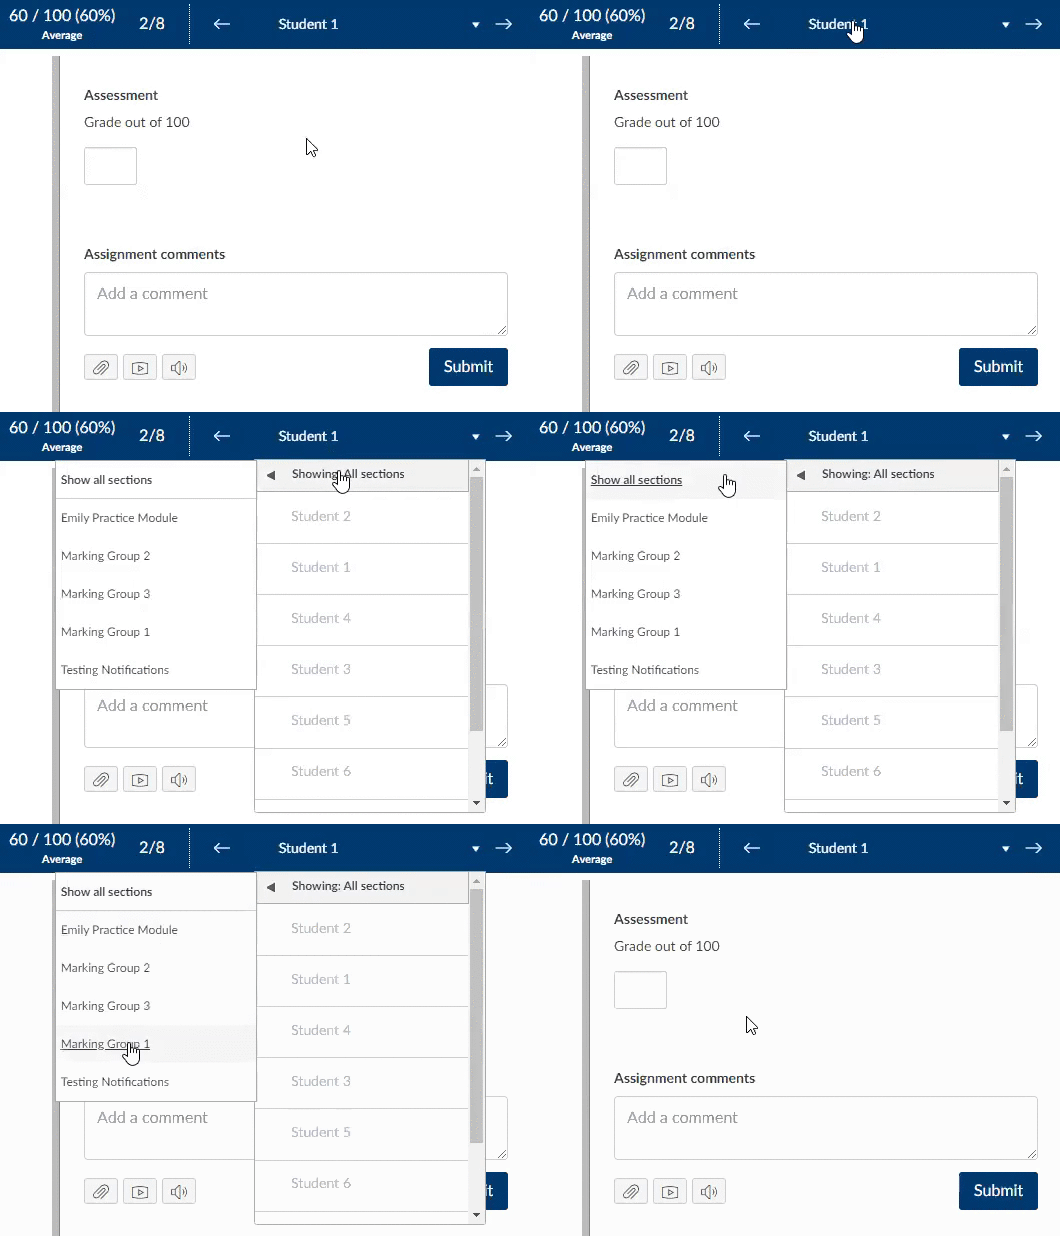
Animated GIFs are a great alternative to short videos or sets of screenshots. They can be used to display short moving images that can be looped to play repeatedly. The example GIF below takes the place of a series of screenshots demonstrating how to access a menu in Canvas.

Making your own GIFs

To make your own animated GIF, first record your screen as you perform the steps you want to illustrate. You can use Zoom for this, or any other screen-recording software you are comfortable with. Once you have your video, upload this to a video-to-GIF converter online. The best choice at the moment is ezgif – it has a wide range of features and good terms of use. They don’t store your file or claim any intellectual property rights over anything you upload, and your file is removed from the server in an hour. It’s always worth double-checking these online tools to make sure the terms are reasonable.

Using ezgif it is possible to crop the screen recording to show the specific part you are focusing on, and you can trim the clip to start and end where you need it to. Other settings include changing colours and setting how many times you want the animated GIF to loop.

Once you have created your animated GIF and have saved it, you can add it to a Canvas course in the same way as any other image.

The advantages of using GIFs

  • Compared with video, they minimise the storage space needed for the content, reducing data needed and loading times.
  • They can replace long sets of screenshots to show stages of a process. Often these screenshots take up a lot of space, and text can get lost amongst the large images.
  • They can be made quickly with no need for specialist skills or software.
  • Recently a change in Apple software made some other types of video and animation – those displayed in iframes – impossible to access using the Canvas app on iPhone. GIFs are a very accessible format and don’t require iframes to work, so using them where possible avoids this issue.
  • Some older formats of animations have become obsolete – animated GIFs have been around for over 25 years and show no signs of disappearing.

Uses for GIFs

  • To illustrate a couple of steps in using some software.
  • To show a series of improvements or changes to a document or file.
  • To show consequences of changing parameters in a simulation.
  • To illustrate the differences between a series of images, such as diagnostic scans.

Technology in your pocket

We have had a few enquiries via FMS Enquiries about getting tasks done without specialist equipment we would normally have on hand in our offices.

We have recently added some information to the FMS Community on how to use mobile devices to produce learning materials. A kind of Do It Yourself guide for producing materials from home or on location.

Create video, audio, images, presentations, conduct meetings, and communicate with students and staff. Set students tasks to do on their own devices. Check it out here: https://ncl.instructure.com/courses/30988/pages/technology-in-your-pocket.

Your device may not have all the features identified, but it may give you some ideas.