Taking Ctrl: Ctrl Taken

control taken, wrapping up the taking control series

Thanks to everyone who submitted their favourite keyboard shortcuts. Here is a round up of all the shortcuts mentioned:

ShortcutFunction
Windows key +EOpen File Explorer
Windows: Ctrl + Shift + V
Mac: Option + Shift + Cmd + V
Paste text without Formatting
Windows: Ctrl + Z
Mac: Cmd + Z
Undo
Windows: Ctrl + Shift + Z or Ctrl + Y
Mac: Cmd + Shift + Z
Redo
Windows: Windows key + L
Mac: Control + Cmd + Q
Lock your Computer
Windows: Ctrl + Shift + T
Mac: Cmd + Shift + T
Reopen Closed Tabs
Reopen a tab in Chrome
Chrome: Ctrl/ Cmd + Shift + N
Firefox: Ctrl/ Cmd + Shift + P
Safari: Cmd + Shift + N
Incognito Mode
Windows: Windows + Shift + S
Mac: Shift + Cmd + 4
Snipping Tool
Windows: Ctrl + K
Mac: Cmd + K
Insert a Link
Windows key + left/right/up/downArrange Windows
Windows: F12
Mac: Cmd + Opt + I
Developer Tools Device Mode
Windows: Window + A > Focus Assist
Mac: Option + click Notification Center icon
Focus Assist/Do not disturb
Summary Table

We will be starting a new and exciting series in 2024!

Blogging: Getting Started and Keeping it Going

We were recently invited to present this blog, and our experiences running it at the Directors of Education forum. We have recorded this presentation as a video for anyone who may be interested in starting their own blog within their team.

The presentation covers:

  • Identifying needs and measuring impact
  • Things to consider before getting started
  • How to keep a blog running over a long period of time
FMS TEL Blog: A practice-sharing success story

Newcastle University staff can watch the video on Panopto.

FMS TEL Conference 2022 – behind the scenes

This post is a review of the conference experience by FMS TEL members John Keogan and Andy Stokes.

This years conference was going to be a bit different to any conference we had ran in the past, the decision was made for the 2022 conference to be hybrid! We would run in-person presentations, online only sessions, and some sessions would be a hybrid of both. We were excited to take advantage of the video-conferencing technologies on offer within the University.

Using lessons learnt from last years online version, we set out tasks to complete and deadlines to meet.

The Tasks

clipboard with list

We divided the main tasks between us and ran through the list of jobs involved in preparing for the conference. We quickly realised that there was lot more involved than we initially thought!

The main tasks included:

  • timetabling
  • booking rooms
  • communications (including mail merges)
  • creating online conference materials

One aspect of the preparation was getting word out about the conference. We approached schools within the faculty and asked them to put up posters in areas with heavy footfall, as well as staffrooms. We put up posters in cafes, corridors and even lifts – please let us know if you saw them! We also requested that the campus messaging screens carried information about the conference in FMS areas. 

Tips

Room Bookings

  • Consider your criteria before booking, for example:
    • ‘Is the room big enough?’
    • ‘Do the speakers work?’
    • ‘Can we connect a laptop to the projectors?’
  • The room bookings website is not always accurate when you nominate the relative criteria; i.e. ‘Hybrid’, ‘videoconference’ etc.
  • Give yourself enough time to visit the rooms in person (It’s also worthwhile booking the rooms for when you plan to test them, as they can be snapped up pretty quickly in term time).
  • Reserved your rooms well in advance! 

Technology

  • Contact the Audio Visual team for a demonstration of the hybrid technology. They showed us how to set up and use the cameras and mics, and also how to troubleshoot common problems.
  • Consider your booking platform and its limitations, we used workshops.ncl which required us to use an iCal maker so delegates could add the events to their diaries.
  • Familiarise yourself with video editing software. As a team we edited the recordings using a mix of ReCap, Premiere Pro and Adobe Rush.
  • Schedule a block of time to review captions. We have some excellent posts on how to edit your captions.

Conclusion

Overall, the conference was a great success and we all enjoyed our time being part of the 2022 FMS TEL Conference team.

Being new to running a conference we developed skills and knowledge during the journey. The encouragement and support from our team helped ensure that we fulfilled our tasks and that looming deadlines were met.

We learned things that we will do different, or better, next year and we hope the tips shared in this post will be a good starting point for anyone wanting to run their own conference.

Setting up different types of Discussions

The FMS TEL team recently delivered a webinar: Getting the most out of your discussion boards. If you can’t access the FMS TEL Canvas community, please enrol yourself before retrying the direct link.

As a follow up to that webinar we have created follow along video guides and step by step written instructions on how to make the ideas and suggestions a reality. Our guides cover:


Voting and Polls ✅

These can be set up in around 2 minutes and no external tools are required. Students can quickly share their opinions or provide feedback in a similar format to Social Media.

Discussion Folders ?

Is your modules area looking cluttered? Organise your discussions into folders so they are easy to navigate.

Sharing Group Discussions ?‍?‍?‍?

Group discussions in Canvas can be a great option however they have the disadvantage of only group members being able to see what was contributed. If your course would benefit from groups being able to share with other groups after the task then we have 2 solutions for you.

Multiple Posting Points ??

Some courses may require students to share personal experiences. In this guidance we offer a solution for student to choose if they post to the whole cohort or just to the Teachers on the course.

Anonymous Posts ft. Padlet ❔

Currently Canvas does not allow anonymous posts. To get around this limitation we can create boards using an External Tool Padlet and embed Anonymous Padlet Boards within Canvas and the MLE.


What does that mean again? Glossary Building

Why use a glossary?

“A glossary is a great reference tool for a student, especially when they’re studying material which is quite technical and contains a vocabulary which is specific to the subject.”

David McGeeney, MCR8019 Module Leader

“Well, our students come from a diverse range of professional backgrounds, are based in different countries and have different experiences.  And when you’re dealing with clinical scenarios you really can’t afford to allow confusion and misinterpretation to happen, especially where the subject material is quite technical.  Adding a glossary to ONC8004: Developments in Diagnostic Imaging in Oncology allows us to focus the webpage content on teaching and learning whilst linking to explanatory terms for those who need it.”

Victoria Hewitt, ONC8004 Module Leader

Benefits of using a Glossary

  • Ensures all students are familiar with discipline specific vocabulary
  • Provides a reliable reference tool students can use throughout their studies
  • Content can be more concise
  • Easy to create
  • Can be rolled over year after year

Making your own Glossary

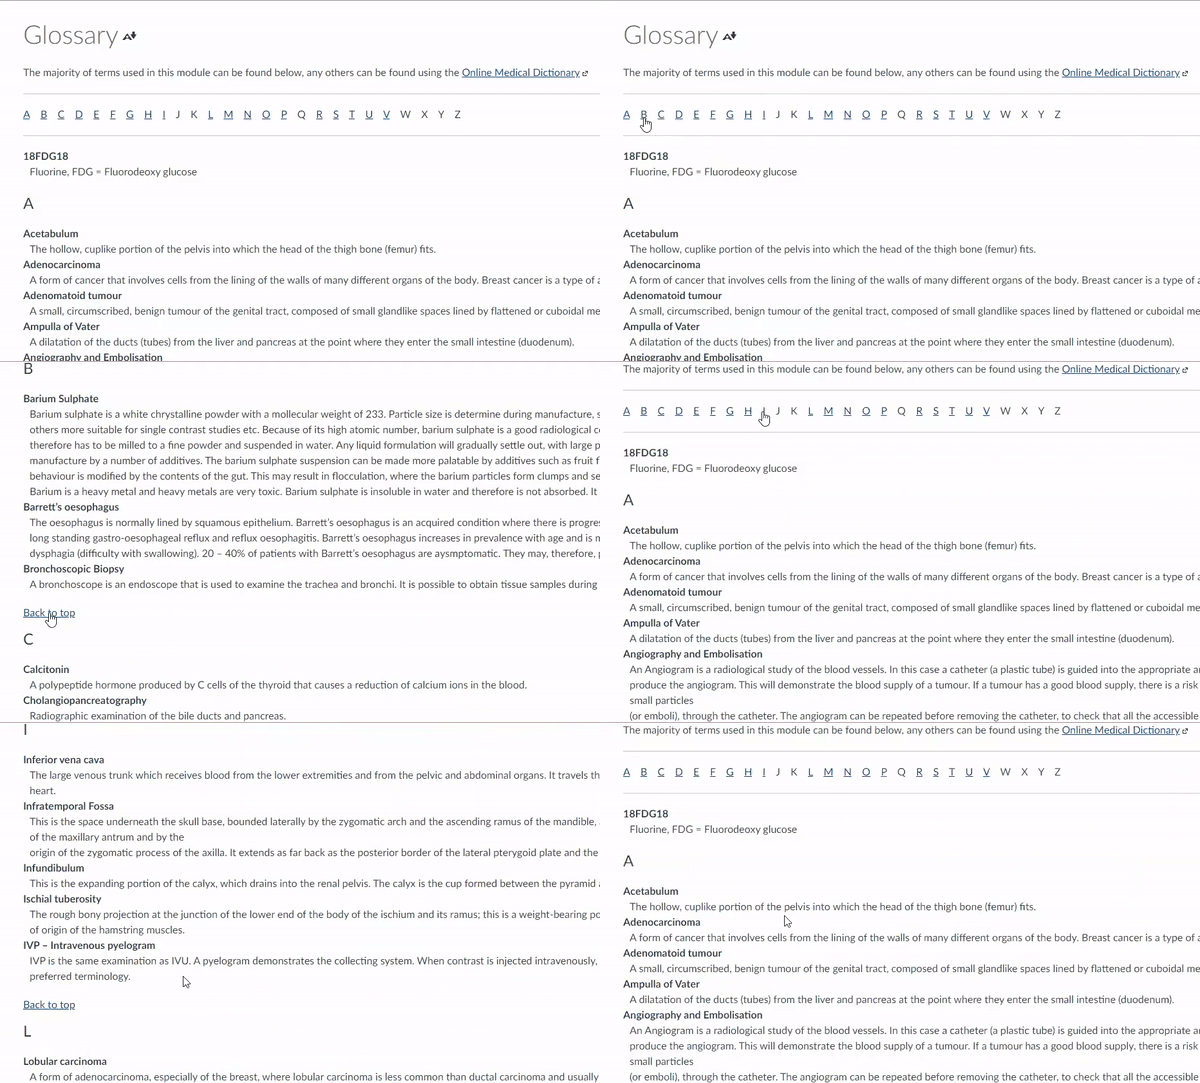
It could be as simple as having a dedicated page located near the start of the content which students can reference throughout the course.

screenshot of a glossary in canvas

You can view example glossaries in the FMS Community, along with instructions on how to add navigation options such as an A-Z menu at the top and ‘Back to top’ links.