Resulting from a few queries from FMS staff, we have added some information to the FMS TEL Community detailing how to add audio to a video using ReCap.
Staff had recorded footage of processes or experiments in laboratories which they wished to add a narration over afterwards. There was existing audio or noise on the video which they did not want to include. Rather than go through the process of removing the unwanted audio, ReCap/Panopto ignores the audio if the video is uploaded as a Secondary file. Audio can only be uploaded as a Primary file.
You may want to record your audio narration first using your mobile phone or software such as Audacity on a computer with a microphone. A common format would be mp3. Then upload your audio narration as your primary file and your video as a secondary file. Any audio in your video file is ignored and the new audio you recorded will be played instead.
As part of our Humanising the Online Experience webinar, we suggested the use of name selectors to take the decision-making out of selecting a student to answer a question. We recommend you use this only when you have gotten to know your students well enough to know how they respond to being asked questions by name. Using a randomiser tool can also reduce the feeling that the teacher is ‘picking on’ a particular student too often – both for the teacher and the students!
There are a lot of online tools available, such as:
Wheel of Names – a flashy web tool with animations and sound
The slight hitch with using these is that they are not reusable – you need to paste the names in every session.
It’s possible to create one of these yourself using Excel, which you can then save and re-use for the class time and again. A 2-minute tutorial for this, and an example file, is available on the FMS TEL Canvas Community. If you haven’t got access to that community in your Canvas yet, first enroll here.
Of course, you can use these tools for more than just selecting names. You could use this to randomly assign cases for students to study, or assign group roles. You can use them to generate lists of anything in a random order by noting outcomes.
During icebreaker games or other tasks, you may want to try a heads-or-tails or dice-roll randomiser, and there are many other randomising tools available on Random.org.
Guest post by Sue Campbell from the FMS Graduate School, Module Leader for ONC8024: Chemotherapy Nurse Training.
The Challenge
In December 2020, we were informed that Lancashire Health would be sending their Nursing students to study our course, which was due to start in February 2021. We had already seen an increase in our own numbers so with these additional students we were going to be expecting a much larger cohort than usual. The increase was in part due to the COVID situation and study leave cancellation in the NHS. We needed to investigate if the course structure would be suitable for 50 students instead of the usual 10-15 we had taught in previous years.
What did you do?
We reviewed each activity and imagined how it would work with 50 students. Activities that students completed on their own such as crosswords and quizzes were fine.
Our main concern were the collaborative wiki tasks – these are pages within Canvas, usually involving a table, that students completed together to create a resource. We wanted to keep these tasks as they encouraged teamwork, but the tasks were not suitable for 50 students to be able to contribute. After discussing the problem with others who have experience of working with larger cohorts we came up with a solution.
With help from the FMS TEL Team we were able to separate the students into groups of 10-15 students and provide each group with their own collaborative wiki task to complete. Once the course began we experienced registration issues so students were all starting at different times. We decided to adjust the groups so the late starting students would be in the same group and would not feel left behind.
“It’s about finding solutions you are not aware of; groups was a really quick and effective fix for what I envisioned to be a much larger problem.”
We wanted to keep the discussion tasks as they worked well in the past but would they work with large numbers? We went through each discussion task and made changes.
Where we had previously asked students to discuss three points, we changed so students could choose one discussion they could take part in but were able to view all discussions.
Modified Discussion Board: Before and After
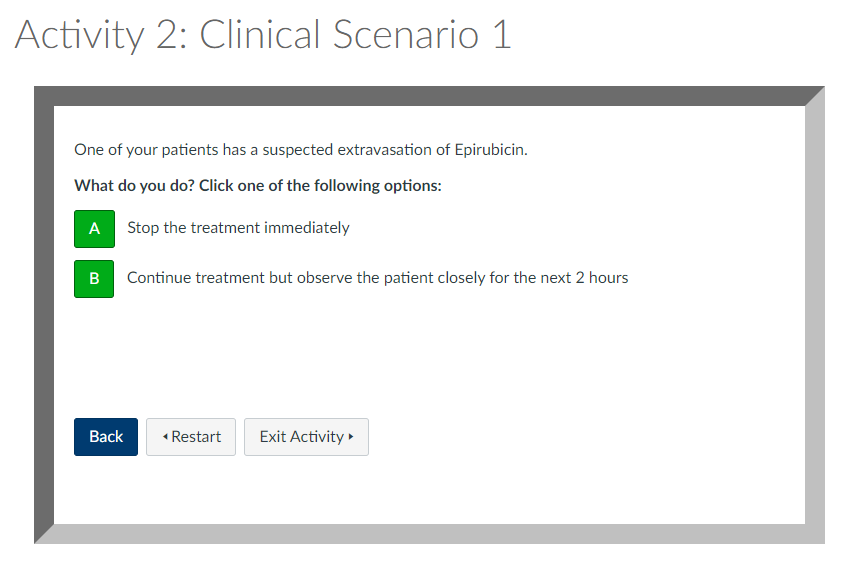
We decided to change the scenario discussions into branching activities instead. The questions asked in these discussions had only one right answer and were more of a fact checking exercise than something the students discussed. Students could complete the branching activities independently, so cohort size did not matter, but the objective of the task was still achieved. We also added a presentation to summarise the learning from the scenarios which replaced the interaction from the Module Leader that would have usually occurred on the discussion board at the end of the week.
Branching Activity
Tips
Ask for advice – I spoke with the FMS TEL and Programme Teams and they provided several solutions I wasn’t aware of. I also spoke with our DPD, Victoria Hewitt for marking help
Consider running the module twice a year if numbers/demand remains too high to sustain within one cohort
Branching activities will work regardless of numbers so we can easily roll those over year after year now
Groups in Canvas is easy to turn on/off and adjust depending on numbers
What might you do differently next time?
We shall wait and see the student feedback but we are currently in week 5 of the course and so far it is going well and the group work is successful. Some things we are thinking about are:
We have a lot of activities, but they are now largely peer to peer or independent tasks so to bring back the teacher presence I would like to include more videos and presentations
We do provide a general Q&A discussion board, and for the rest of the course we are also introducing fortnightly, 10 minute 1:1 Q&A bookable slots via zoom for any students preferring a one-to-one discussion with the tutor.
I was able to present an instance of FMS Journal Club in February 2021, and chose to present the paper Medicine as a Community of Practice: Implications for Medical Education (Cruess, Cruess and Steinert, 2018).
“Communities of practice can guide the development of interventions to make medical education more effective and can help both learners and educators better cope with medical education’s complexity.”
Cruess, Cruess and Steinert, 2018
The paper suggests the framework of the Community of Practice (CoP) for activities in medical education, specifically, cultivating a sense of belonging and professional identity associated with that community.
The authors put forward a long list of recommendations as to how CoPs as a framework can be embedded. The area I was most interested in was that of helping people to join these communities, particularly in relation to forming professional identity.
One of the key elements is that of regular meaningful interactions. This goes beyond simple matters of curriculum, but also incorporates something of a pastoral side. As well as bolstering students’ confidence in their skills, these interactions help students to form their identities as aspiring professional practitioners.
While video conferencing software offers a fairly rich interactive experience, there are many non-synchronous tools that provide arenas for interaction as well. The tool chosen is not the most important part – the important part is the regular, high-quality authentic interactions that can be facilitated between students and others with more experienced positions within their communities of practice.
What does this look like in practice?
Explicit acknowledgement of the difficulties faced when building a professional identity
Regular engagement with online discussions / Q+A / chat rooms
Unstructured / less structured time for students and teachers to talk less formally
Engagement with formal mentoring processes
Encouragement for students to form supportive relationships with one another
The FMS TEL team are proud to present our upcoming Webinar – Humanising the Online Experience.
Thursday 11th March 9 am-10 am and 1 pm-2 pm GMT
Many of us – staff and students – have struggled with the feeling of losing the human connections we would normally have in face-to-face teaching spaces. This webinar concentrates on how to regain some of that connected feeling. The webinar will include plenty of examples and quick tips that can help reduce the awkwardness of teaching online. The webinar will cover the following:
Setting and maintaining expectations for online teaching and interactions.
How to make your synchronous sessions feel more like PiP interaction.
Simple strategies to be more present in non-synchronous aspects of your course.
“A glossary is a great reference tool for a student, especially when they’re studying material which is quite technical and contains a vocabulary which is specific to the subject.”
David McGeeney, MCR8019 Module Leader
“Well, our students come from a diverse range of professional backgrounds, are based in different countries and have different experiences. And when you’re dealing with clinical scenarios you really can’t afford to allow confusion and misinterpretation to happen, especially where the subject material is quite technical. Adding a glossary to ONC8004: Developments in Diagnostic Imaging in Oncology allows us to focus the webpage content on teaching and learning whilst linking to explanatory terms for those who need it.”
Victoria Hewitt, ONC8004 Module Leader
Benefits of using a Glossary
Ensures all students are familiar with discipline specific vocabulary
Provides a reliable reference tool students can use throughout their studies
Content can be more concise
Easy to create
Can be rolled over year after year
Making your own Glossary
It could be as simple as having a dedicated page located near the start of the content which students can reference throughout the course.
You can view example glossaries in the FMS Community, along with instructions on how to add navigation options such as an A-Z menu at the top and ‘Back to top’ links.
The cross-university LTDS Flexible Learning 2020 course has information for everyone on copyright at this link. But there are some aspects likely to be more specific for FMS which are discussed here.
Copyright is the legal right of the creator of an original work to the exclusive rights for its’ use and distribution. It does not protect an idea though, just the expression of an idea whether they are in the form of a journal article, a book, an image, a video or any other media.
This means that you may not indiscriminately use any image or other media you find online.
Don’t run the risk of legal action; check provenance and obtain permission!
Creative Commons
When media are marked ‘Creative Commons’ or ‘CC’ this means that you are allowed to use the material with provisos according to licence type, whilst the creator retains the copyright of the material.
Creative Commons has a searchable database where you can look for materials which are legal to be used under CC licences; you can find it at this link. It covers YouTube, Wikimedia Commons and Flickr amongst others. Canvas has a searchable database of CC images, to access these select ‘Unsplash’ when you click the image icon in the text editor.
There are different types of licence which govern what you are allowed to do with the material, shown in this video:
Other free sources of images
There are several searchable databases where you can find images for use in courses. Some of these are detailed below, which may be of interest to bioscientists and medics.
Wellcome Images
The Wellcome Image library has thousands of images available under CC licences, from historical medical images through to electron micrographs. Their website is at this link.
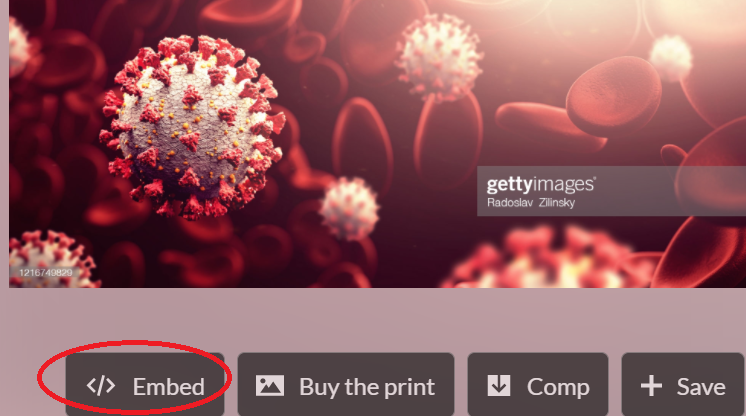
Getty Images
Some Getty Images are available for free via this link.
You will need an account, and you are only allowed to embed certain editorial images for non-commercial use; however there are still plenty to choose from! The embed option (</>) is present when you click on the image if you are allowed to use it; see red circle in image below:
Copy the embed code and paste into Canvas.
Images without an embed code must be paid for.
Radiopaedia
This provides a huge collection of X-rays which can be used for free, as well as articles and diagrams. The website is at this link.
Public domain
Some materials are in the public domain which means they can be freely used. It is polite to attribute these materials to their author.
Most images created by employees of the USA government are in the public domain, e.g. those from the National Institutes of Health.
Some materials are so old that the copyright has run out (more than 70 years). A good example of this is Gray’s Anatomy, available online at this link.
Rightslink
If you cannot find a free source you will need to obtain permission for use of images. This will sometimes require a budget.
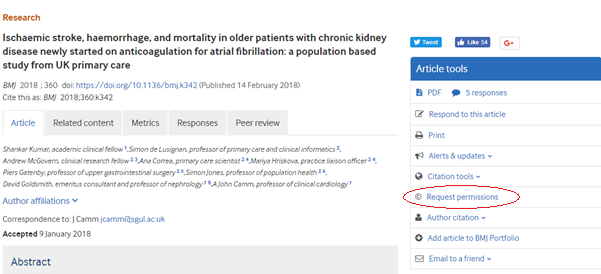
Journals which are not Open Access (most of these are Creative Commons, but do check because not all have their images as CC) often have a ‘request permissions’ button, as shown circled in red on the BMJ below.
This image is used with permission! (logged as 18797960 [ ref:_00D205YOi._500D01fS0ch:ref ] on 20.2.2018).
This will take you to a Rightslink login; you can create an account for free and this will allow you to say what you want to use the image for, and what type of institution we are: despite charging for courses we are a non-commercial institution. Complete the dropdown boxes, then find out from ‘Quick price’ whether the licence is free or not, and act according to your budget. Remember to print the licence or at least store the licence electronically as well as filing the email you will be sent as well.
The licence will tell you the wording to use beside the image. An example can be found here: NATURE PUBLISHING GROUP LICENSE
Other permissions
Other permissions may be harder to obtain due to lack of attribution. If created by a named academic they can generally be tracked down to their institution and if you email them permission is often readily given; hopefully we would be as obliging if the request was made to us.
The session comprised of presentations from Pam and Christian, followed by a series of questions from the audience that they responded to. Pam’s initial presentation focused on the impact of the physical learning environments on the learning process, highlighting that while the learning environment itself doesn’t have direct influence over the learning, it can have an indirect impact – as long as the learners’ basic needs are met in terms of physical comfort (temperature, air quality, etc.). Whether or not PiP learning is preferable over online learning can be dependent on what the room is like! Physical spaces provide access to information such as body language in interactions, as well as the opportunities for chance meetings, or hanging back after class to speak to the teacher when you might be too shy to speak in front of others or send an email.
Christian covered aspects of online learning including automation of feedback, analytics and the role of the instructor in online learning. When considering MOOCs such as those hosted on Kahn Academy, for example, there is usually no direct personalised feedback for learners – it is intentionally prepared. He also discussed aspects of accessibility, both in the sense of physical access to spaces/content and the work being done to make online content more accessible, e.g. through captioning. Content needs to be planned in advance, and interactions can become purely intentional. Non-synchronous activities such as discussion boards can help students who prefer to plan what they want to say rather than having to respond in the moment.
A common theme I have taken from both of these talks is the idea of intentional vs unintentional interactions – both in terms of learning experiences and social interactions. Intentional interactions include things like seminars and talks, as well as interactive learning activities such as quizzes with feedback. These types of planned interactions are fairly easy to replicate online. Unintentional interactions are usually a side-effect of being in the same room as your teacher, or other learners. There can be a social aspect to this – such as meeting new people, or a pedagogical side, such as when teachers bring the class back together to address a difficulty they have noticed is common to all. This is much easier to do in PiP teaching.
While social aspects of teaching and learning are difficult to replicate online, there are some guides available on the Flexible Learning 2020 site that can help with this. When it comes down to unintentional interactions, if we want these to happen the best thing we can do is try to create time and space for it. While it may feel a little counterintuitive to formally schedule informal chats, in reality, it’s one sure way of ensuring they can happen.
One of the services I offer as part of the FMS TEL team is the creation of bespoke 2D animations. These are most commonly used as small parts of a bigger project, but they can also be stand-alone projects themselves.
Types of animation and choosing the right tool for the job Depending on the nature of the animation required, and also the context in which it will be used, there are three different types of animation that we can produce.
These are:
Video based animation
HTML5 (web based) animation
Animated GIFs
When looking at the source material I will first plan the animation in my head, and will usually know right away which type of animation will be most appropriate for the job. For example, if there are any user interactions to be included then an HTML5 animation would allow for that, but if there is the need for some organic shapes then that would suit a video based animation better.
Planning and Storyboarding When visualising an animation, I plan the animation as a whole from the start, rather than tackling it scene-by-scene as this gives a more natural and entertaining feel to the end result.
Once I’m happy that I have a good understanding of the content I will then create a series of illustrations as a storyboard and send this as a PDF for review.
Storyboarding example
I then discuss with the subject specialist which techniques will work best for the application, and raise any concerns. I can then start the animation process.
Creating the animation Getting things right at the concept and storyboard stage is critical and can save a lot of time, compared to how much of a time investment it can be if you have to re-do a large part of the animation.
However, understanding that I may not get the content perfect in the first draft every time, I structure my files in a way that changes can be made with minimal disruption to the rest of the timeline. This is achieved by both layering up the source Illustrator files and also separating the key points of the main composition timeline into separate sub-compositions. That way I can work on a small section without knocking everything else out of sync.
Obviously, every project is different but by focusing on the movements involved, the flow between the scenes and the basic animation principles I begin the sequence (as you may have guessed) from the start and work on each stage in sequence. This is important because elements will often carry through from one scene to another so duplication can be avoided.
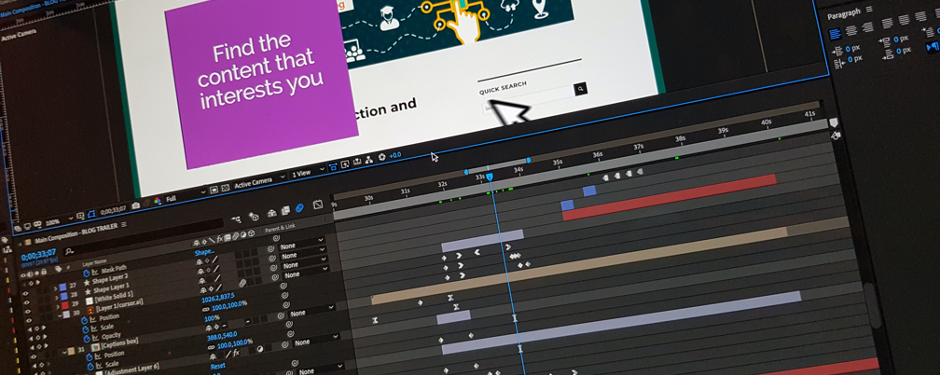
I use Adobe After Effects to create video-based animation and animated GIFs, and Adobe Illustrator to create any graphic and illustration assets needed for the animation. After Effects is an extremely powerful timeline-based tool that can make almost anything possible – think of it as being a kind of Photoshop for video!
If there is to be audio narration or a musical soundtrack on the video, then I arrange for that to be recorded early on in the development rather than being added at the end, as the content and movements should be timed to fit with events in the audio.
Most of the development time actually lies in creating the assets for the storyboard (which are later used in the animation), so when it actually comes to the animating stage things tend to move along pretty quickly.
I usually render out (export) the animation after every new section is complete and upload it our Vimeo account for approval and to check that I’m on the right track before moving on to the next one.
The review process
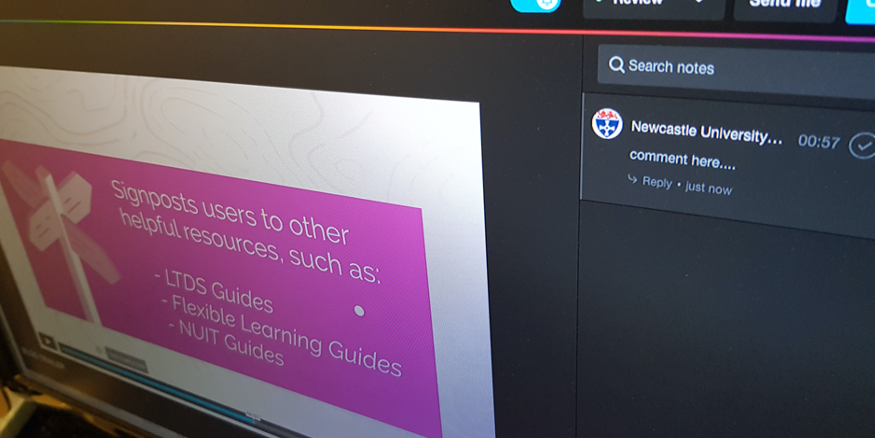
The Vimeo Review platform we use lets the users add time-stamped comments directly onto the video and sends me a notification email immediately thus providing a good communication channel for each specific issue.
When the first draft of an animation is complete, a shareable, password-protected link to the video can be sent out for a wider review to gather comments and feedback. From there we can address any comments and fine-tune the animation for further revisions, which will in turn be sent out for review.
While there is no standard for this, normally after a first (alpha) release and review, changes are made if required and a second (beta) release is then sent for review, with any further required changes reflected in a final (gold) release.
The finished product The final render from After Effects will be a simple video file, usually in the .H264 codec (MP4) that can either be hosted on our Vimeo account and an embed code supplied, or, depending on file size restrictions, this could be uploaded directly to your target system. It can also be supplied as a file to be included in a PowerPoint presentation or other teaching material. The type of output required is discussed before we start the project to make sure we are taking the best approach.
Past examples I’ve worked on a wide variety of projects during my time at the university, including multiple MOOCs, marketing materials, and work on modules across both FMS and Engineering courses. The showreel below includes just a small sample of the projects I have been involved in.
FMS TEL Animation Showreel
Can we help you with your project?
If you have a project that you would like to see come to life in an animation, or a smaller component of your teaching materials that could benefit from some animated content, then please get in touch via FMSTEL Enquiries. I would be very happy to discuss options with you to see what we can do to help.


